Add Offices to Your Account
- Print
- DarkLight
- PDF
Add Offices to Your Account
- Print
- DarkLight
- PDF
Article summary
Did you find this summary helpful?
Thank you for your feedback!
Creating Offices allows you to segment projects and account users by different locations within a single STACK account. This is especially useful if you have a large team spread across multiple offices, districts, or regions.
How it Works
You start by adding as many Offices as you need to your account in Account Settings. (You can use any naming convention that works for your team.) Once you’ve added Offices, you can choose to assign individual projects and account users an office, essentially tagging them so it is easy to organize projects for the appropriate team members to work on. You can also choose to assign Default Libraries to an office.
Offices can also be used to restrict access to projects. You can enable the Restrict access to projects by Office function which will only allow projects that have been assigned an office to be viewed by users assigned that same office. This function requires all users and projects in your account to be assigned an Office.
Key Information:
You can add as many Offices to your account as needed.
Assigning projects and account users an Office is optional.
Projects and account users can be assigned one, multiple, or all Offices.
Libraries refer to the Item, Assembly, and Takeoff Libraries in the account.
Assigning Default Libraries to an Office is optional.
You can assign one, multiple, or all Default Libraries to each Office.
The Restrict access to projects by Office function will only allow projects that have been assigned an office to be viewed by users assigned that same office. (Projects that are not assigned an office will be visible to all users.)
Enabling the Restrict access to projects by Office function requires all users and new projects in your account to be assigned to an Office.
Offices can be controlled using STACK’s API.
For info on how to assign account users and projects an office, see Assign and Manage Account Users and Create a Project and Add Project Information.
Add an Office.jpg)
Click the Settings icon at the right of the main navigation toolbar.
Select Account Settings from the dropdown menu.
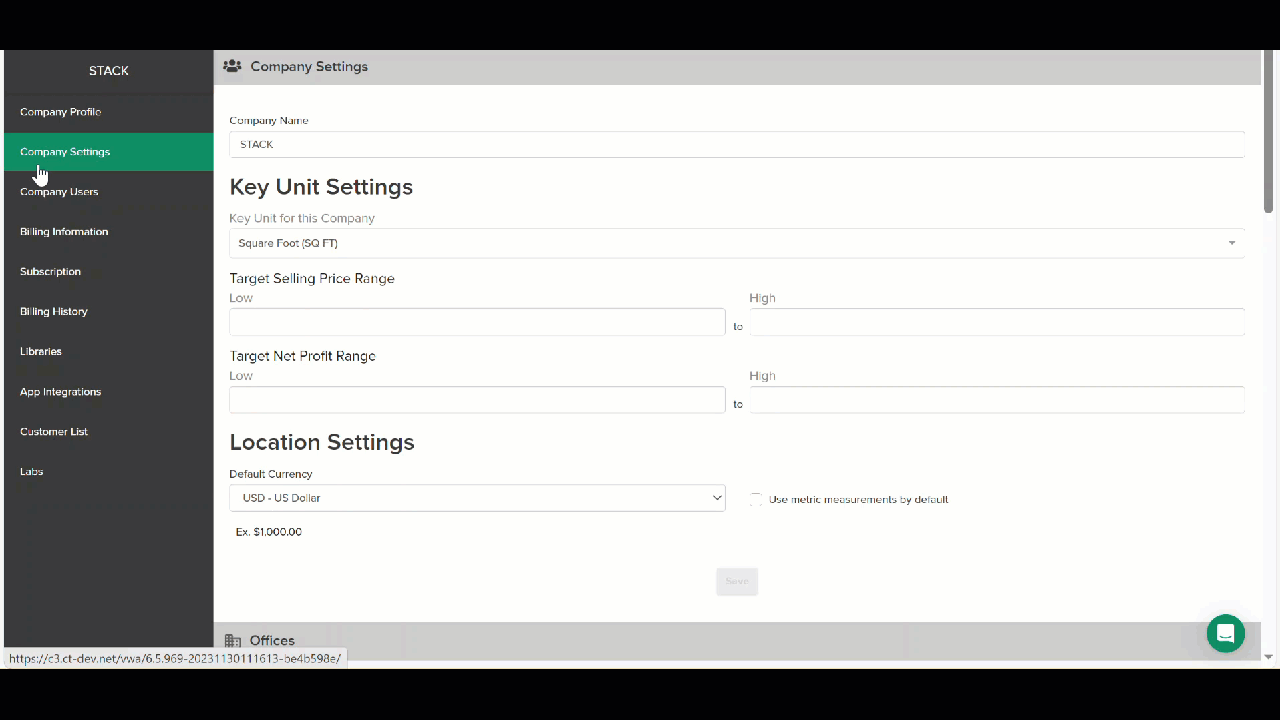
Click Company Settings on the left panel.
.gif)
Scroll down to the Offices section and click the green Add Office button.
Type in a Name for the office.
NOTE: Each Office name must be unique (100-character limit).(Optional) Click on the Libraries dropdown arrow and check the box next to each Library you want to assign the office. Click the dropdown menu arrow to close the menu.
Click Save.
You can repeat the process to add as many Offices as needed.
Once you have added an Office to your account, you can assign it to individual account users and projects. See Assign and Manage Account Users and Create a Project and Add Project Information for instructions.
Edit Office Info
You can change the name of an office and add/remove its default Libraries at any time if needed. If you rename an Office, any projects or users assigned to that office will remain assigned to the office under the new name.
Click the Settings icon at the right of the main navigation toolbar.
Select Account Settings from the dropdown menu.
Click Company Settings on the left panel.
Scroll down to the Offices section and locate the office for which you want to edit information.
Click the edit icon (pencil) to the far right of the office name.
To change the Office Name, and type in a new Name for the office.
To assign/remove Default Libraries, click on the Libraries dropdown arrow, check the box next to each Library you want to assign the office, uncheck the box next to Libraries you want to remove, then click the dropdown menu arrow to close the menu.
Click Save.
Delete an Office
When you delete an Office, it is removed from all existing projects assigned to it and will be unavailable for future assignment.
.gif)
NOTE: An Office cannot be deleted if it is assigned to any account user. Make sure to remove the Office you want to delete from all account users before proceeding.
Click the Settings icon at the right of the main navigation toolbar.
Select Account Settings from the dropdown menu.
Click Company Settings on the left panel.
.gif)
Scroll down to the Offices section and locate the office you want to delete.
Click the delete icon (trash can) to the far right of the office name.*
Click Delete to confirm and delete the office from the account.
*If the Office you are trying to delete is assigned to any account user, you will receive a message that states -
You cannot delete this office because it has Users assigned to it. Remove this office from all Users and try again.
You will need to remove the Office from all account users then repeat the steps above to delete the Office. Refer to Assign and Manage Account Users for instructions on how to remove/change Offices assigned to account users.
Restrict Access to Projects by Office
You can enable Restrict access to projects by Office so that users can only access projects in offices to which they are assigned.
This will require all account users and new projects to be assigned an office.
NOTE: Existing projects that are not assigned an office will be visible to all users.
Account Owners, and users with roles/permissions to edit Account Settings will still be able to see all projects.
Users assigned to a specific project will still be able to see that project regardless of their assigned office.
TIP: You can still use Private Project to further restrict access.
NOTE: You must assign all account users an Office before you can enable this function.
Click the Settings icon at the right of the main navigation toolbar.
Select Account Settings from the dropdown menu.
Click Company Settings on the left panel.
.gif)
Scroll down to the Offices section.
Click to check the box next to Restrict Access to Projects by Office.
If you have assigned all account users an Office, you will receive a message stating -
Enabling this restriction will require all projects and users be assigned an Office. Any existing Projects without an Office assigned will be visible to all users.*Click Confirm.
*If you have not assigned all account users an Office, you will receive this message -
Enabling this restriction will require all projects and users be assigned an Office. You cannot enable this setting until all of your users are assigned an Office.
You will need to assign all of your account users an office, then repeat the steps above.
See Assign and Manage Account Users if you need instructions on how to assign users an office.
To disable the Restrict Access to Projects by Office function:
Follow Steps 1-4 above.
Uncheck the box in Step 5.
You will receive a message stating - Disabling this restriction will allow all users to see all projects. Are you sure you want to disable this setting?
Click Confirm.
Related Articles
Assign and Manage Account Users
Create a Project and Add Project Information
Private and Public Projects
Was this article helpful?