Save and Apply Views
- Print
- DarkLight
- PDF
Save and Apply Views
- Print
- DarkLight
- PDF
Article summary
Did you find this summary helpful?
Thank you for your feedback!
Saving Views in your Estimate Worksheet can be a huge timesaver. Views allow your team to save and apply preset column layouts, filters, sorts, and groupings to the Estimate Worksheet to quickly see the estimate data in different ways. This can be useful if you want to look at data by Label or Takeoffs; or you could create a proposal view, material cost view, labor cost view... anything you need.
How It Works
Start by configuring your estimate so the columns you want are visible and in the order you want; Sort and Filter data as needed; make any Roll Up or Group by, Assembly Item Group, selections and collapse/expand the groupings as desired. After you’ve customized the estimate layout so data is displayed the way you want, save that View. You can then change the estimate layout to display the data in a different way and save that as another View. Your team can create as many different Views as needed. Once views have been saved, any account user who has access to estimates can apply any of the saved views to the Estimate Worksheet to easily switch back and forth between the different estimate layouts that have been created.
Views can be saved as an Estimate View or a Company View.
Estimate Views are only available for use in the Estimate Worksheet in which they are created. (However, if you copy the Estimate Worksheet or copy the project, the Estimate Views will be included in the copy.)
Any account user who has access to estimates can save, update, or delete Estimate Views.Company Views are available for use in every Estimate Worksheet in the account.
Only account users with the role of Account Owner can save, update, or delete Company Views.
STACK also provides a Default view, which is the condensed list of columns shown when you first create an estimate. If you start moving and hiding columns and feel like you just need to start over, you can apply the Default view to get back to the original view.
Save a View
Views can be saved as an Estimate View which is specific to the Estimate Worksheet in which it is created, or as a Company View which is available for use on any Estimate Worksheet in the account.
NOTE: Only users with an Account Owner role can save a Company View.
.gif)
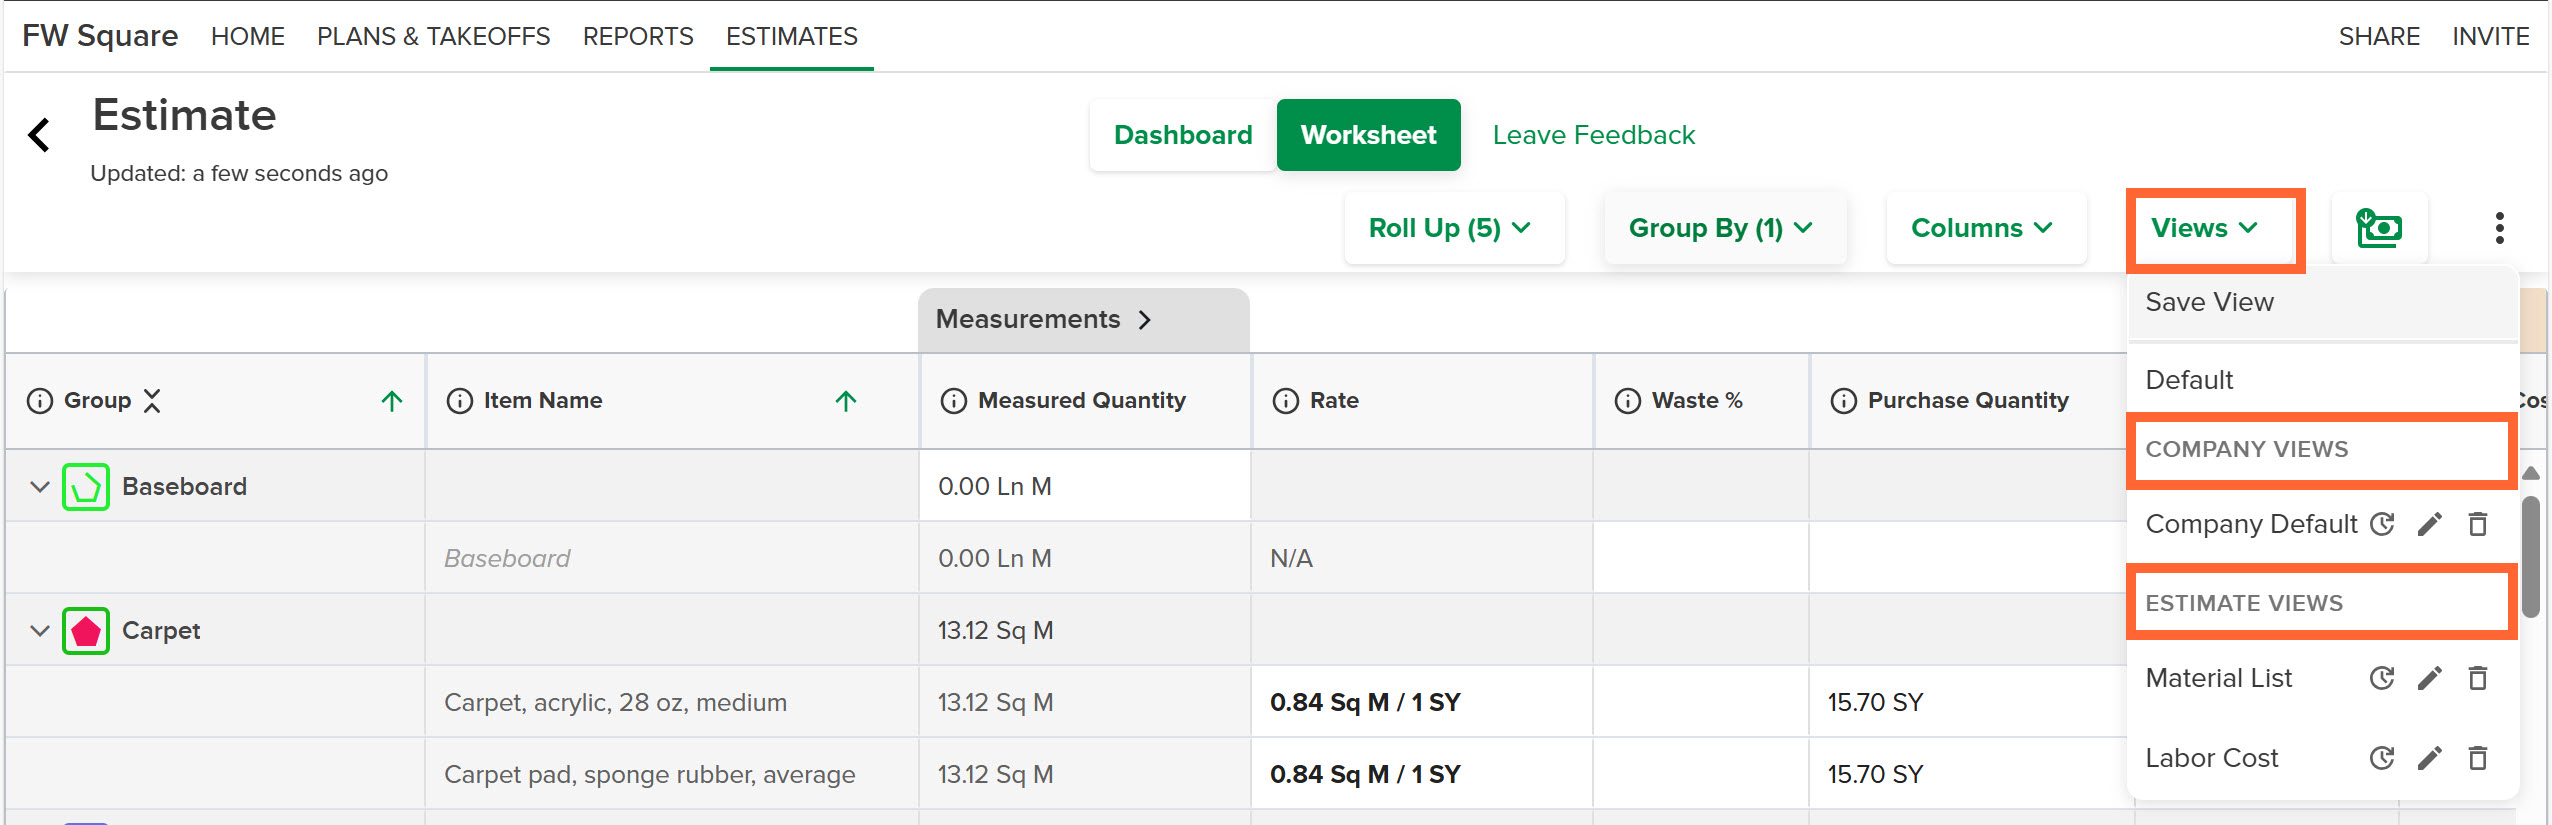
Click Views on the estimate toolbar at the top of the estimate.
Select Save View.
Type in the View Name.
(Optional) Check the Company View box if you want the view to be available for use in all Estimate Worksheets.
NOTE: This option is only available/visible to users with an Account Owner role.
If the box is not checked, the view will be saved as an Estimate View and will only be available for use in this Estimate Worksheet.Click Save.
You can create multiple views. Views you save will be listed in the Views dropdown for use by anyone (with the appropriate role/permissions). Views listed under Estimate Views are only available in that specific Estimate Worksheet. Views listed under Company Views are available in every Estimate Worksheet.
Apply / Switch Views
You can quickly apply/switch between any saved Views or the STACK Default view.
.gif)
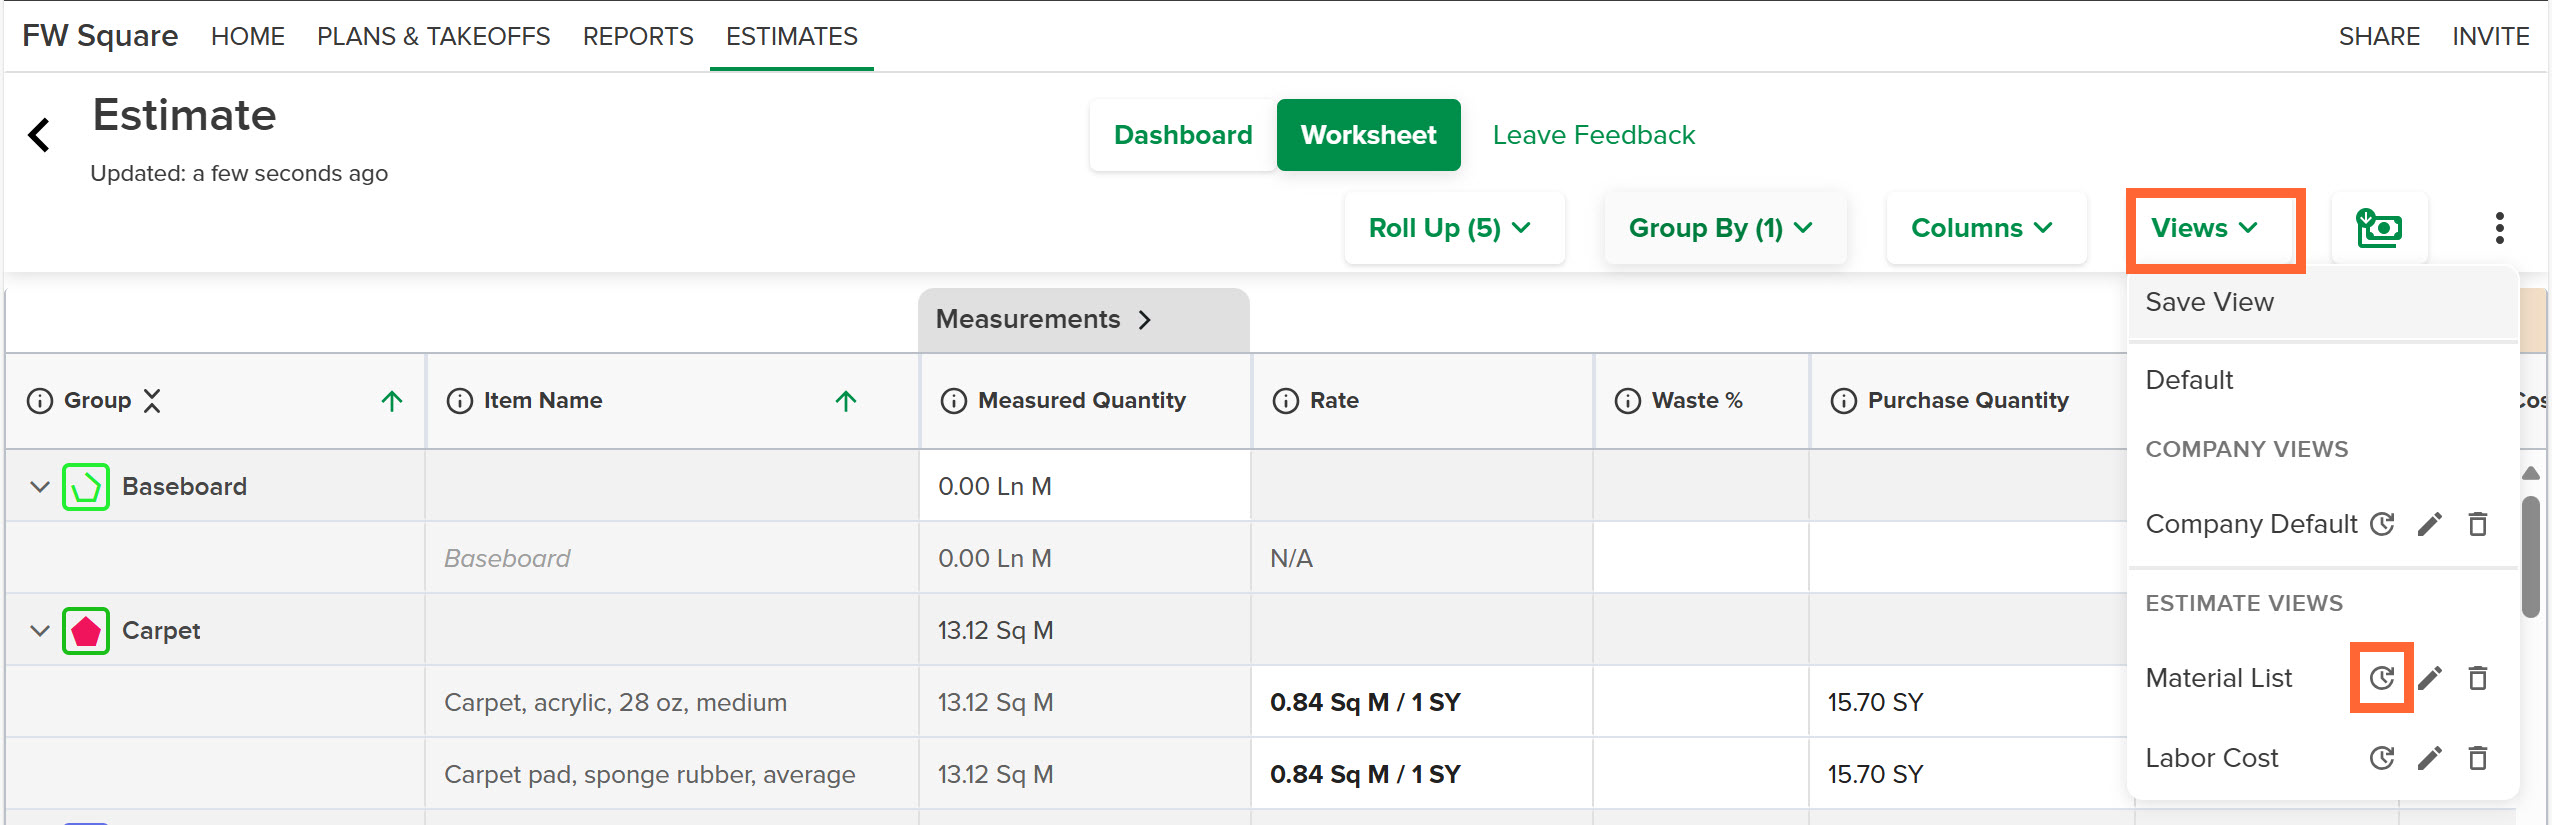
Click Views on the estimate toolbar at the top of the estimate.
Select the view you want to apply from the list.
(To revert to the default estimate view, select Default.)
Update a View
If you save a view and later find that you need to make changes - like add/remove a column or change the way the data is grouped - you can apply those updates to the saved view, and they will be a part of that view going forward. You can also rename a view if needed.
NOTE: You can only update views that have been created by someone in your account, not the STACK Default view. However, you can make changes to the Default view and then save it as a different view.
Only users with an Account Owner role can update or rename Company Views.
Make the layout changes you want to the Estimate Worksheet.
Click Views on the estimate toolbar at the top of the estimate and locate the view you want to update on the dropdown.
Click the Update icon to the right of the view name.
NOTE: You will not see/have access to the Update icon for Company Views unless you are an Account Owner.
Rename a View
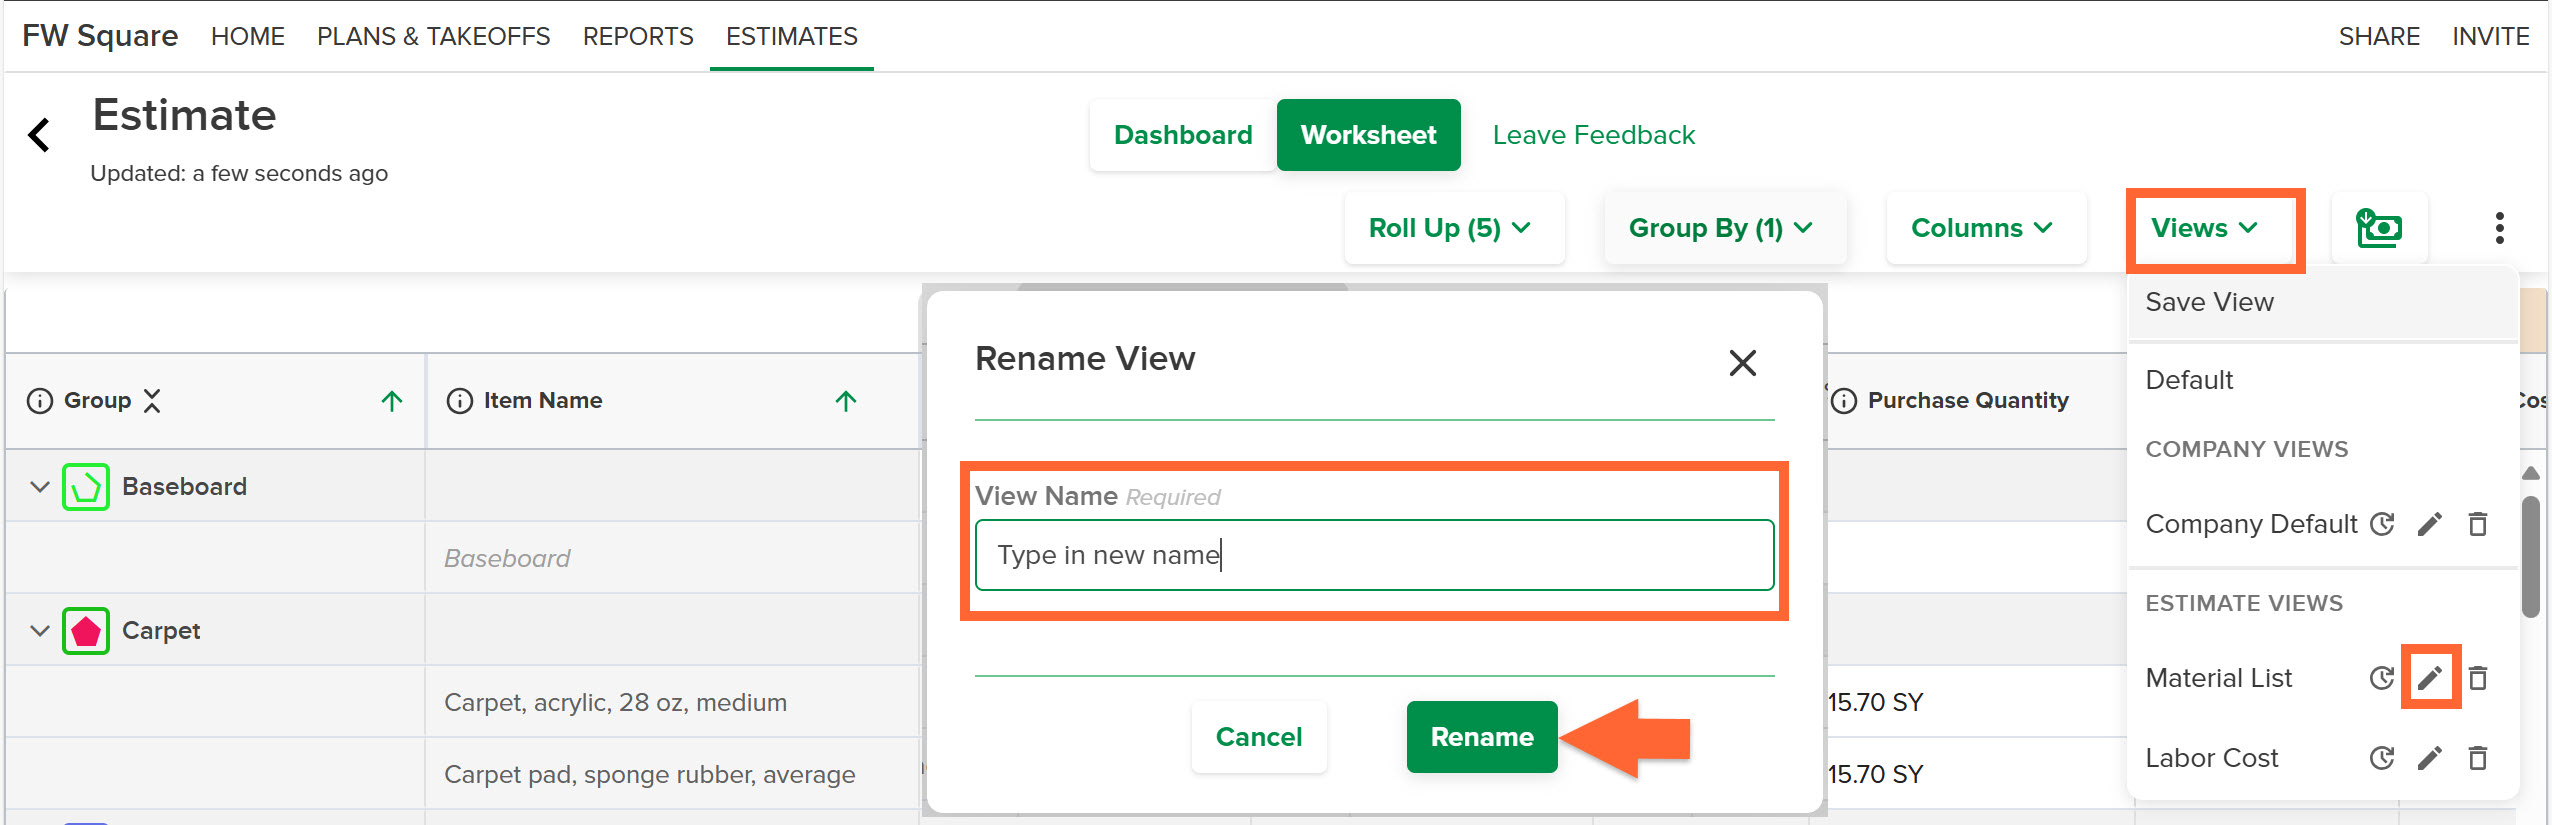
Click Views on the estimate toolbar at the top of the estimate and locate the view you want to rename on the dropdown.
Click the Edit (pencil) icon to the right to the view name.
NOTE: You will not see/have access to the Edit icon for Company Views unless you are an Account Owner.Type in the new View Name.
Click the Rename button.
Delete a View
If needed, you can delete a view that has been saved and it will no longer be available for use.
NOTE: You can only delete saved Estimate Views and Company Views, not the STACK Default view.
Only users with an Account Owner role can delete Company Views.
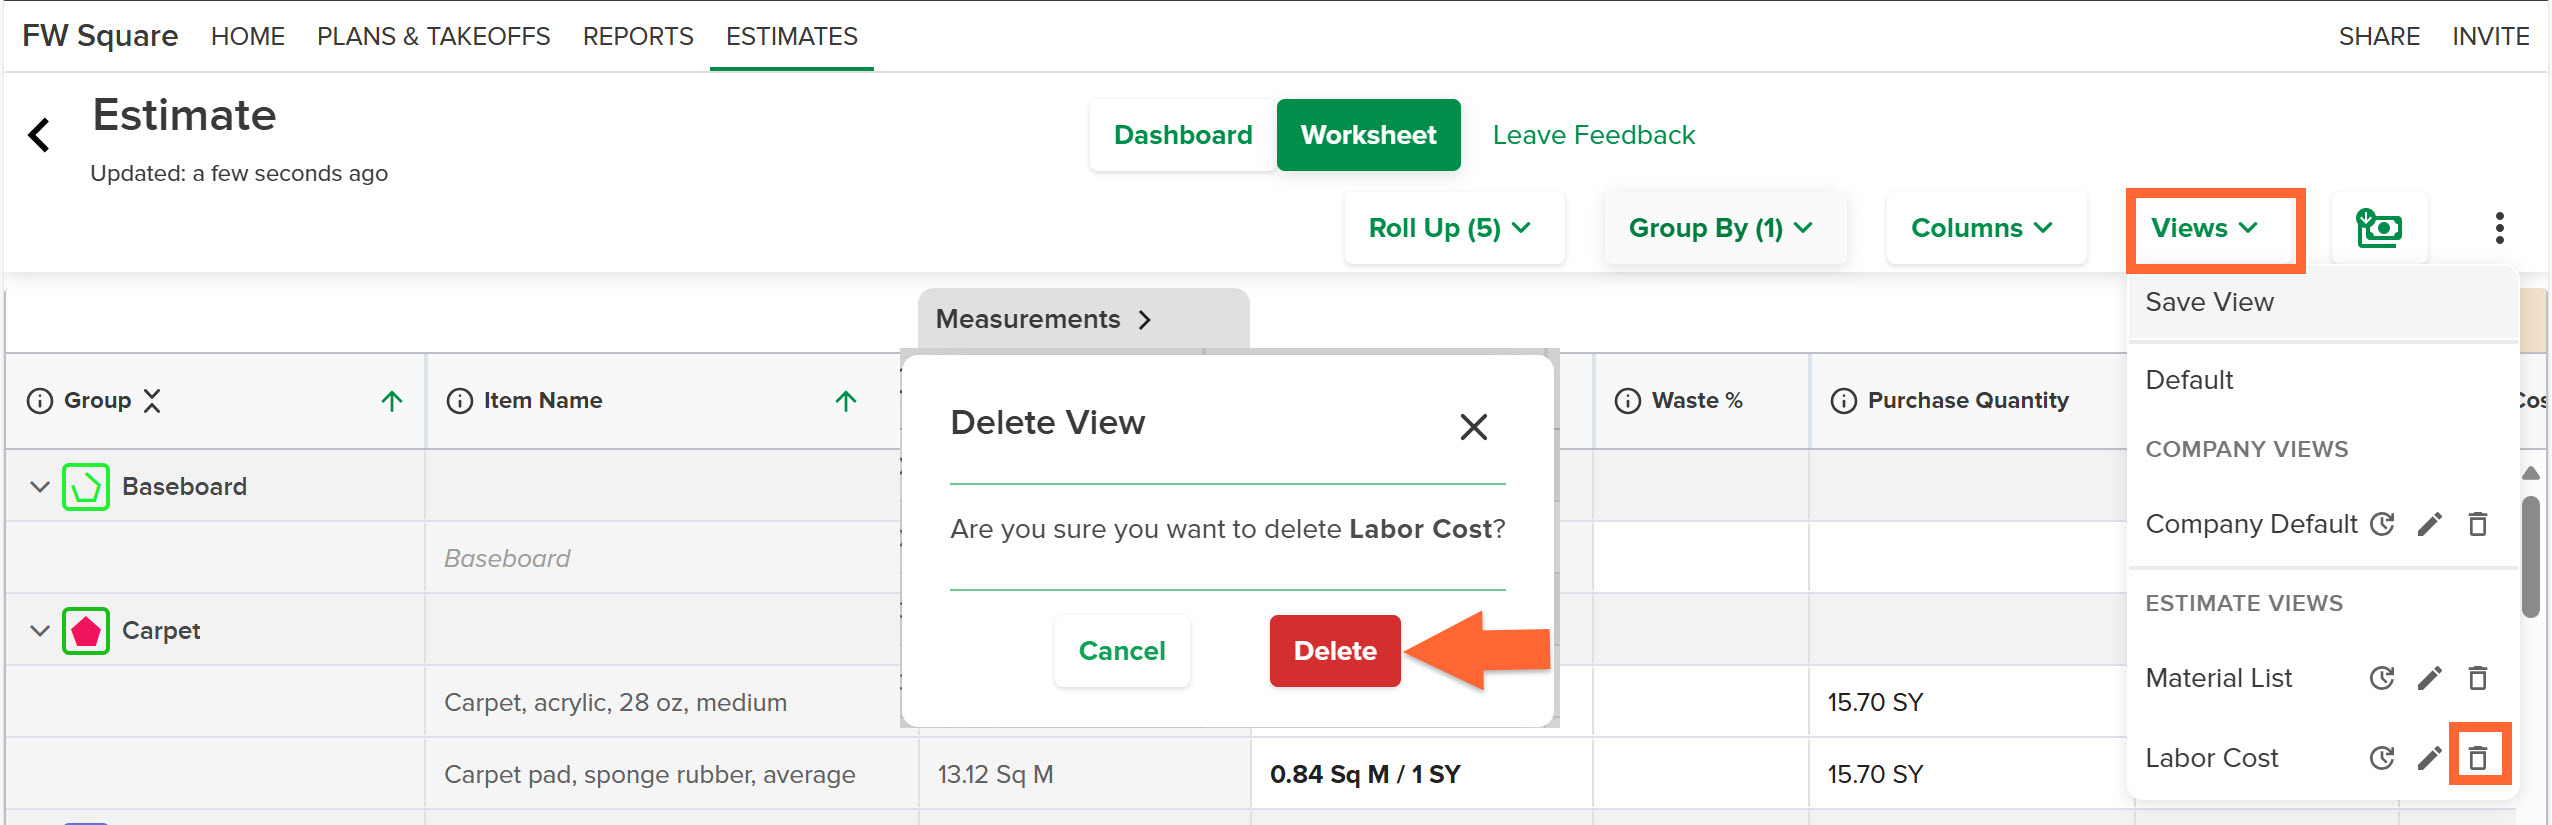
Click Views on the estimate toolbar at the top of the Estimate Worksheet and locate the view you want to delete.
Click the Delete (trash) icon to the right of the view name.
NOTE: You will not see/have access to the Delete icon for Company Views unless you are an Account Owner.Click the red Delete button to confirm.
Related Articles
Was this article helpful?