Plan Overlay
- Print
- DarkLight
- PDF
Plan Overlay
- Print
- DarkLight
- PDF
Article summary
Did you find this summary helpful?
Thank you for your feedback!
Plan Overlay is a great tool to help you compare similar plan sheets (E.g., an original and revised plan sheet) to see what's different between them.
It allows you to layer multiple plan sheets and applies a different color to each sheet so you can easily see any differences.
It also gives you the option to transfer any measurements and annotations you've made on the original sheet to a sheet you've layered.
Overlay / Layer Plan Sheets
.gif)
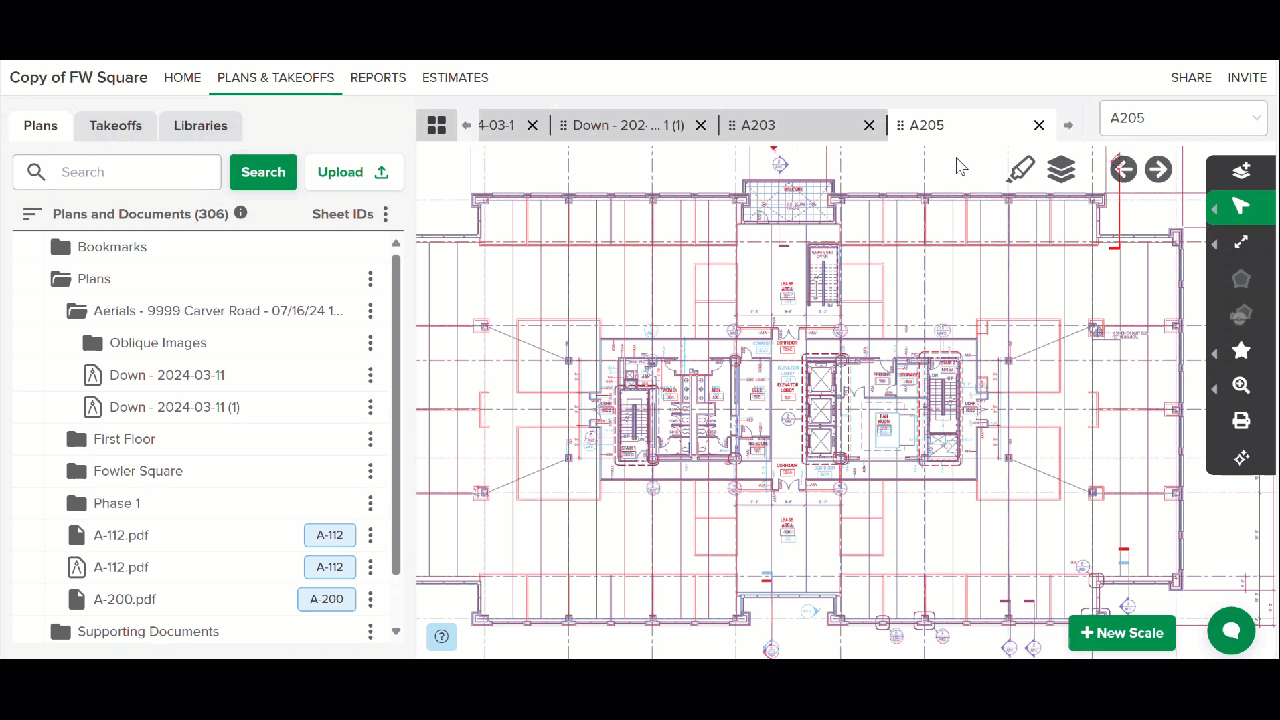
Open the plan sheet you want to use as your base layer.
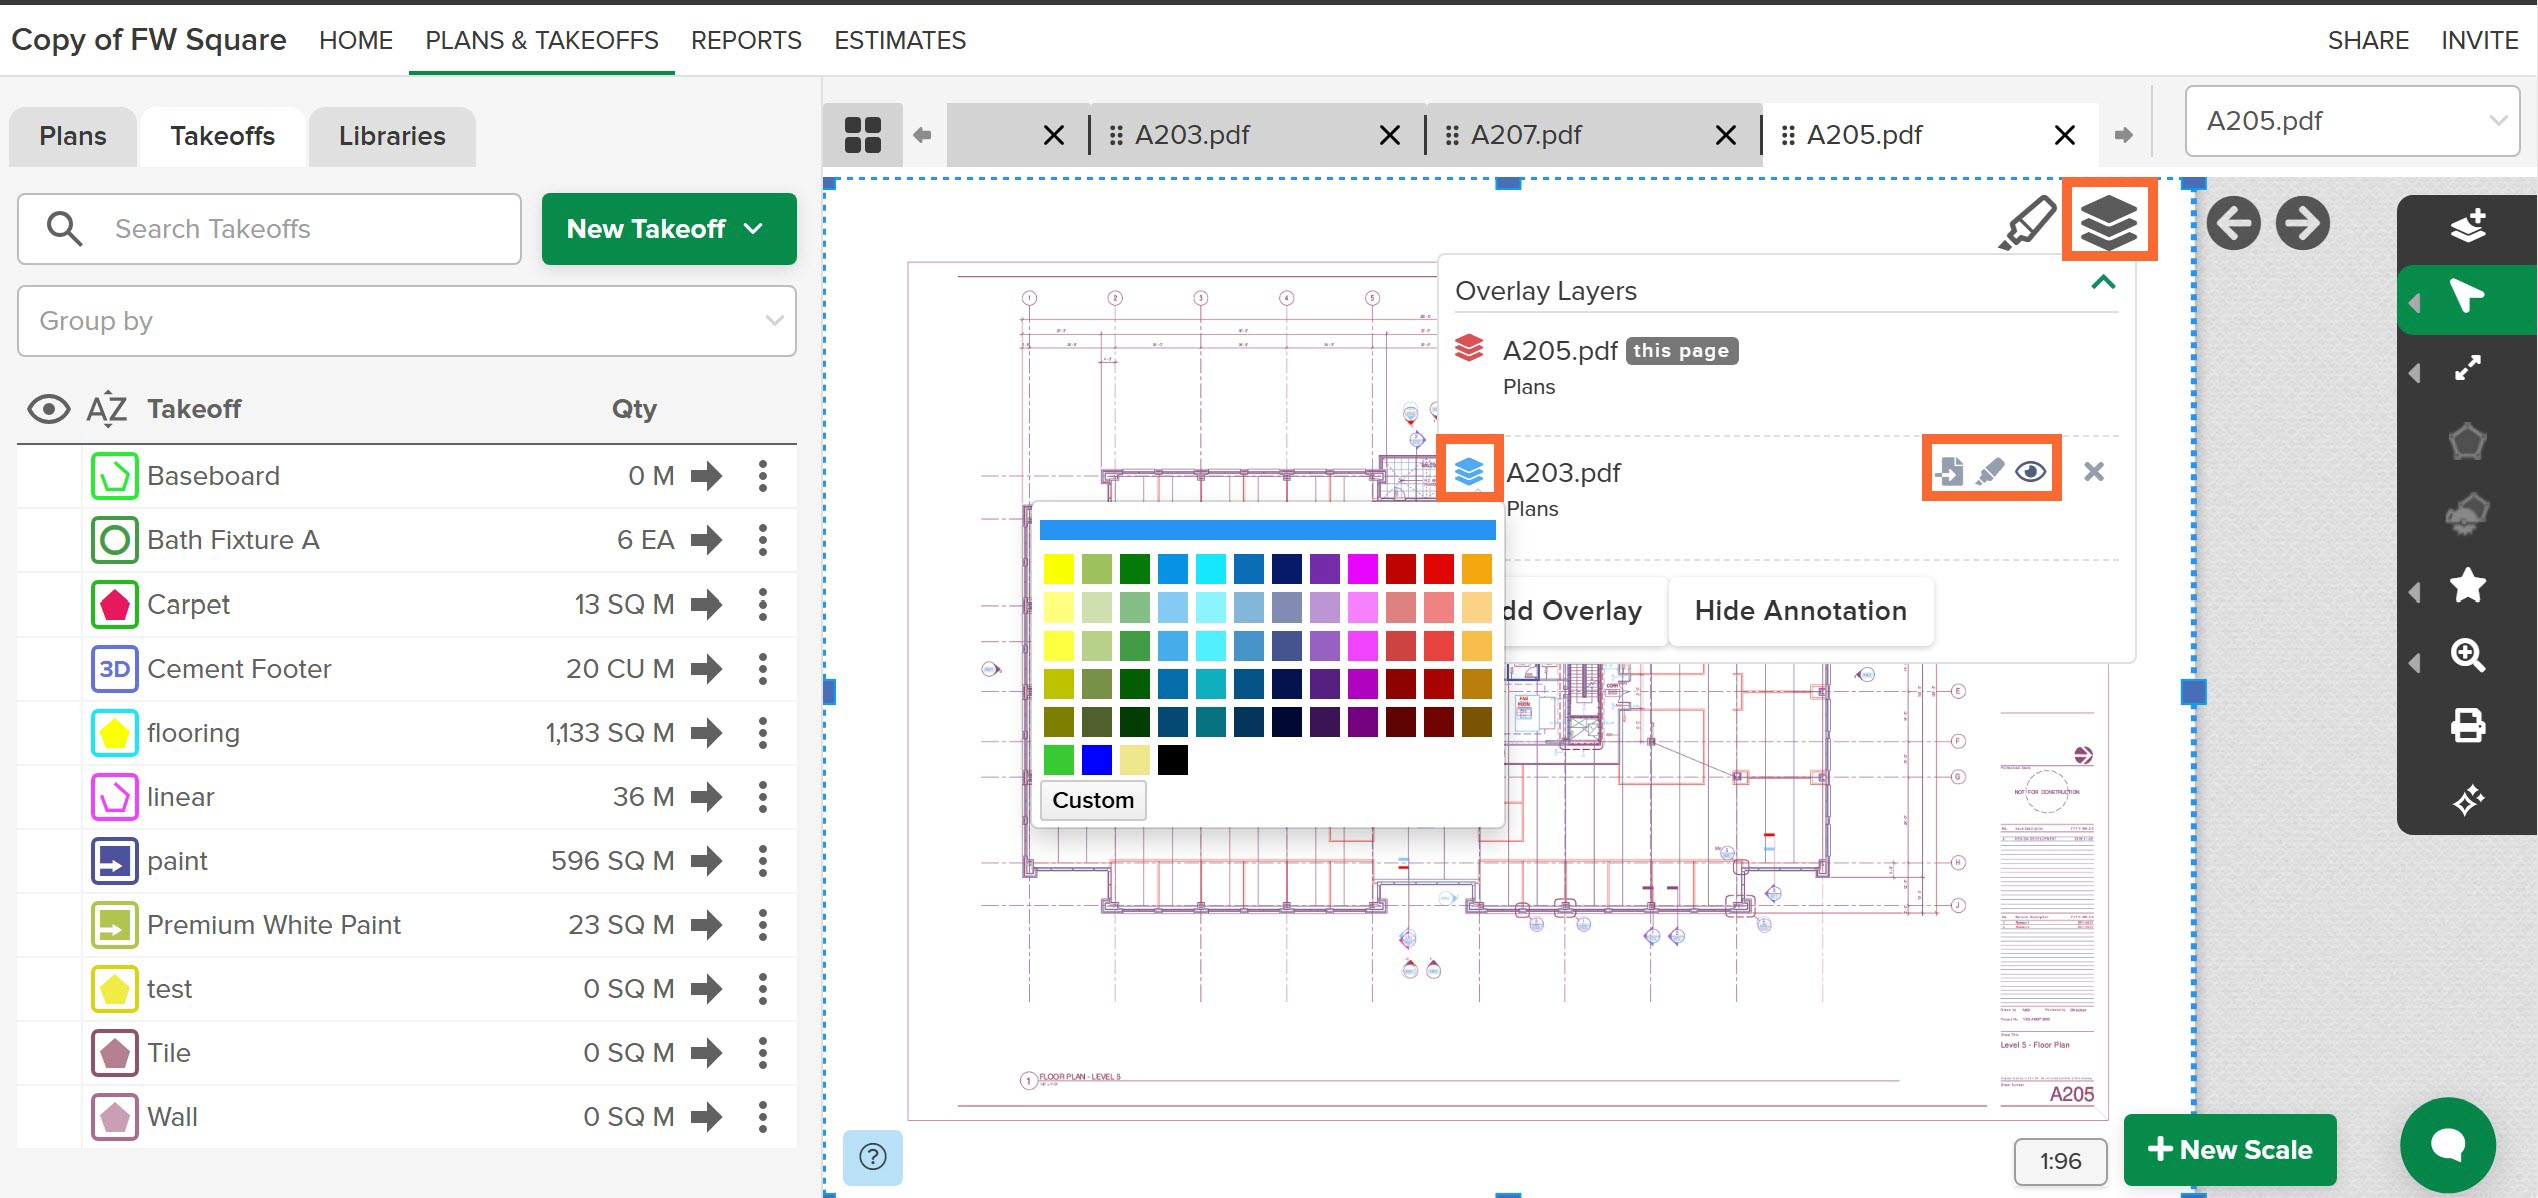
Click the Layers icon at the top of the canvas.
OR
Click the Overlay tool at the top of the right-side tool bar and skip to step 4.Click the Add Overlay button.
The Plan Overlay box will open listing all plan sheets in the project.Search Plan Names or scroll through the list and click on the plan sheet that you want to overlay/layer on top of the base layer.
The plan sheets will change color.*Resize/move the overlay sheet to align with the base layer if needed.
Click and drag any of the drag handles to resize.
Hold the Control key and drag to move the overlay.
TIP: If you have any annotations on the base layer, it may be easier to compare the layers if you hide the annotations. To do this, just click the Hide Annotations button. (Click the button again to unhide them.)
TIP: Click the Layers icon to close the Plan Overlay box.
You can repeat the process to add additional layers if needed.
NOTE: Overlay mode does not persist if you close the base layer sheet or move to another plan sheet or project.
NOTE: If you draw any measurements/counts or add any annotations while in overlay mode, they will be added to your original/base layer plan sheet. However, you can use the Takeoff Transfer tool (see below) to move them to a different layer.
*Once you add an overlay, the base layer will turn red and the first plan sheet you overlay will turn blue. (So, where you see purple, there are no changes between the two plans.) Each additional overlay layer will be a different color. You can change the color of the overlay layers (instructions below) but not the base layer color.
Layer Tools
Once you add Overlay Layers, you can access several useful tools:
Color Selector - Allows you to pick the color of individual overlay layers to suit your preference.
NOTE: You cannot change the base layer color.Takeoff Transfer - Lets you to move all measurements and annotations from the base layer to one of the overlay plan sheets.
NOTE: This action cannot be reversed. The measurement/counts and annotation will no longer be shown on the base layer; they will only be visible on the selected overlay plan sheet.Plan Differencing - Provides greater contrast to help you detect the color difference between layered plan sheets and shows similar lines in black.
Hide - Allows you to determine if a layer is visible.
To Use Layer Tools:
Click the Layers icon and locate the desired Overlay Layer.
Employ the needed tool(s) -
Access the Color Selector and change the layer color:
Click on the Colored Layers icon to the left of the layer.
Select the color you want or click Custom for more color options.
Use Takeoff Transfer to move measurements and annotations from the base layer to another layer:
Click the Move icon to the right of the layer name where you want to move the measurements and annotations.
Turn on Plan Differencing to show greater contrast between layers:
Click the Highlighter icon to the right of the layer name.
TIP: You can also turn on Plan Differencing by clicking the Highlighter icon located to the left of the Layers Icon at the top of the canvas area.
(Click the Highlighter icon again to turn off Plan Differencing.)
Hide a layer:
Click the Hide (eyeball) icon to the right of the layer name.
(Click the Hide icon again to unhide the layer.)
Remove an Overlay Layer
Click the Layers icon at the top of the canvas.
Click the X to the far right of the name of the Overlay Layer you want to remove.
Related Articles
Managing Drawings and Project Documents
Rotate Plans
Annotation Tools
Was this article helpful?