Copy a Project or Plan Sheets
- Print
- DarkLight
- PDF
Copy a Project or Plan Sheets
- Print
- DarkLight
- PDF
Article summary
Did you find this summary helpful?
Thank you for your feedback!
Copying a project or plan sheet allows you to quickly reuse existing work without starting from scratch. This is especially helpful when managing similar scopes, templates, or project versions.
The copied project or plan sheet includes all associated data — plans, takeoffs, items, and other project details — to save setup time and maintain consistency.
There are three ways to quickly copy existing project plans:
Copy an entire project to create a new project with all plans, takeoffs, and data from the original.
Copy a plan sheet to duplicate a specific plan and its measurements within a project.
Copy plan sheets between projects to move one or more plans from an existing project into another.
When a project or plan sheet is copied, all plan sheet names and numbering are preserved, whether they were renamed manually or automatically using AI-Accelerated Prename Plans.
This AI feature automatically detects and applies the correct sheet number and sheet title when drawings are uploaded, ensuring accurate naming and easier navigation across projects.
Key Information
The project or plan sheet is copied the moment the Copy Project or Copy Plan Sheet button is selected.
If another user is editing the project while it’s being copied, those edits will not be included.
The original project cannot be accessed while it is being copied.
The time required to complete the copy depends on the size of the project and the number of projects being copied.
AI-Accelerated Prename Plans ensures that copied plan sheets maintain accurate and consistent names.
Sheet number and title are stored separately and can also be used in other STACK tools such as Build & Operate.
Copy a Project
Use this option to create an entirely new project based on an existing one. The copied project includes all plans, takeoffs, items, and related data from the original.
When a project is copied, all plan sheets retain their names and numbering — whether they were renamed manually or automatically using the AI-Accelerated Prename Plans feature. This ensures that sheet names remain consistent and accurate across project versions, saving time and reducing setup work.
NOTES
The project is copied the moment the Copy Project button is selected. If someone else is editing the project at that time, those edits will not be included.
The original project cannot be accessed while it is being copied.
The copy process time varies depending on the project’s size and number of the projects being copied.
Click PROJECTS on the main toolbar.
Locate the project you want to copy on the project list.
Click the three dots to the right of the project.
Select Copy Project.
By default, plans and documents are included when you copy a project. If you do NOT want to include them in the copy, uncheck the Include Plans and Documents box.Click Copy to confirm.
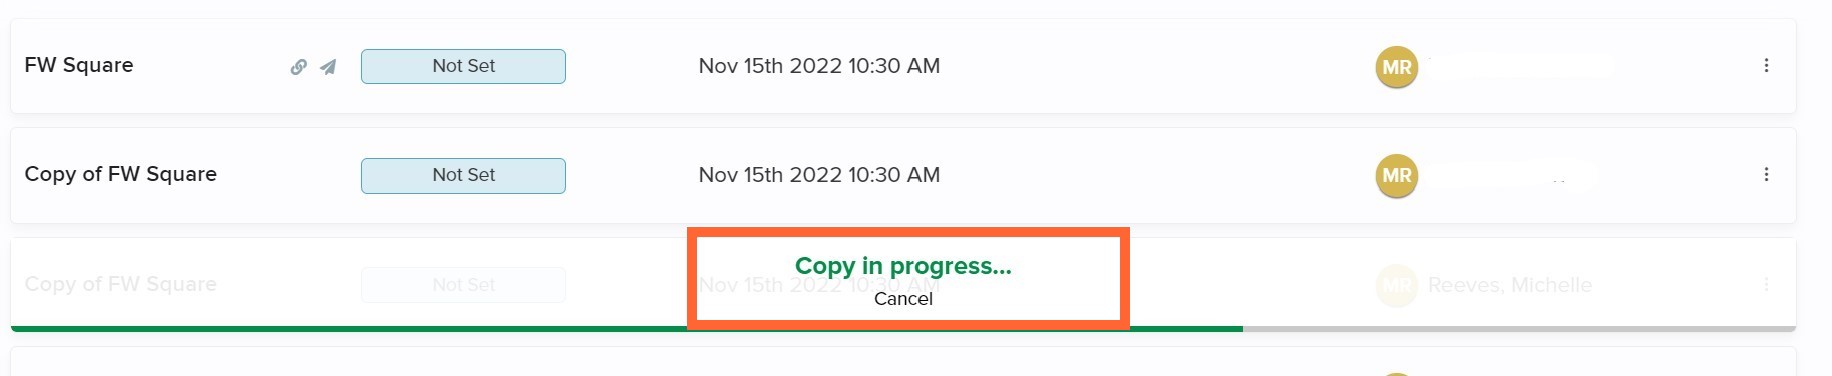
As a project starts to copy, you will see a Copy in progress… notice and have the option to click Cancel to stop the copy if needed (e.g., it is taking too long or there is an error, and it is timing out).
While a project is being copied, you can continue to work on other projects in STACK or close your browser to do other work. Once the copy is complete, you'll receive a notice in My Notifications (designated by a green mark on the My Notifications icon (bell) on the main toolbar) which you can click to open.

The new project will appear on the project list as “Copy of” the original project name but you can rename it if needed.
Rename a Project
On the Project List, click on the PROJECT NAME you want to change.
This will take you to that project's HOME screenClick on the Project Name at the top of the screen and enter the new name.
Copy a Plan Sheet
How to create a copy of an individual plan sheet in your existing project.
- Go to the PLANS & TAKEOFFS section of your project.
- Click the Plans tab.
- Locate the plan sheet you want to copy under Plans and Documents.
- Click the three dots to the right of the plan sheet.
- Select Copy.
- If the plan sheet does not have measurements, annotations, or bookmarks, this is the last step.
- If the plan sheet does have measurements, annotations, and/or bookmarks, a dialogue box will open. Continue to Step 6.
- Check the box next to Measurements, Annotations, and/or Bookmarks if you want them included in the copy.
- Click Copy to confirm.
NOTE
The new plan sheet will have the same name as the original sheet that was copied with a number in parenthesis at the end, e.g., Page Name (1). Any names longer than 255 characters will be truncated.
TIP
We suggest renaming the new plan sheet and creating folders to keep your plans organized and quickly find what you need. When choosing a name, keep in mind that folders and the plans within them are listed in alphanumeric order.
Copy Multiple Plan Sheets
How to create copies of multiple plan sheets in your existing project at the same time.
Go to the PLANS & TAKEOFFS section of your project.
Click the Plans or Takeoffs tab.
On the Overview tab, click the checkbox in the upper left of the thumbnail for each plan sheet you want to copy.
TIP: If you select one thumbnail, hold the shift key and select another thumbnail, all thumbnails between them will also be selected.
Hotkey CTRL + A (or Command A on a Mac) will select all of the thumbnails and ESC will de-select all selected thumbnail images.Click Copy on the toolbar at the right.
If none of the plan sheets have measurements, annotations, or bookmarks, this is the last step.
If any of the plan sheets do have measurements, annotations, and/or bookmarks, a dialogue box will open. Continue to Step 5.
Check the box next to Measurements, Annotations, and/or Bookmarks if you want them included in the copy. (This will apply to all plan sheets being copied at the time.)
Click Copy to confirm.
While the plan sheets are copying, a message will appear in the upper right of your screen stating how many sheets are being copied. Once complete, the copied sheets will appear on the Plans and Documents list.
NOTE: The new plan sheets will have the same names as the original sheets that were copied with a number in parenthesis at the end, e.g., Page Name (1). If there are two sheets with same name being copied, they will have the same number at the end.
TIP: We suggest renaming the new plan sheets and creating folders to keep your plans organized and quickly find what you need. When choosing names, keep in mind that folders and the plans within them are listed in alphanumeric order.
Rename a Plan Sheet
There are two ways to rename plan sheets in STACK.
You can use AI-Accelerated Prename Plans, which automatically detects and suggests the correct sheet number and title based on the text found on the drawing, or you can manually rename plan sheets at any time directly from the Plans tab.
There are two options for renaming plan sheets
AI-Accelerated Pre-name Plans (for AI subscribers)
Plan sheets are automatically named and numbered when uploaded. If needed, sheet names can be edited manually at any time.
When plan sheets are uploaded, STACK uses AI-Accelerated Pre-name Plans to automatically identify and apply the correct sheet number and sheet title based on the text detected on each drawing.
The AI model reads the title block and renames each sheet using the following format:[Sheet Number] [Sheet Title] (for example, A101 Floor Plan).
This automation improves accuracy and saves time by eliminating the need to manually rename plan sheets after upload.
If the detected name isn’t accurate, it can be updated manually in the Plans & Takeoffs section just like before.
NOTE
Duplicate plan names are allowed (for example, different versions of the same sheet)
The AI-Accelerated Pre-name feature is available to AI-enabled STACK accounts only.

Manually Rename a Sheet
.gif)
In the Global Settings Top Navigation Menu (grey bar), select PROJECT.
Open the project where the plan is located.
In the Project Top Navigation Menu (white bar), select PLANS & TAKEOFFS.
Select the Plans tab.
Navigate to where the plan you want to rename.
Click the three dots ellipsis (⋮) next to the plan name and number.
Select Rename.
Type in the new name.
Hit Enter on your keyboard to save it.
Related Articles
Create Folders to Organize Your Plans
Was this article helpful?