Organize Your Project Documents
- Print
- DarkLight
- PDF
Organize Your Project Documents
- Print
- DarkLight
- PDF
Article summary
Did you find this summary helpful?
Thank you for your feedback!
The Plans and Documents list under the Plans tab is where you organize all your project files. From here, you can sort, group, and manage your plan sheets and supporting documents for easier navigation and review.
Key Information
The Plans tab is divided into Plans and Supporting Documents sections.
Plans include all drawing sheets uploaded to the project; Supporting Documents contain reference files such as specifications, instructions, or spreadsheets.
Files can be sorted alphanumerically or in their original document order.
You can create and manage folders and subfolders to organize project data.
AI-Accelerated users can use tools like Autoname and Classify by Discipline for automatic plan naming and organization.
Any changes made to plan names, folders, or disciplines are instantly reflected across the project.
Sorting the Plans and Documents List
When you upload multipage files to STACK as Plans, they are automatically split and saved as individual sheets.
By default, sheets appear in alphanumeric order in the Plans and Documents list. You can change this to Document Order (the order in which the sheets appear in the original file).
NOTE
The Document Order sort option only applies to Plans uploaded after April 25, 2024.
Click the icon to the left of Plans and Documents.
Three horizontal lines: the list is sorted by Document Order.
A–Z: the list is sorted alphanumerically.
These sort options apply to any folder that contains Plans, even if you move the Plans to new folders.
Bookmarks Folder
Bookmarks create shortcuts to specific areas or zoom levels on plan sheets.
All project bookmarks are listed in the Bookmarks folder under the Plans and Documents list.
Clicking a bookmark in this folder will open the saved view.
You can Rename or Delete a bookmark using the three-dot menu (⋮) next to its name.
Plans Folders
The Plans folder is where all uploaded plan sheets are stored and organized.
By default, new uploads are placed here, but you can create additional folders and subfolders to match your project structure.
You can:
Upload plans directly into a chosen folder.
Drag and drop plans between folders.
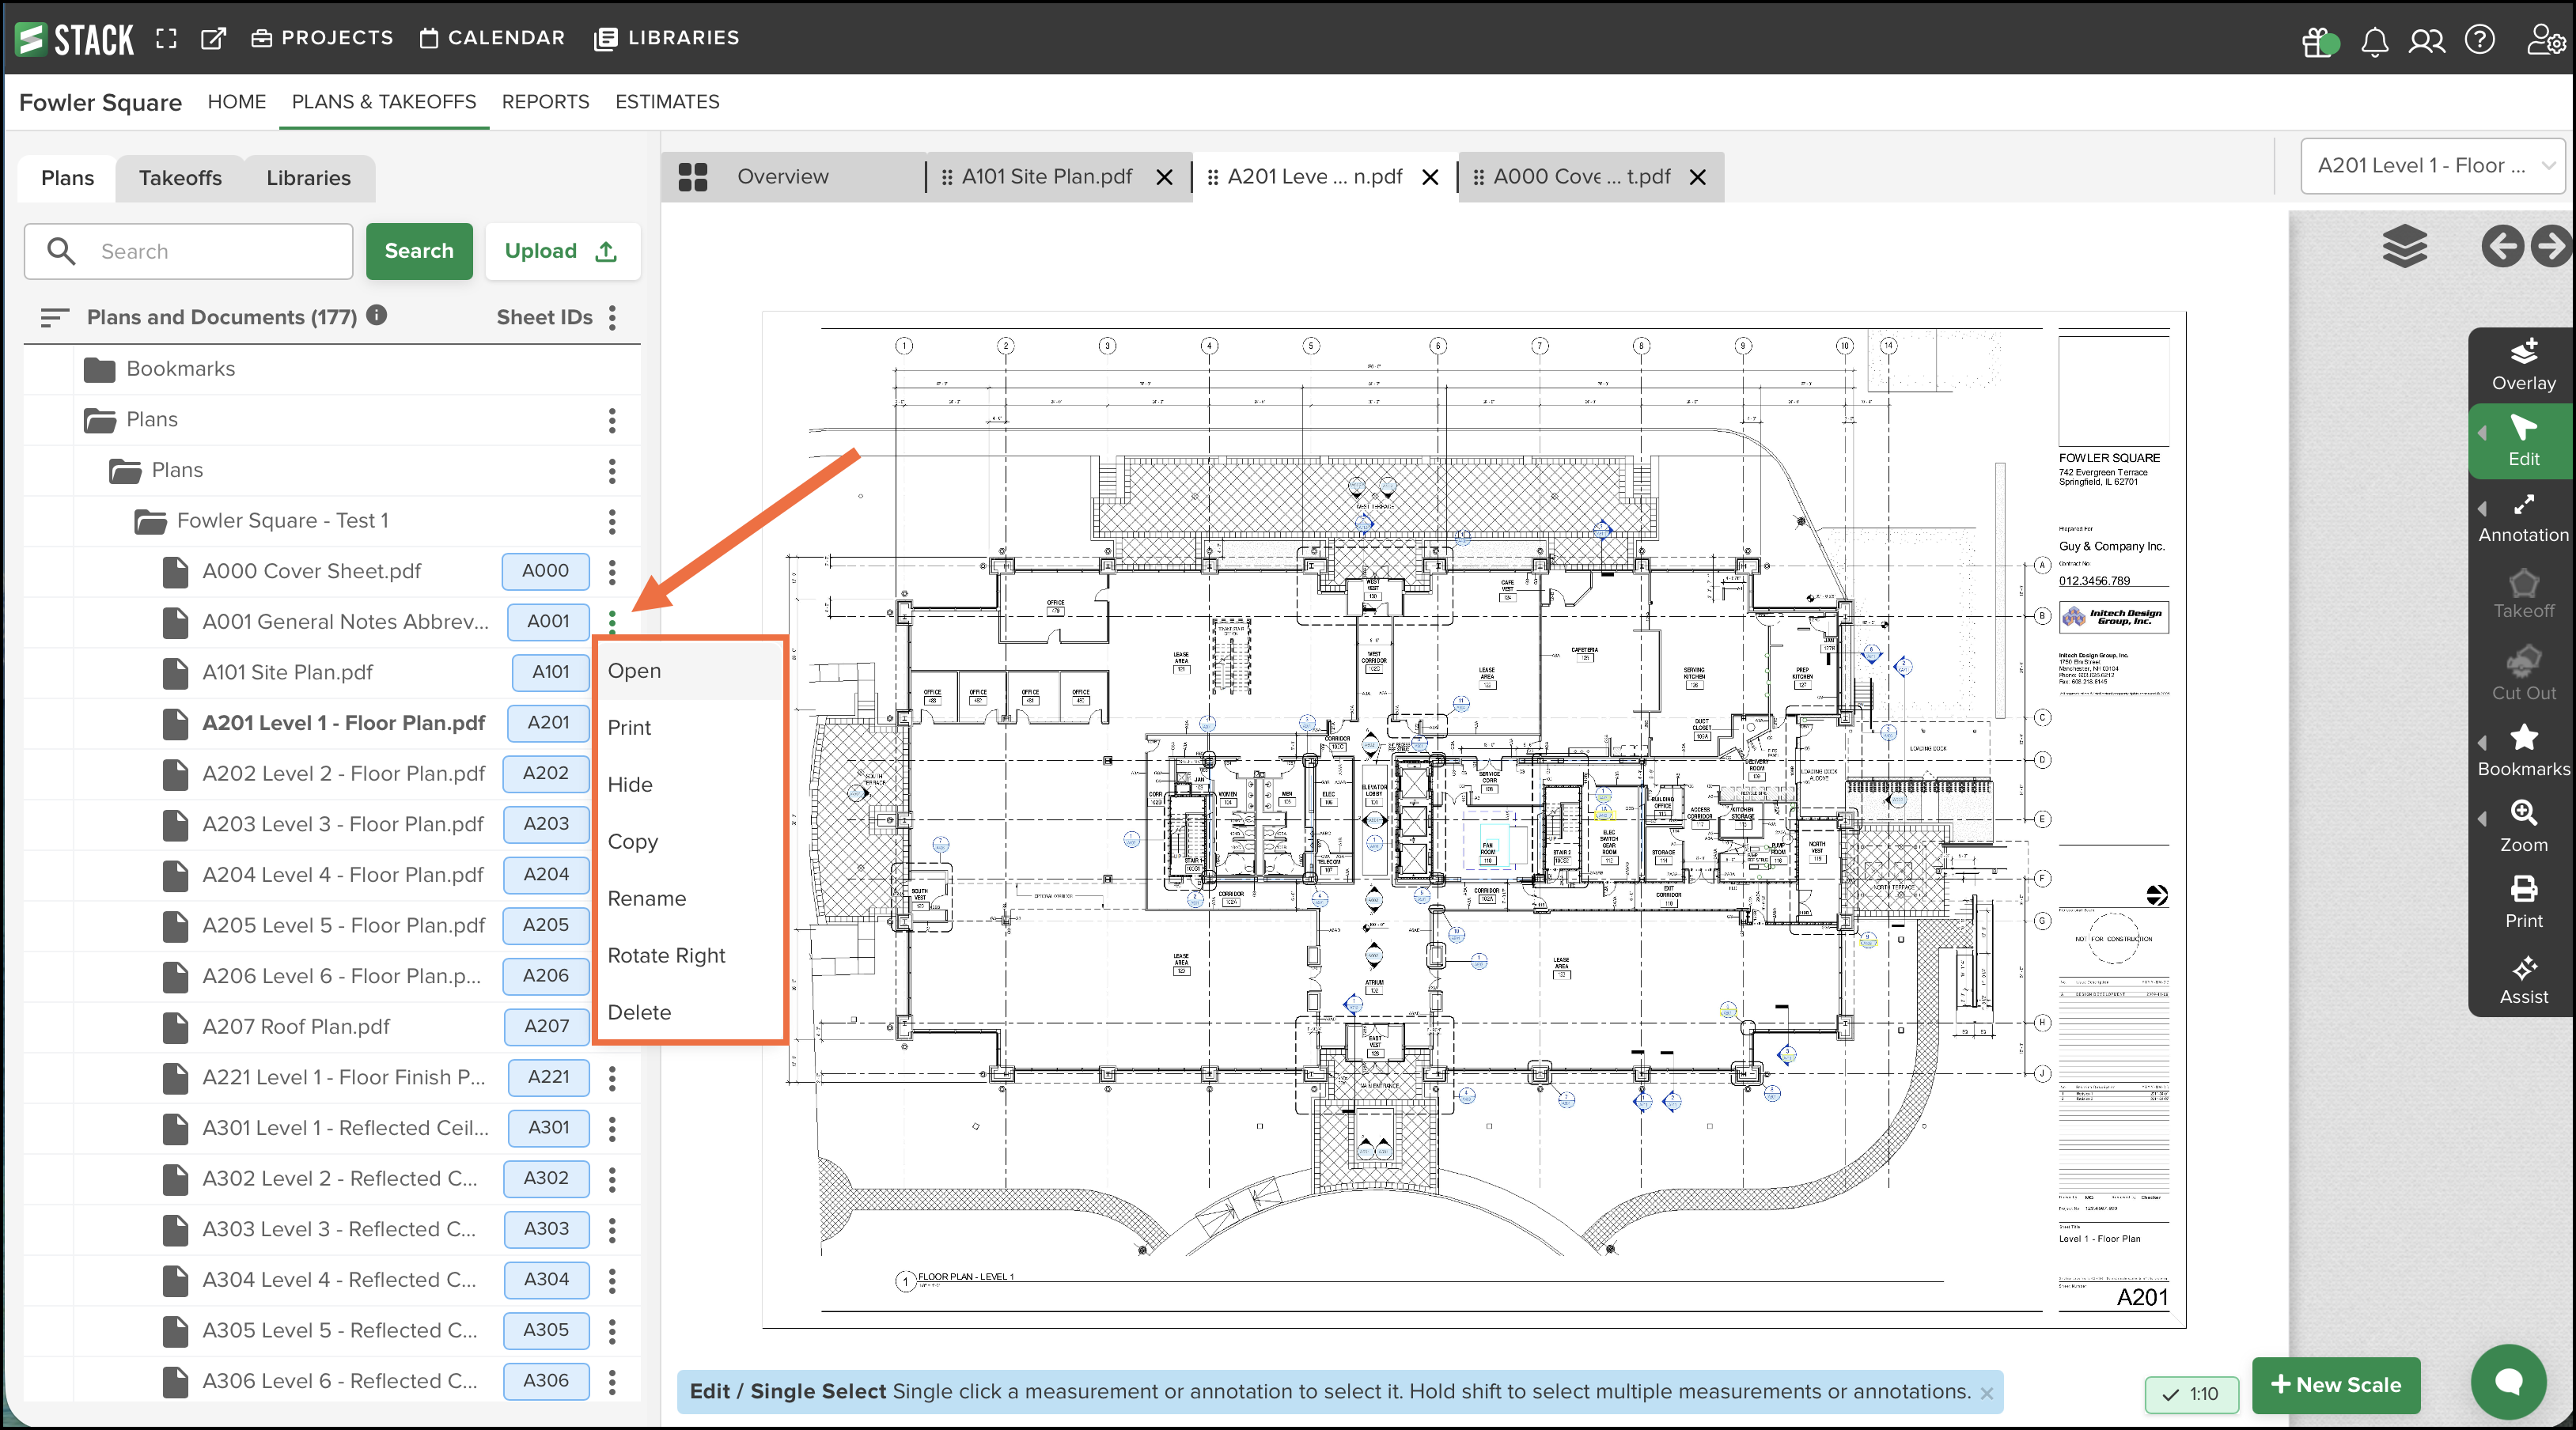
Manage files using the three-dot menu (⋮) to Print, Hide, Copy, Rename, Rotate, or Delete them.
NOTE
Plans in this section are text searchable and can be organized manually or busing AI tools such as Autonomy or Classify by Discipline.
See Create Folders to Organize Your Plans for detailed instructions.
Choose Which Pages to Display
By default, all project plan sheets are displayed within the Plans and Documents list unless you have selected to Hide specific pages (hidden pages are not displayed).
However, you have the ability change this:
You can choose to display only pages with takeoffs on the Plans and Documents list. (This makes it easier to quickly find your working plan sheets.)
You can also choose to include Hidden Pages on the list.
NOTE
You can collapse the left hand panel by clicking the white circle with the green arrow, or adjust the size by grabbing the drag handle.
By default, all plan sheets are displayed in the Plans and Documents list unless they’ve been hidden.
You can change this to focus only on active work or specific sheets.
In the project top navigation menu, go to PLANS & TAKEOFFS.
Select the Plans tab.
Open the three-dot menu (⋮) next to Sheet IDs.
Select one or both of the following:
Only Pages with Takeoffs – displays only sheets that have takeoffs.
Hidden Pages – includes sheets that were previously hidden.
To show all pages again, uncheck both boxes.
NOTE
Selecting Only Pages with Takeoffs hides individually hidden sheets with takeoffs unless Hidden Pages is also checked.
More information on plan organization can be found here.
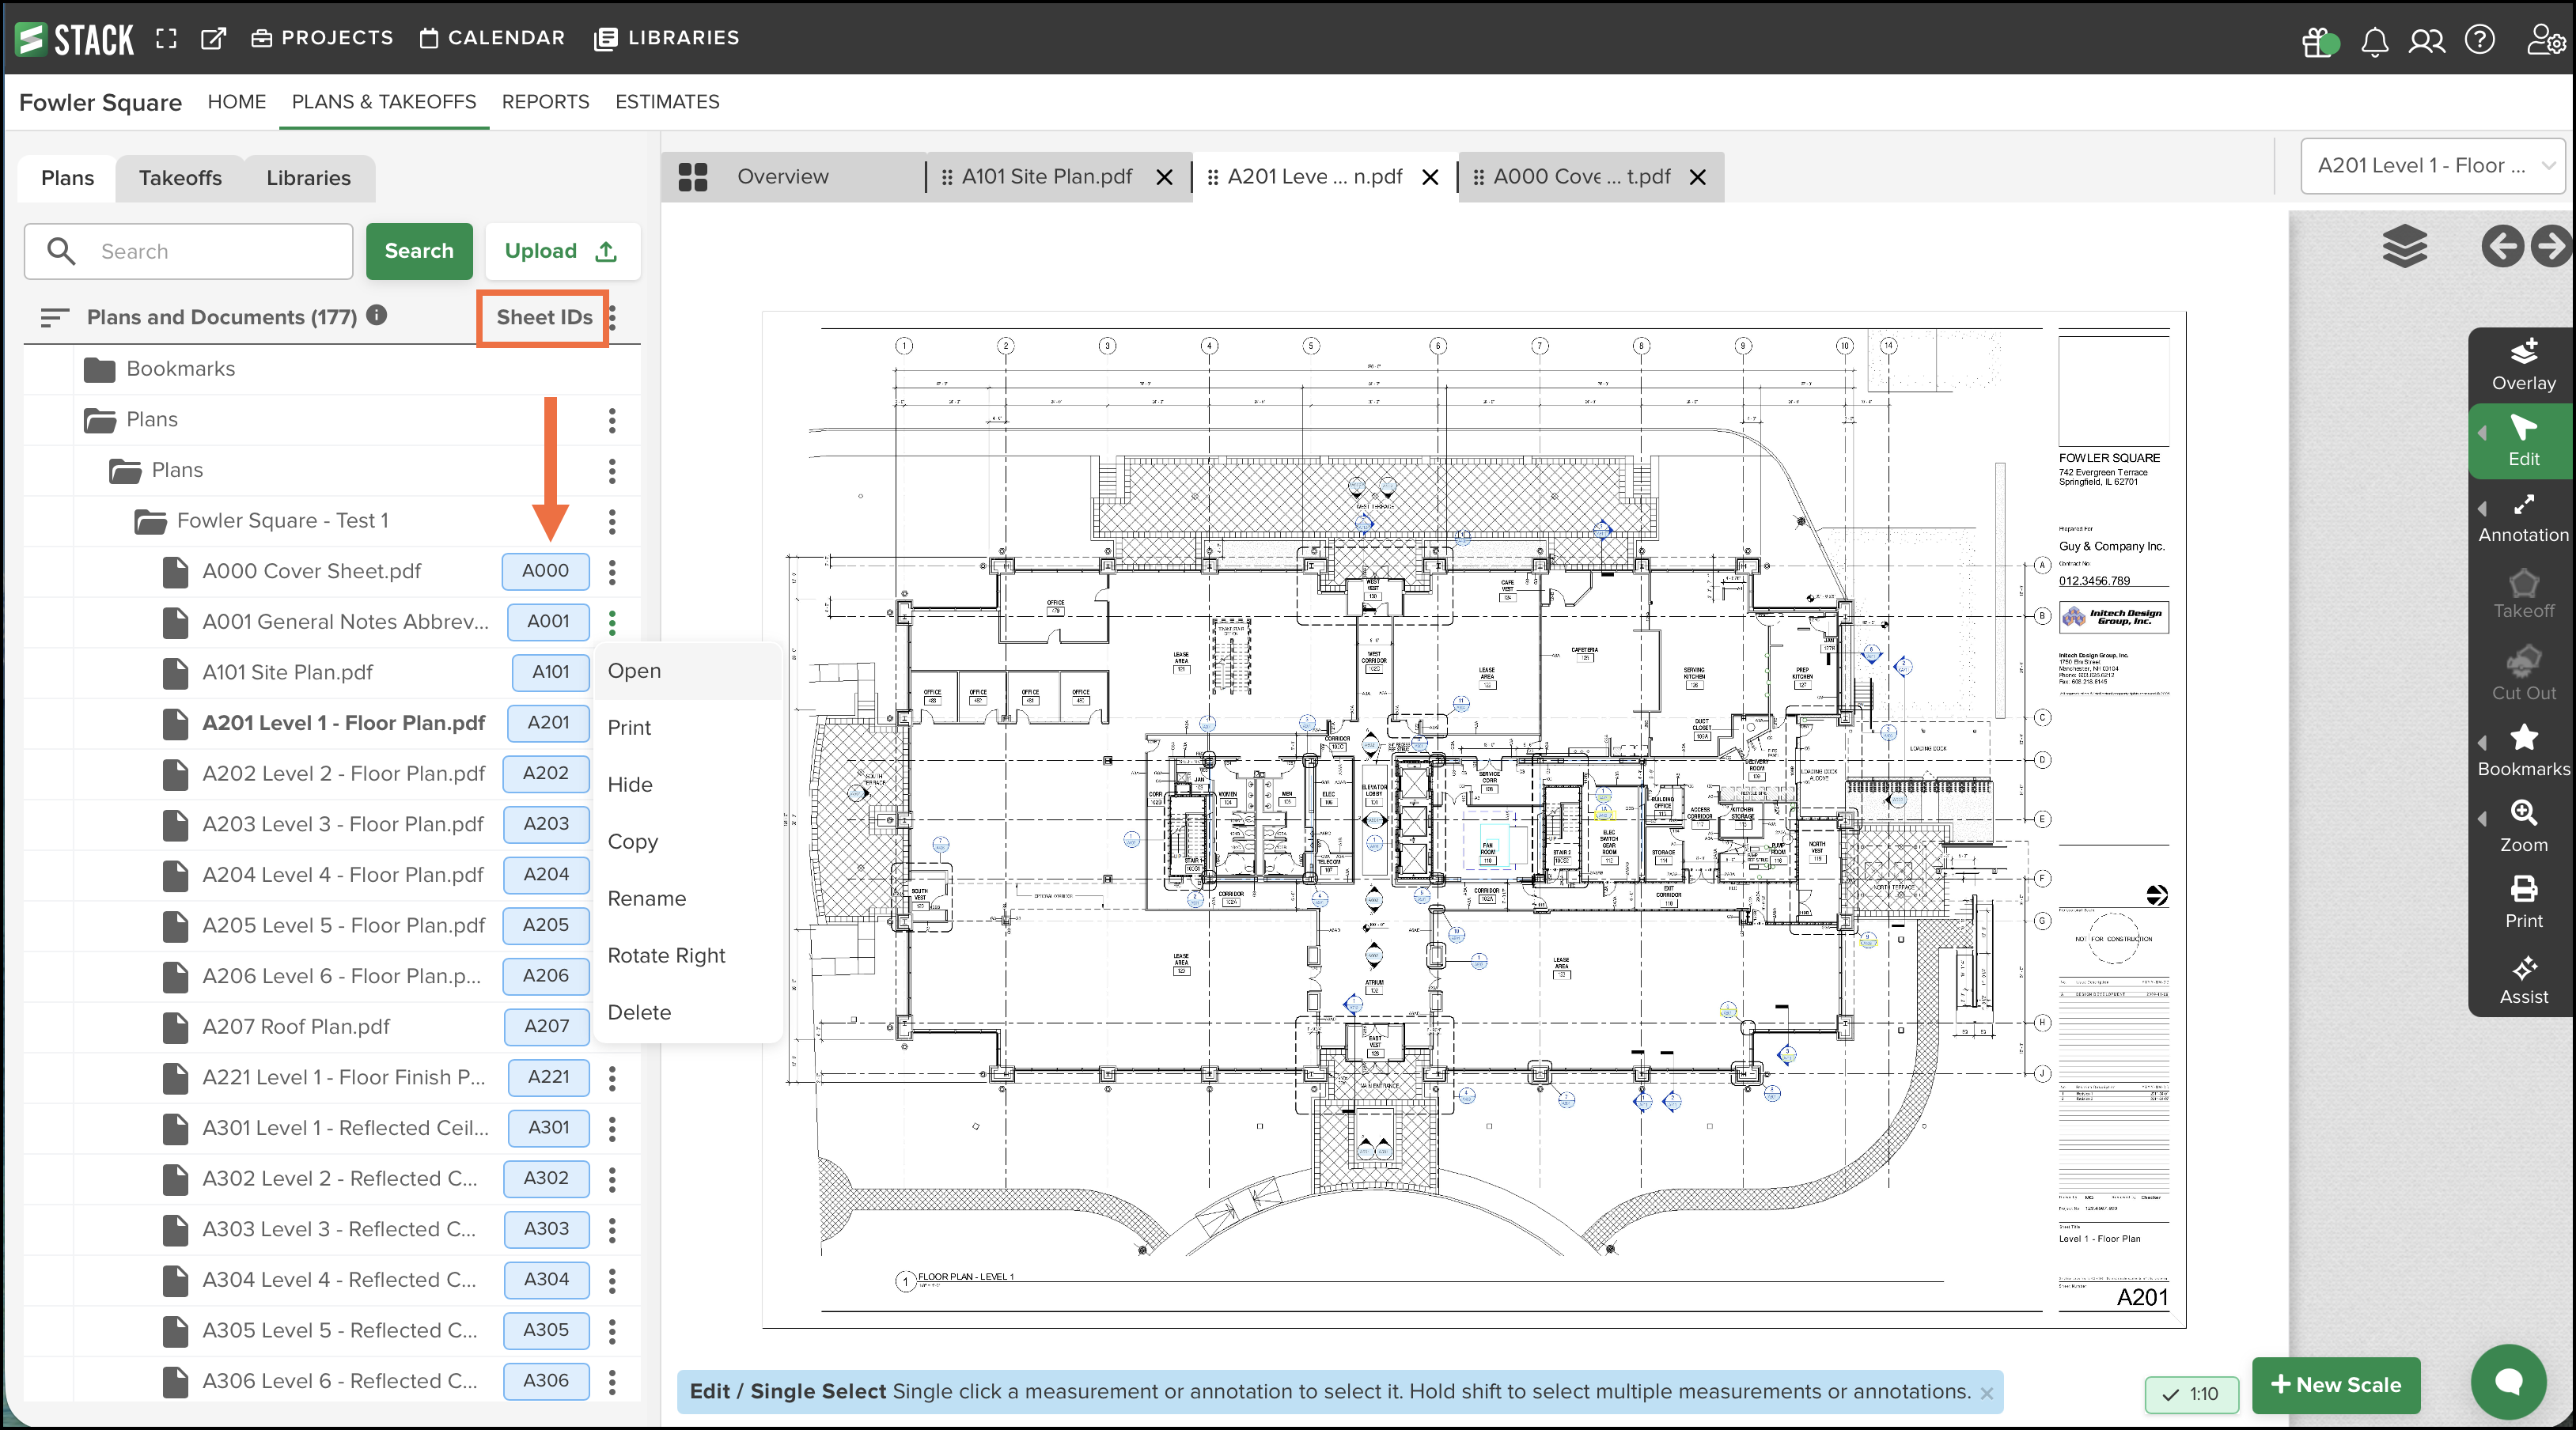
Sheet IDs
Proper Sheet IDs are essential for STACK’s Automatic Plan Hyperlinking feature to work correctly.
If sheet IDs were misidentified during upload, you can use Autoname to rename the sheets or rename them individually.
TIP
Proper Sheet IDs are critical for STACK's Automatic Plan Hyperlinking feature to work. If the Sheet IDs were incorrectly identified during upload, you can use Autoname to rename the plans in the set, or you can individually rename plan sheets.
More information on renaming plans and using Automatic Plan Hyperlinking can be found here.
Supporting Documents Folder
The Supporting Documents folder stores files that are part of the project but not drawings — such as bid instructions, specifications, or spreadsheets.
These files:
Can be any file type.
Do not appear on the Overview tab.
Can be organized using your own folder/subfolder structure.
You can Open, Print, Hide, Copy, Rename, Rotate, or Delete files in this section via the three-dot menu (⋮).
See Create Folders to Organize Your Plans for instructions on building your folder structure.
TIP
Collapse or resize the left-hand panel by clicking the white circle with the green arrow, or drag the panel’s edge to adjust its width.
.png)
Classify Plans by Discipline
For AI-Accelerated users, STACK can automatically identify and organize plan sheets by discipline (e.g., Architectural, Structural, Mechanical, Electrical, Plumbing). This helps quickly find the right sheets by trade and ensures your project plans are grouped in a consistent, professional structure.
How it Works
The AI analyzes each plan’s Title Block, Sheet Number, and Name to detect its discipline.
Plans are then moved into discipline-specific folders (e.g., Architectural, Structural, etc.).
If a matching discipline folder already exists, the plan is placed there.
Only drawings are processed — not other document types such as specifications or RFIs.
Hidden plans are also moved automatically.
In the project top navigation menu, go to PLANS & TAKEOFFS.
In the Plans tab, locate the folder you want to organize.
Click the three-dot menu (⋮) next to the folder name.
Select Classify by Discipline.
Once processing is complete, the plans are automatically moved into their discipline folders.
NOTE
The Classify by Discipline option will be disabled if no drawings in the folder can be classified.
TIP
If a plan’s discipline is moved to the wrong folder, the user can manually drag and drop to the correct folder.
Related Articles
Upload Project Files
Create Folders to Organize Your Plans
Bookmarks
Automatic Plan Hyperlinking
Managing Drawings and Project Documents
Text and Keyword Search Plans
Was this article helpful?