- Impression
- SombreLumière
- PDF
Bookmarks
- Impression
- SombreLumière
- PDF
Bookmarks allow you to create a link to a specific view/location on a plan sheet, then place the link (in the form of an icon) on other plan sheets in the project for quick access.
They are a great way to create shortcuts to general notes or section views.
For instructions to rename or delete an existing bookmark from the project, see Organize Your Project Documents.
Create / Add Bookmark

Go to the PLANS & TAKEOFFS section of your project.
Open the plan sheet that you want to bookmark/create a link to.
Scroll/zoom in to the specific view of the sheet that you want people to see when they use the bookmark.
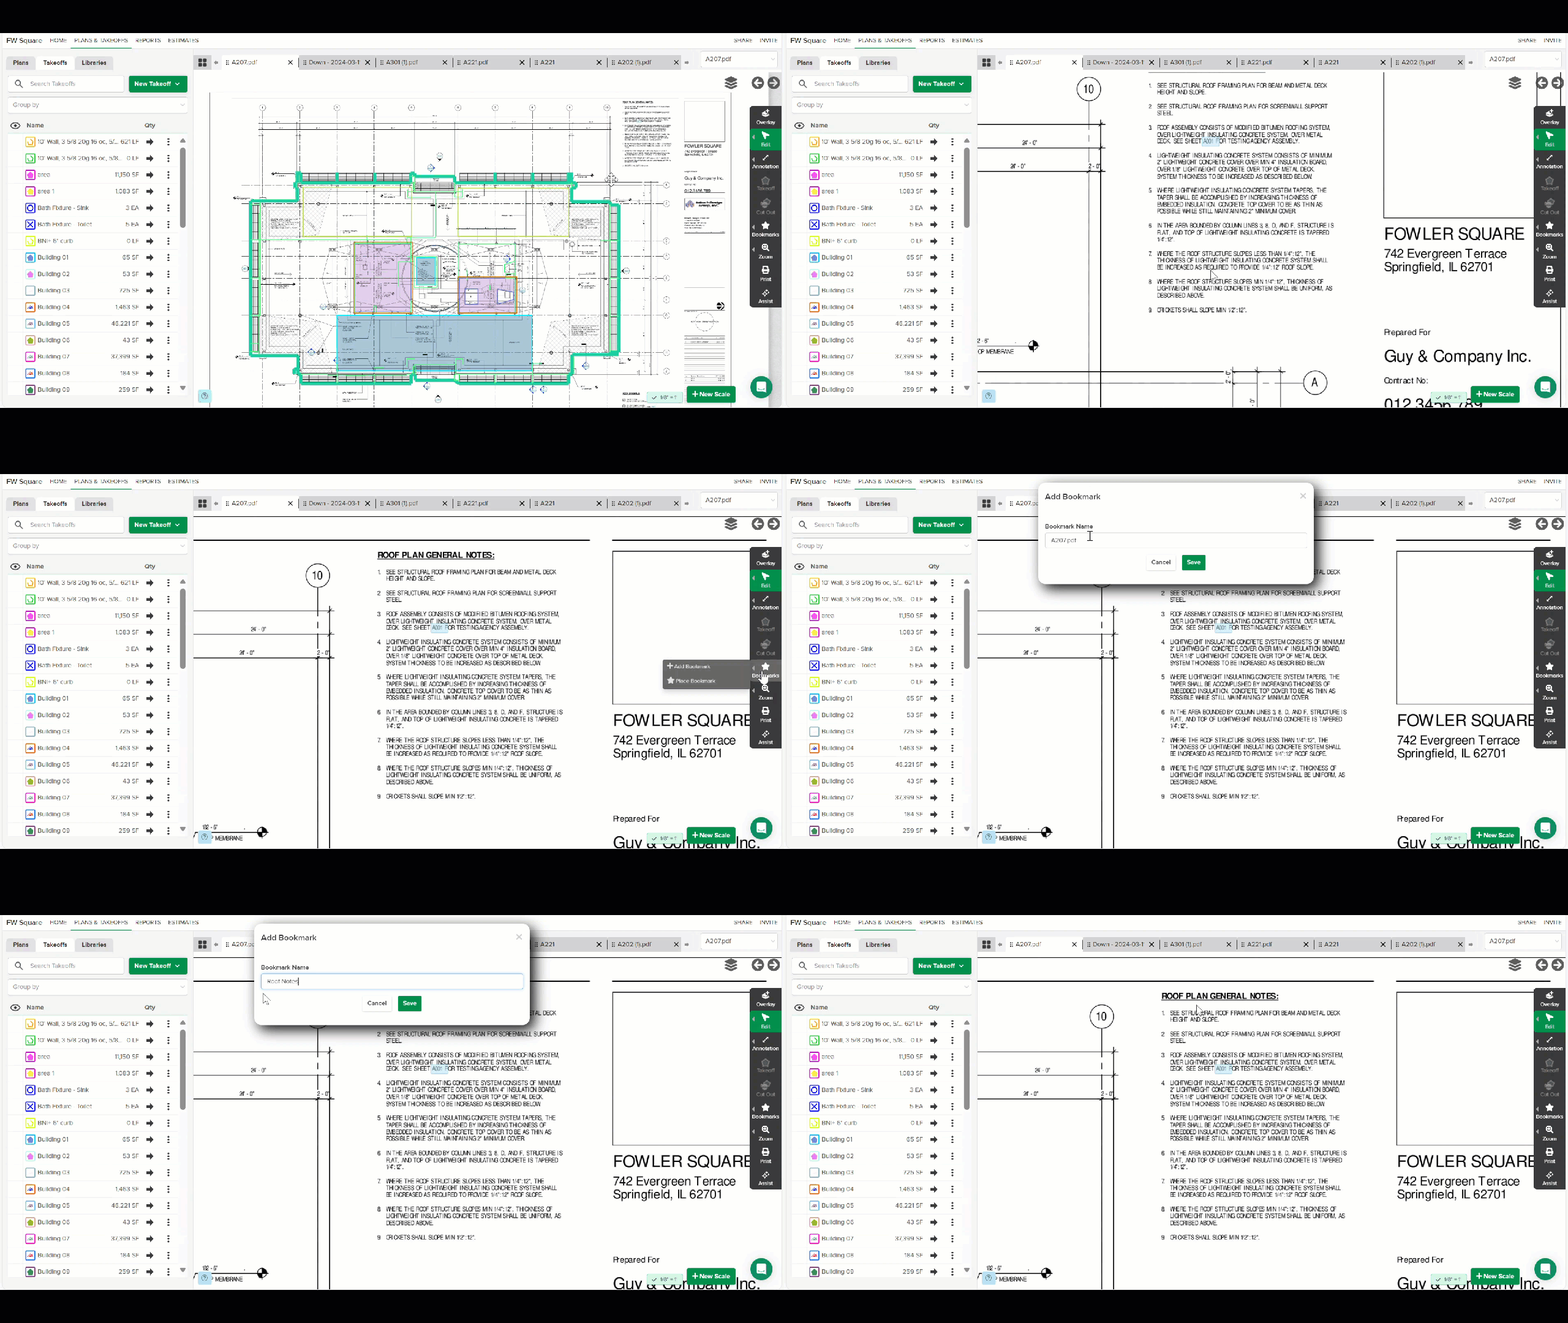
Click Bookmarks on the Measuring Toolbar along the right side of the screen and select Add Bookmark.
Type in a Bookmark Name.
Click Save.
Once you add a bookmark, you can place it on any plan sheet in the project.
TIP: All the Bookmarks that are available for use in the project are listed in the Bookmarks folder on the Plans tab. This is also where you can rename a bookmark if needed. See Organize Your Project Documents for more info.
Place Bookmark

Go to the PLANS & TAKEOFFS section of your project.
Open the plan sheet on which you want to place a bookmark.
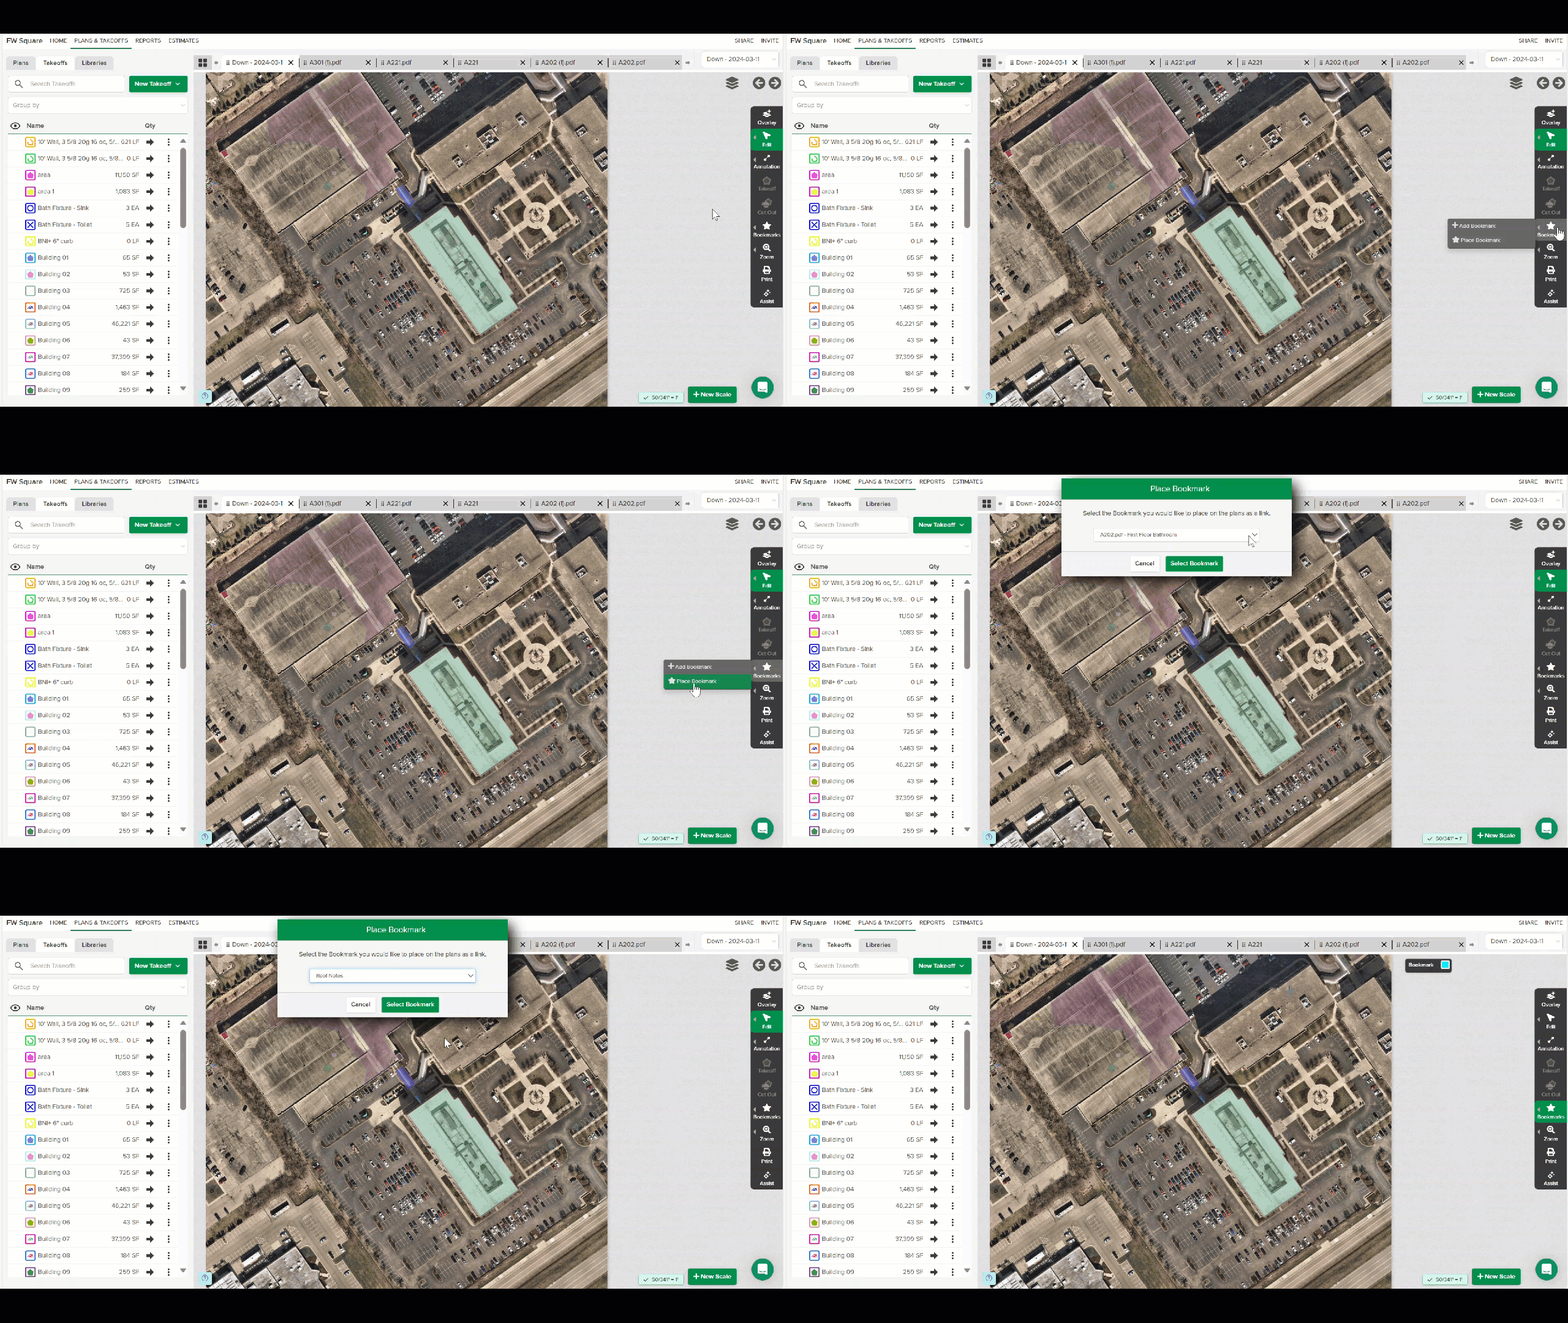
Click Bookmarks on the Measuring Toolbar along the right side of the screen and select Place Bookmark.
Choose the desired Bookmark from the dropdown and click Select Bookmark.
(Optional)Choose the color you want for the Bookmark icon.
A small Bookmark toolbar will be at the top of the canvas area where you can select the color.
Click the location on the plan sheet where you want to place the Bookmark.
A Bookmark icon showing the first four letters of the Bookmark Name will be placed at that spot on the plan sheet.
When the icon is clicked, a new tab will open showing the bookmarked plan sheet view.
TIP: To change the color of the bookmark icon after placement, click the arrow at the top right of the icon. The Bookmark toolbar will appear at the top of the canvas area where you can select a different color.
Clicking on the arrow also allows you to move the bookmark if needed.
To remove a Bookmark from a plan sheet, click the arrow at the top right of the icon, then press Delete on your keyboard.
.jpg)
If you want to completely delete a bookmark from the project, see Organize Your Project Documents.
Related Articles
Organize Your Project Documents
Automatic Plan Hyperlinking
Annotation Tools

