Connect Your Sage Intacct and STACK Account
- Print
- DarkLight
- PDF
Connect Your Sage Intacct and STACK Account
- Print
- DarkLight
- PDF
Article summary
Did you find this summary helpful?
Thank you for your feedback!
Connecting your Sage Intacct account to your STACK account allows you to quickly transfer various data between the platforms so you can take full advantage of all the tools and features each platform offers and streamline your workflow. (See Create a Project from an External Source and Export Estimate Worksheet Data to Sage Intacct for more info.)
To connect your Sage Intacct and STACK accounts, you'll need to:
Set up Sage Intacct for the STACK connection
Connect Sage Intacct to STACK
Once you complete the connection process (instructions below), you'll be able to use the integration to import/export data between STACK and Sage Intacct.
Key Information
The Sage Intacct integration is an add-on to your STACK subscription. Contact your STACK Account Manager for pricing.
You can only connect one Sage account to your STACK account.
Only STACK users with a role/permission to access Account Settings can set up the connection.
The user setting up the connection must have permissions/access to the Sage Intacct account you want to connect.
The user must have a Sage Intacct role with Admin permissions to perform the necessary setup in Sage Intacct.
This is a one-time setup. Once you have connected your STACK and Sage Intacct account, you will not need to repeat this process.
You can easily disconnect your STACK and Sage Intacct account if needed.
Set Up Sage Intacct for STACK Connection
Before you can connect your Sage Intacct and STACK accounts, you'll need to set up your Sage Intacct account to recognize STACK.
NOTE: You must have a Sage Intacct role with Admin permissions to complete the setup.
Log in to the Sage Intacct account you want to connect to STACK.
Add the STACK Sender ID to your approved list.
Go to the main menu and click Company, then Company (on the Setup tab).
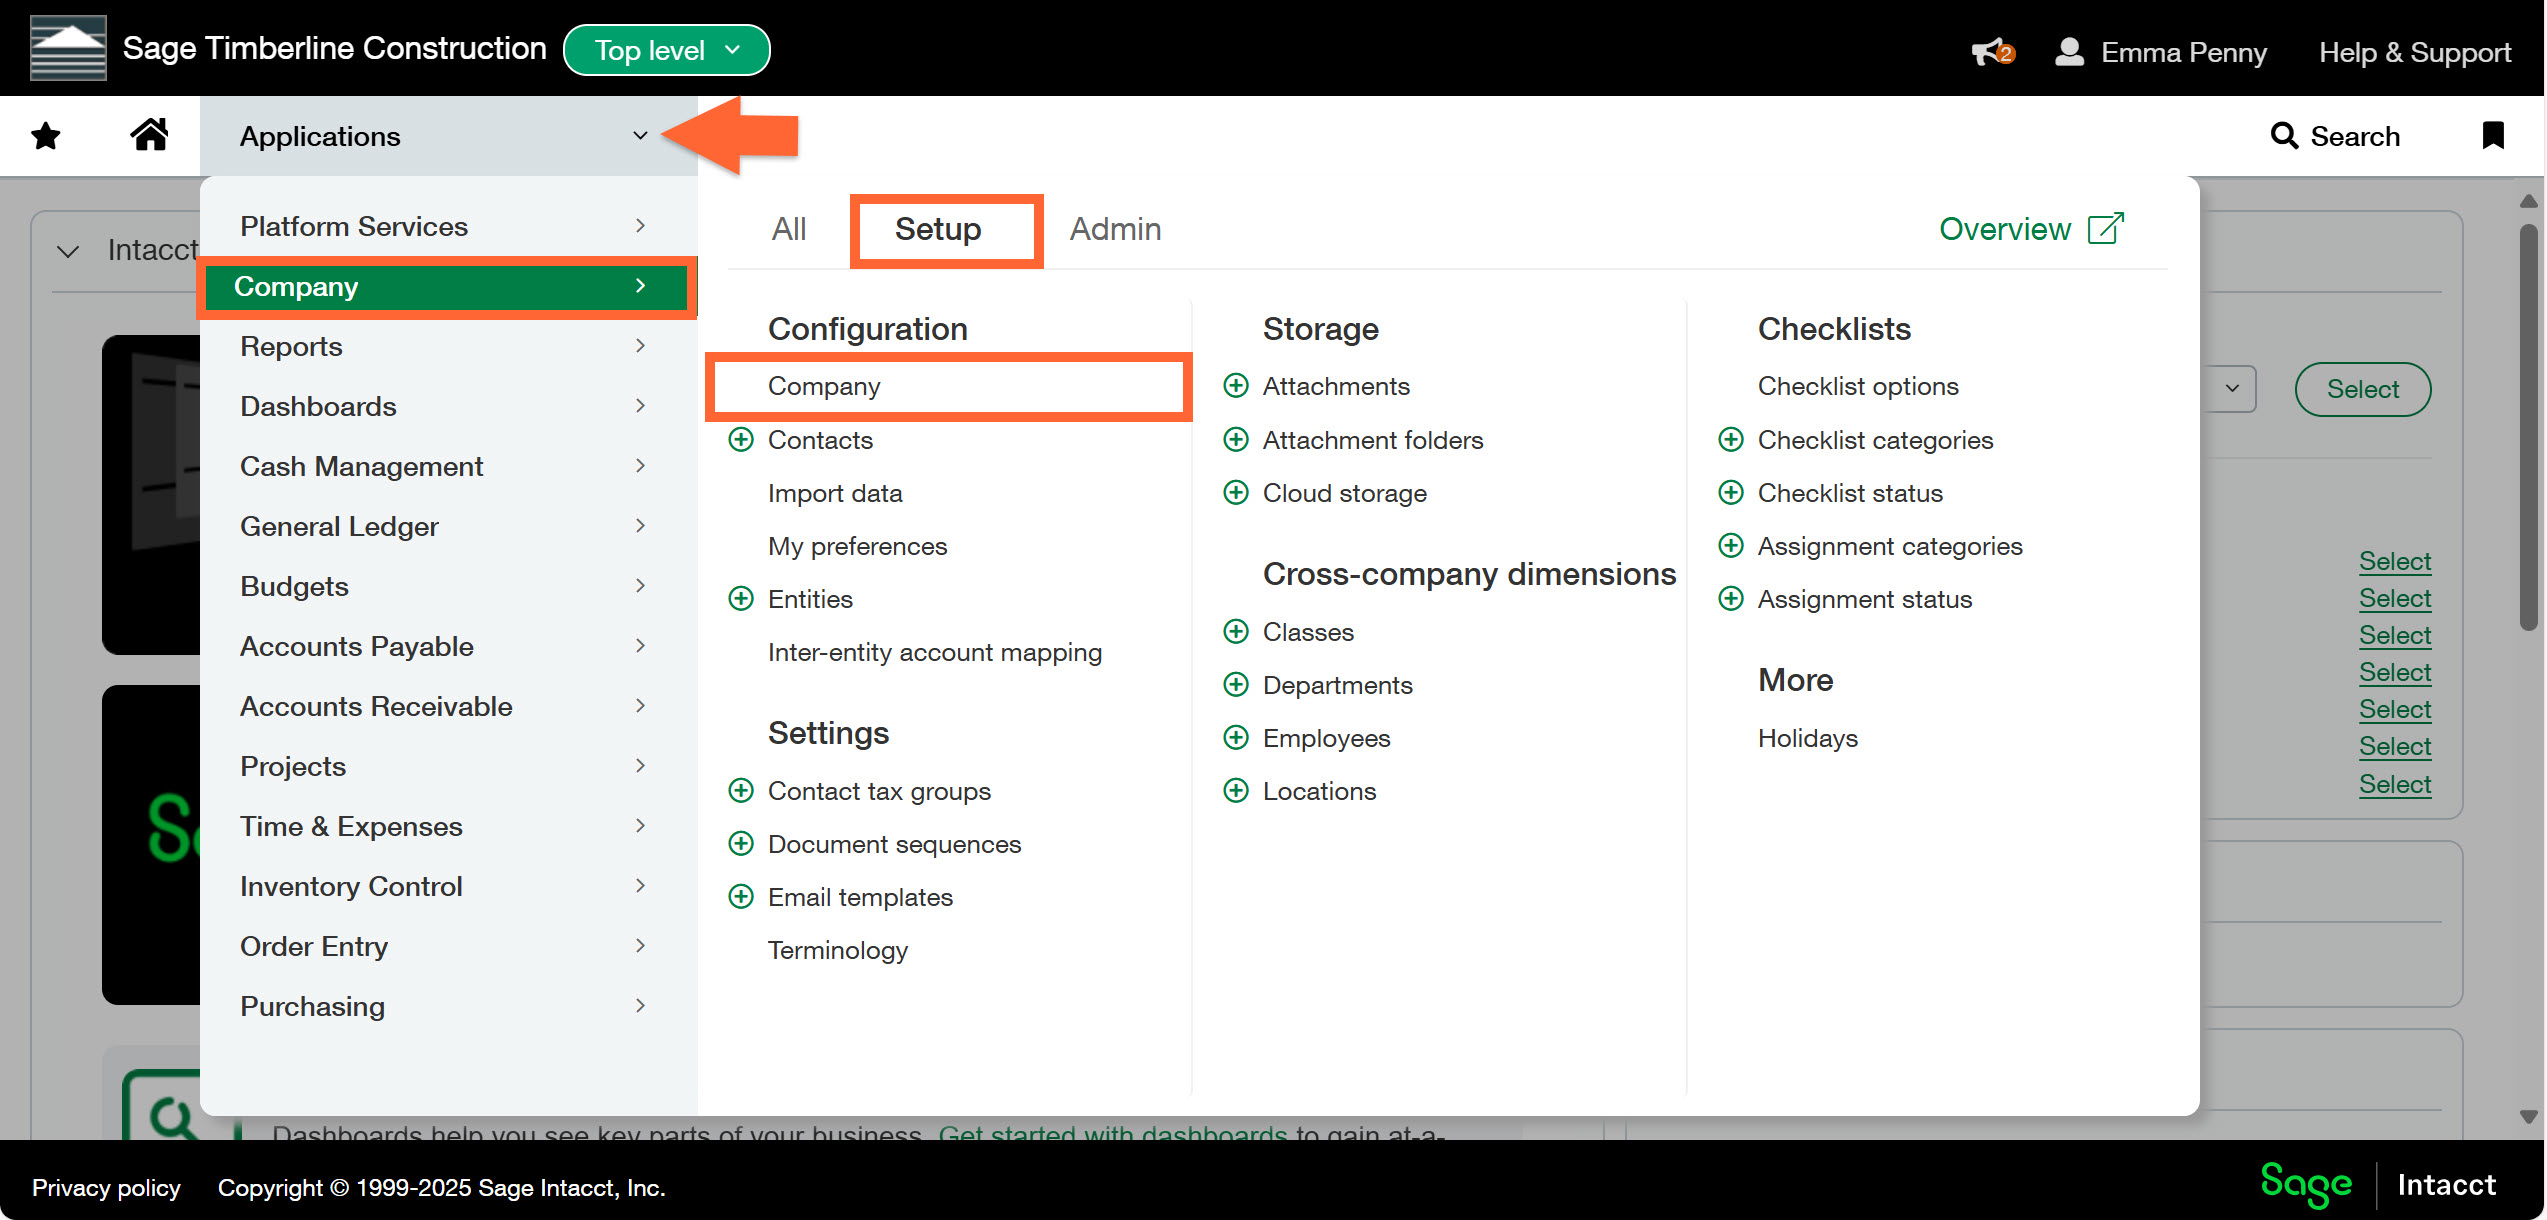
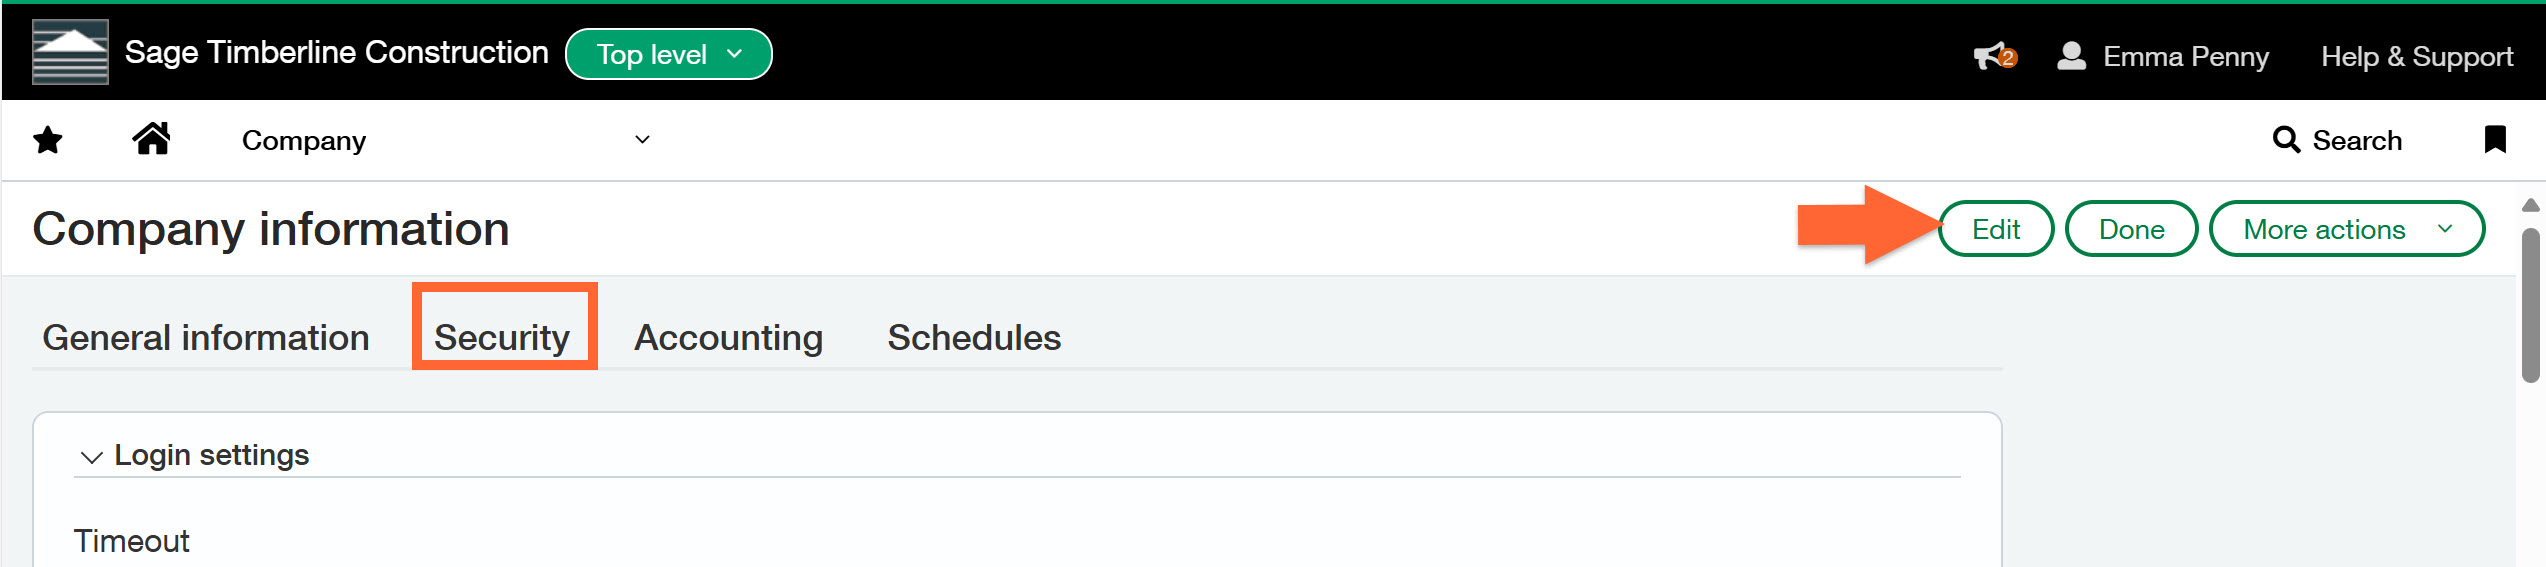
Click the Security tab and click edit.
Go to the Web Services authorizations section and click Add.
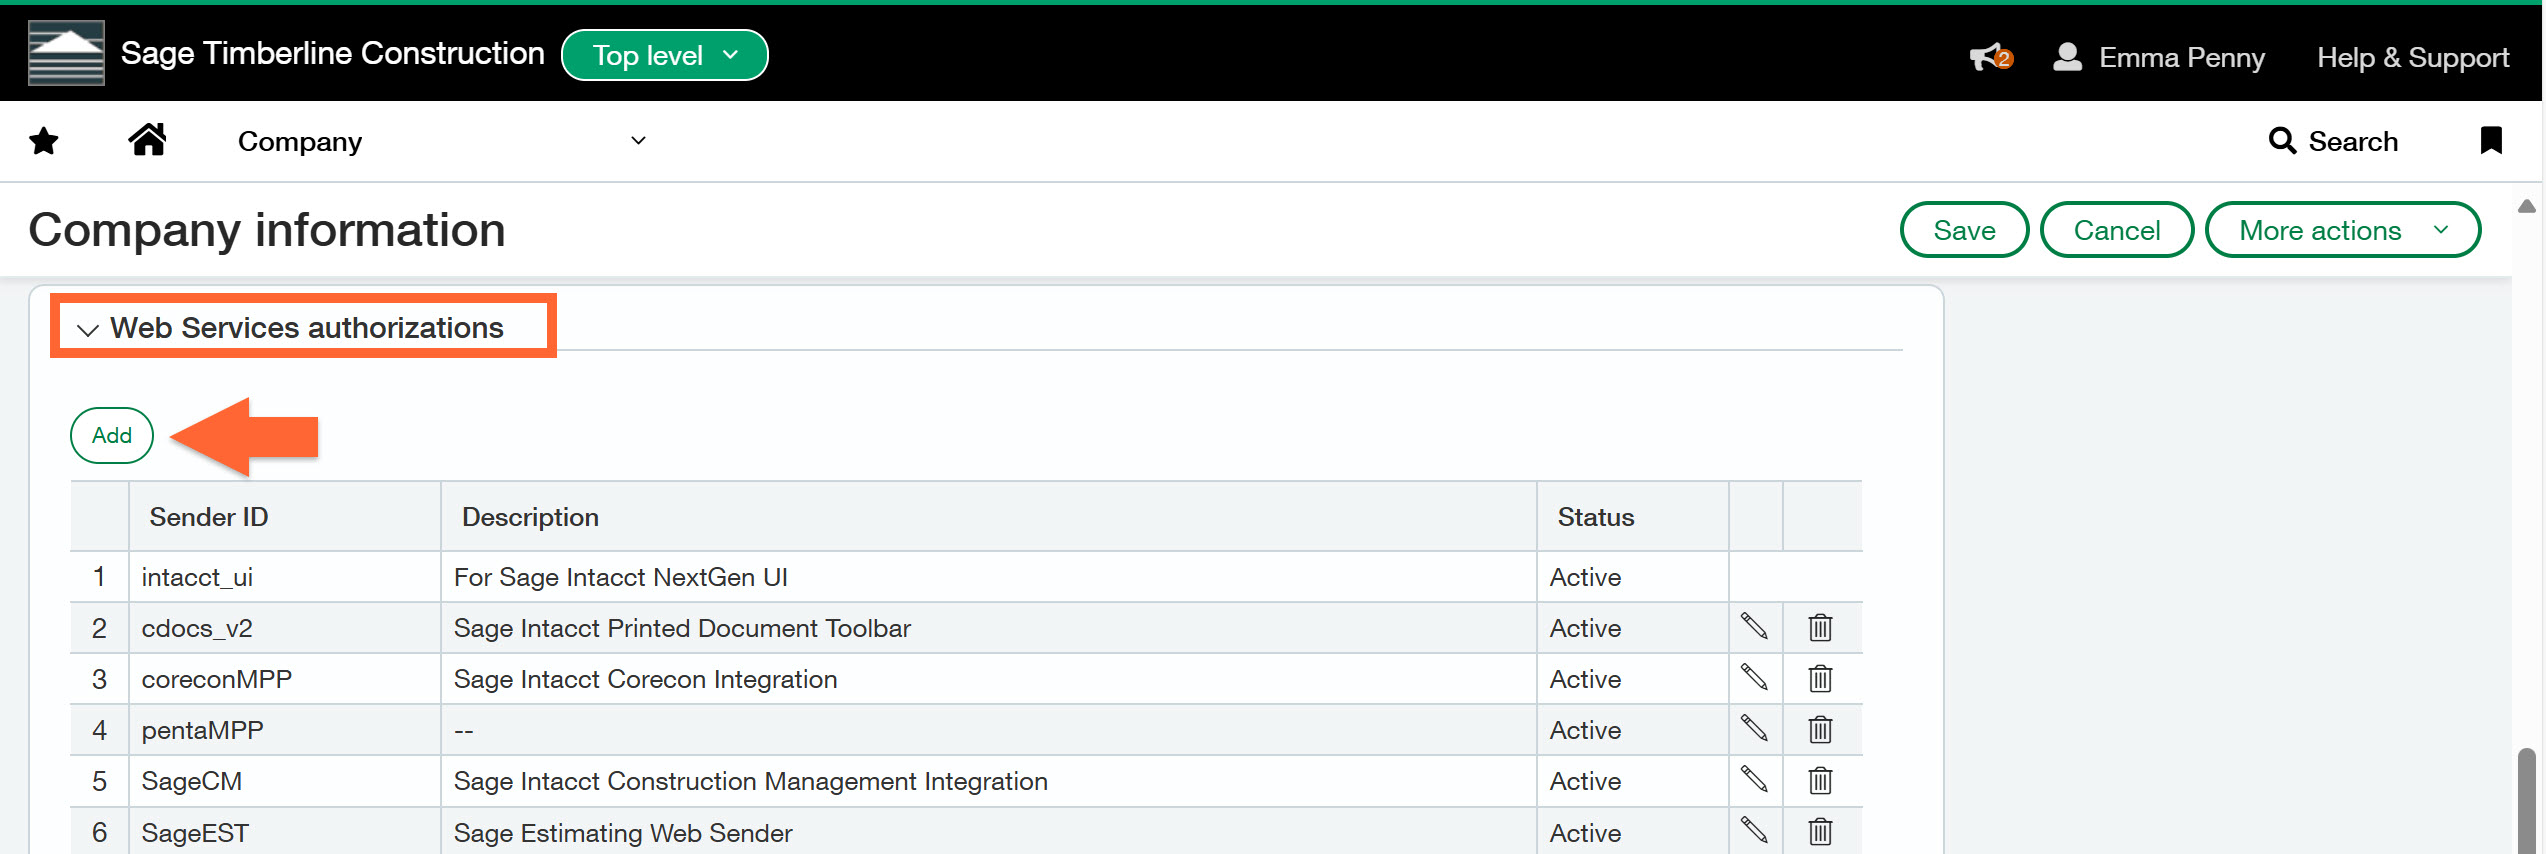
Enter stackctMMP in the Sender ID field.
Click Save.
.jpg)
Create a new Role for the STACK integration.
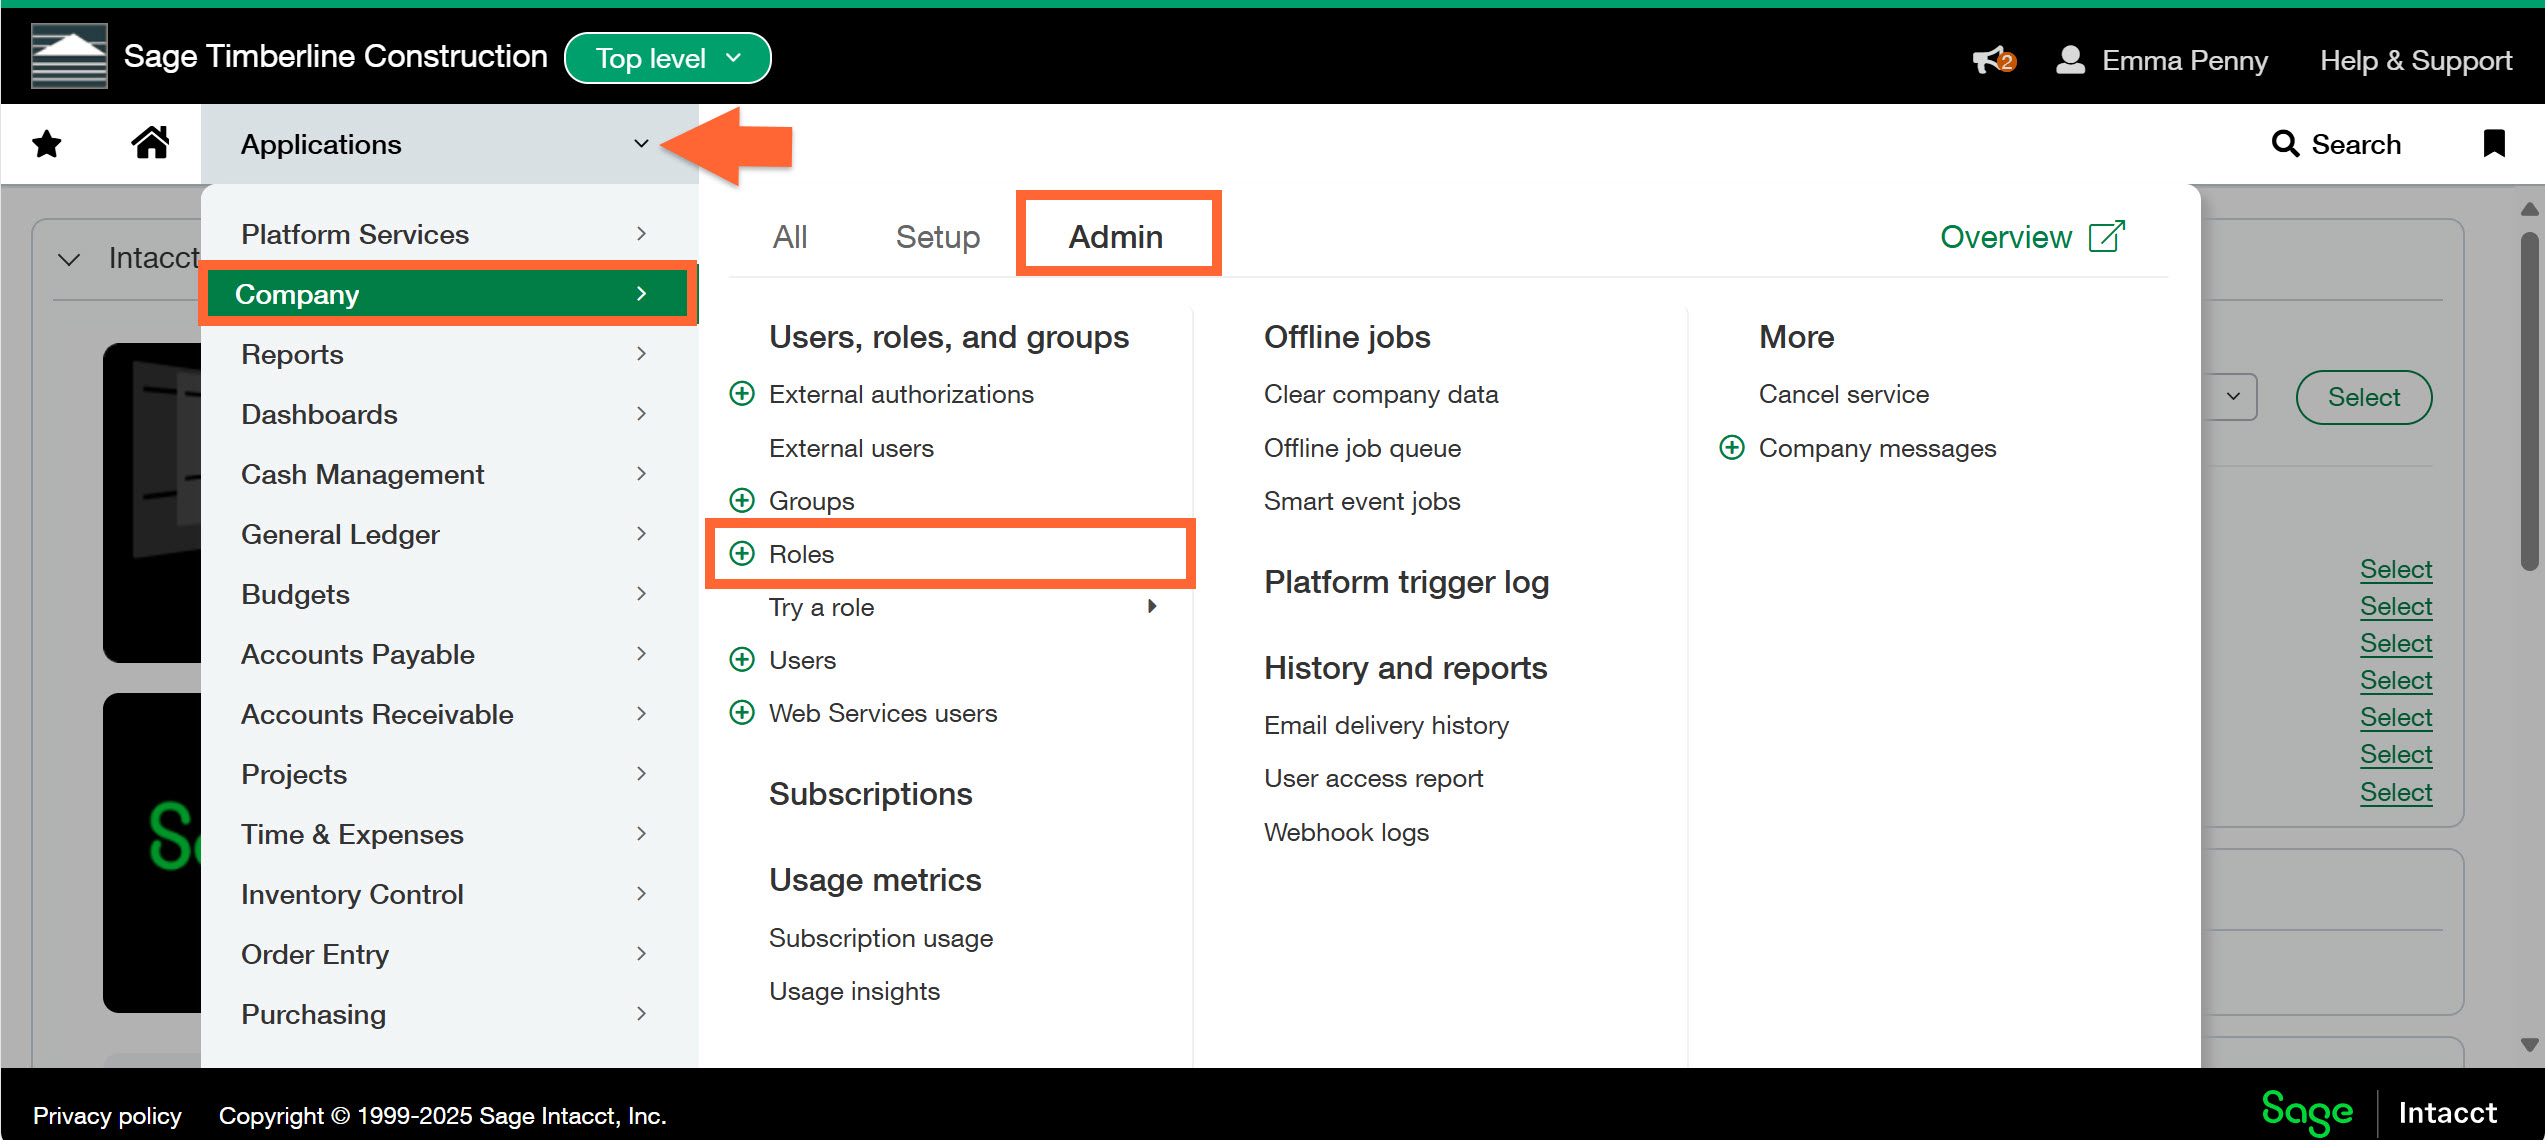
Go to the main menu and click Company, then Roles (on the Admin tab).
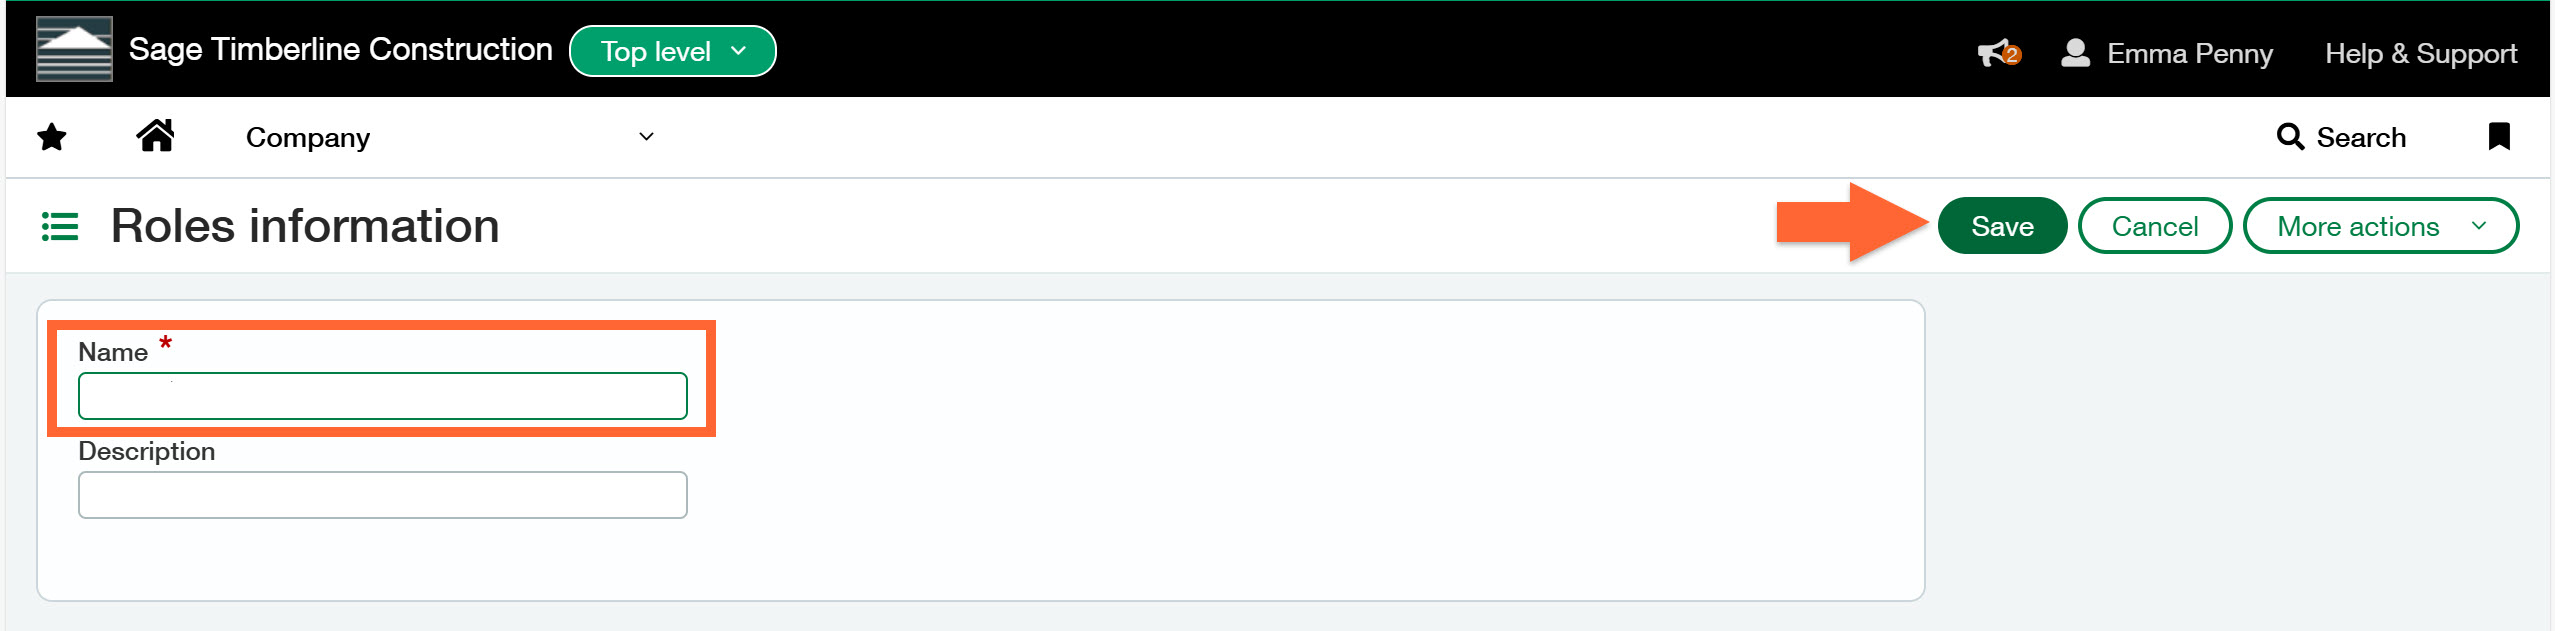
Click Add.
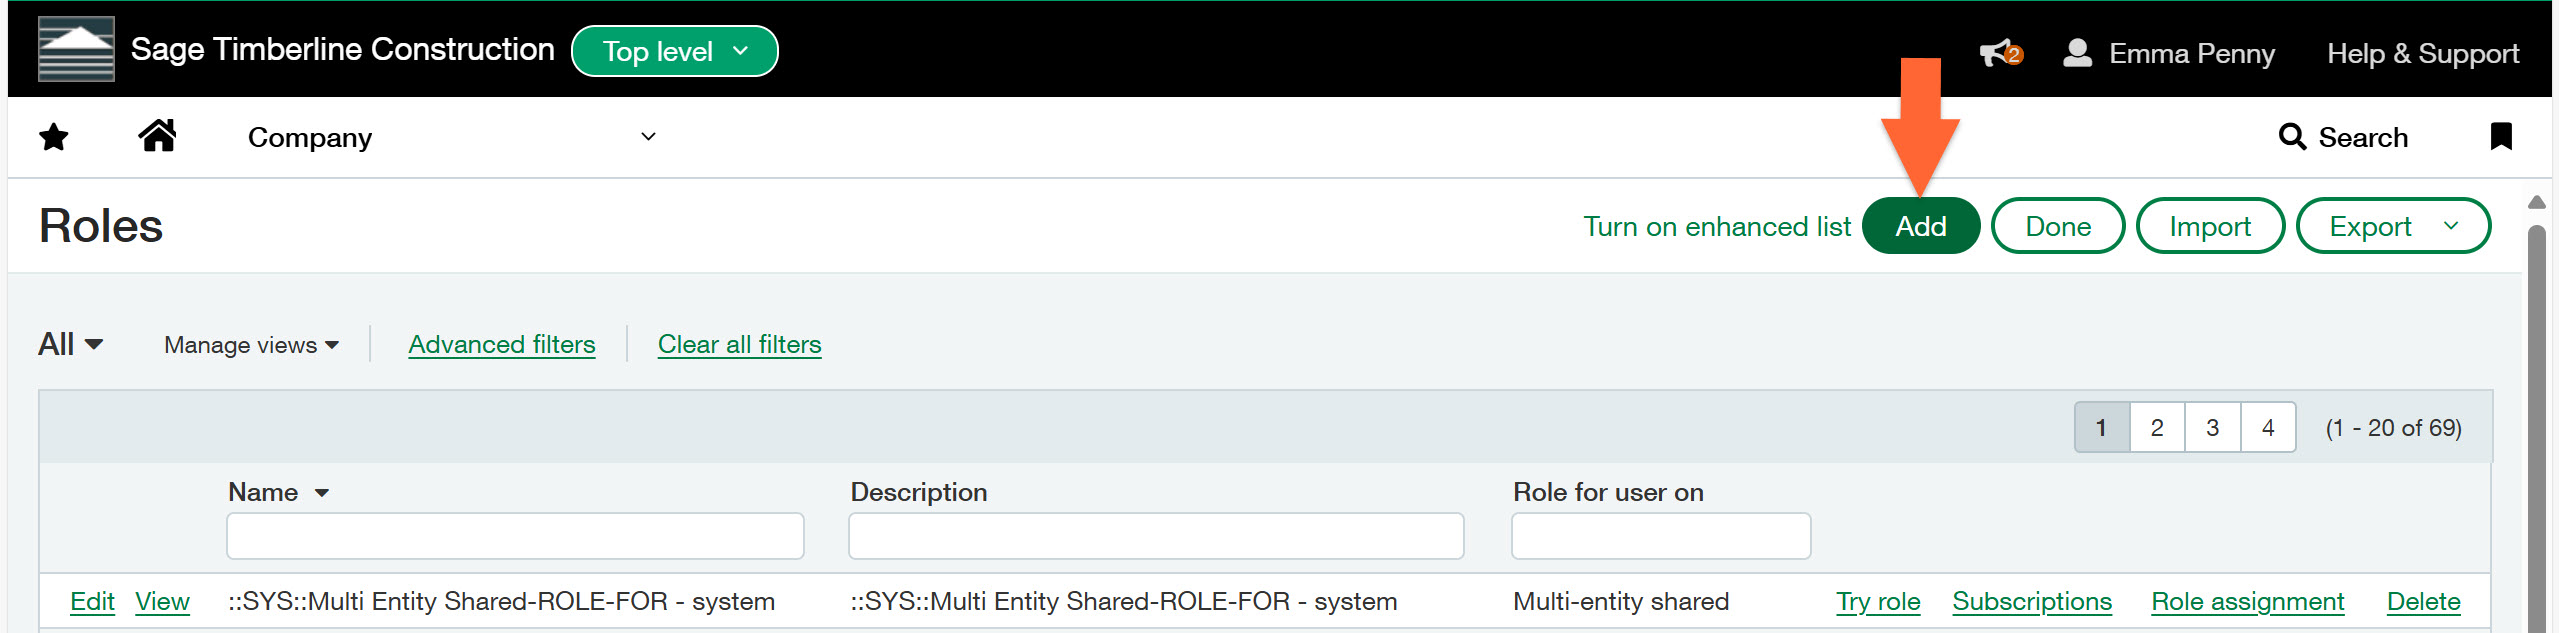
Enter a Name (like STACK) for the role.
Click Save.
Click Permissions next to Company on the Roles subscriptions screen.
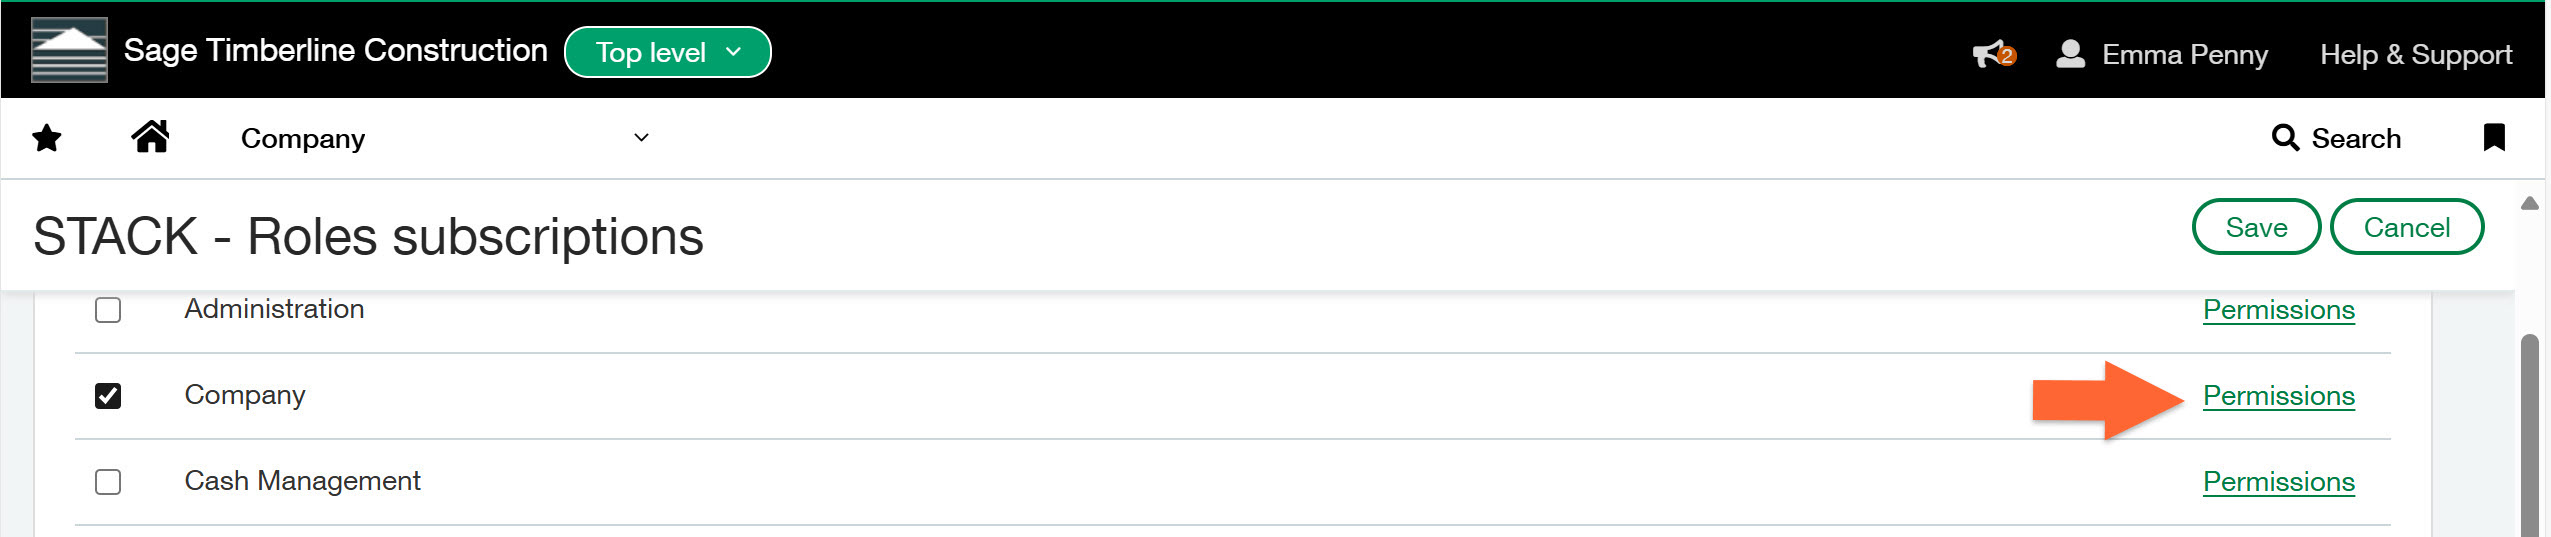
Check the View permission box for Entities and Locations.
Click Save.
.jpg)
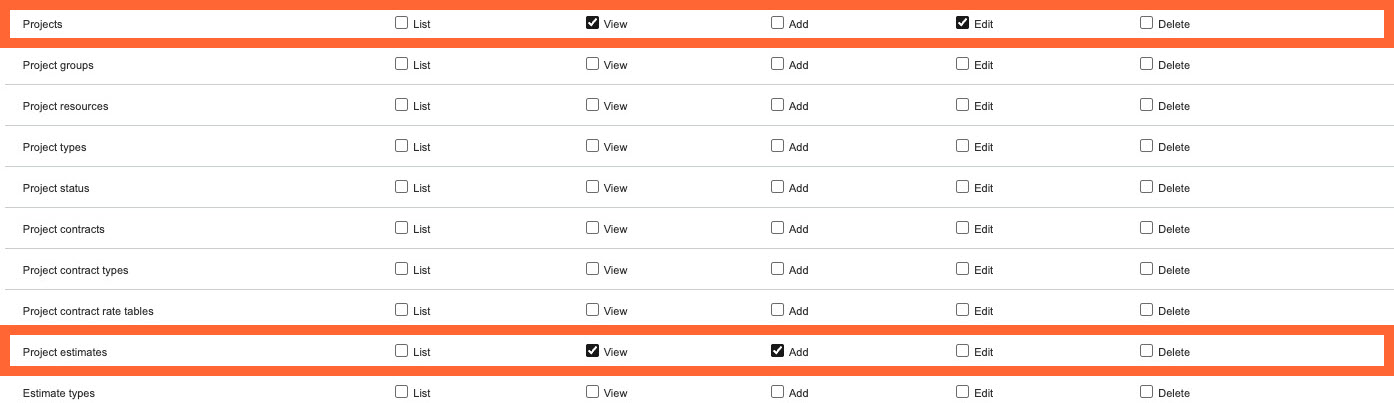
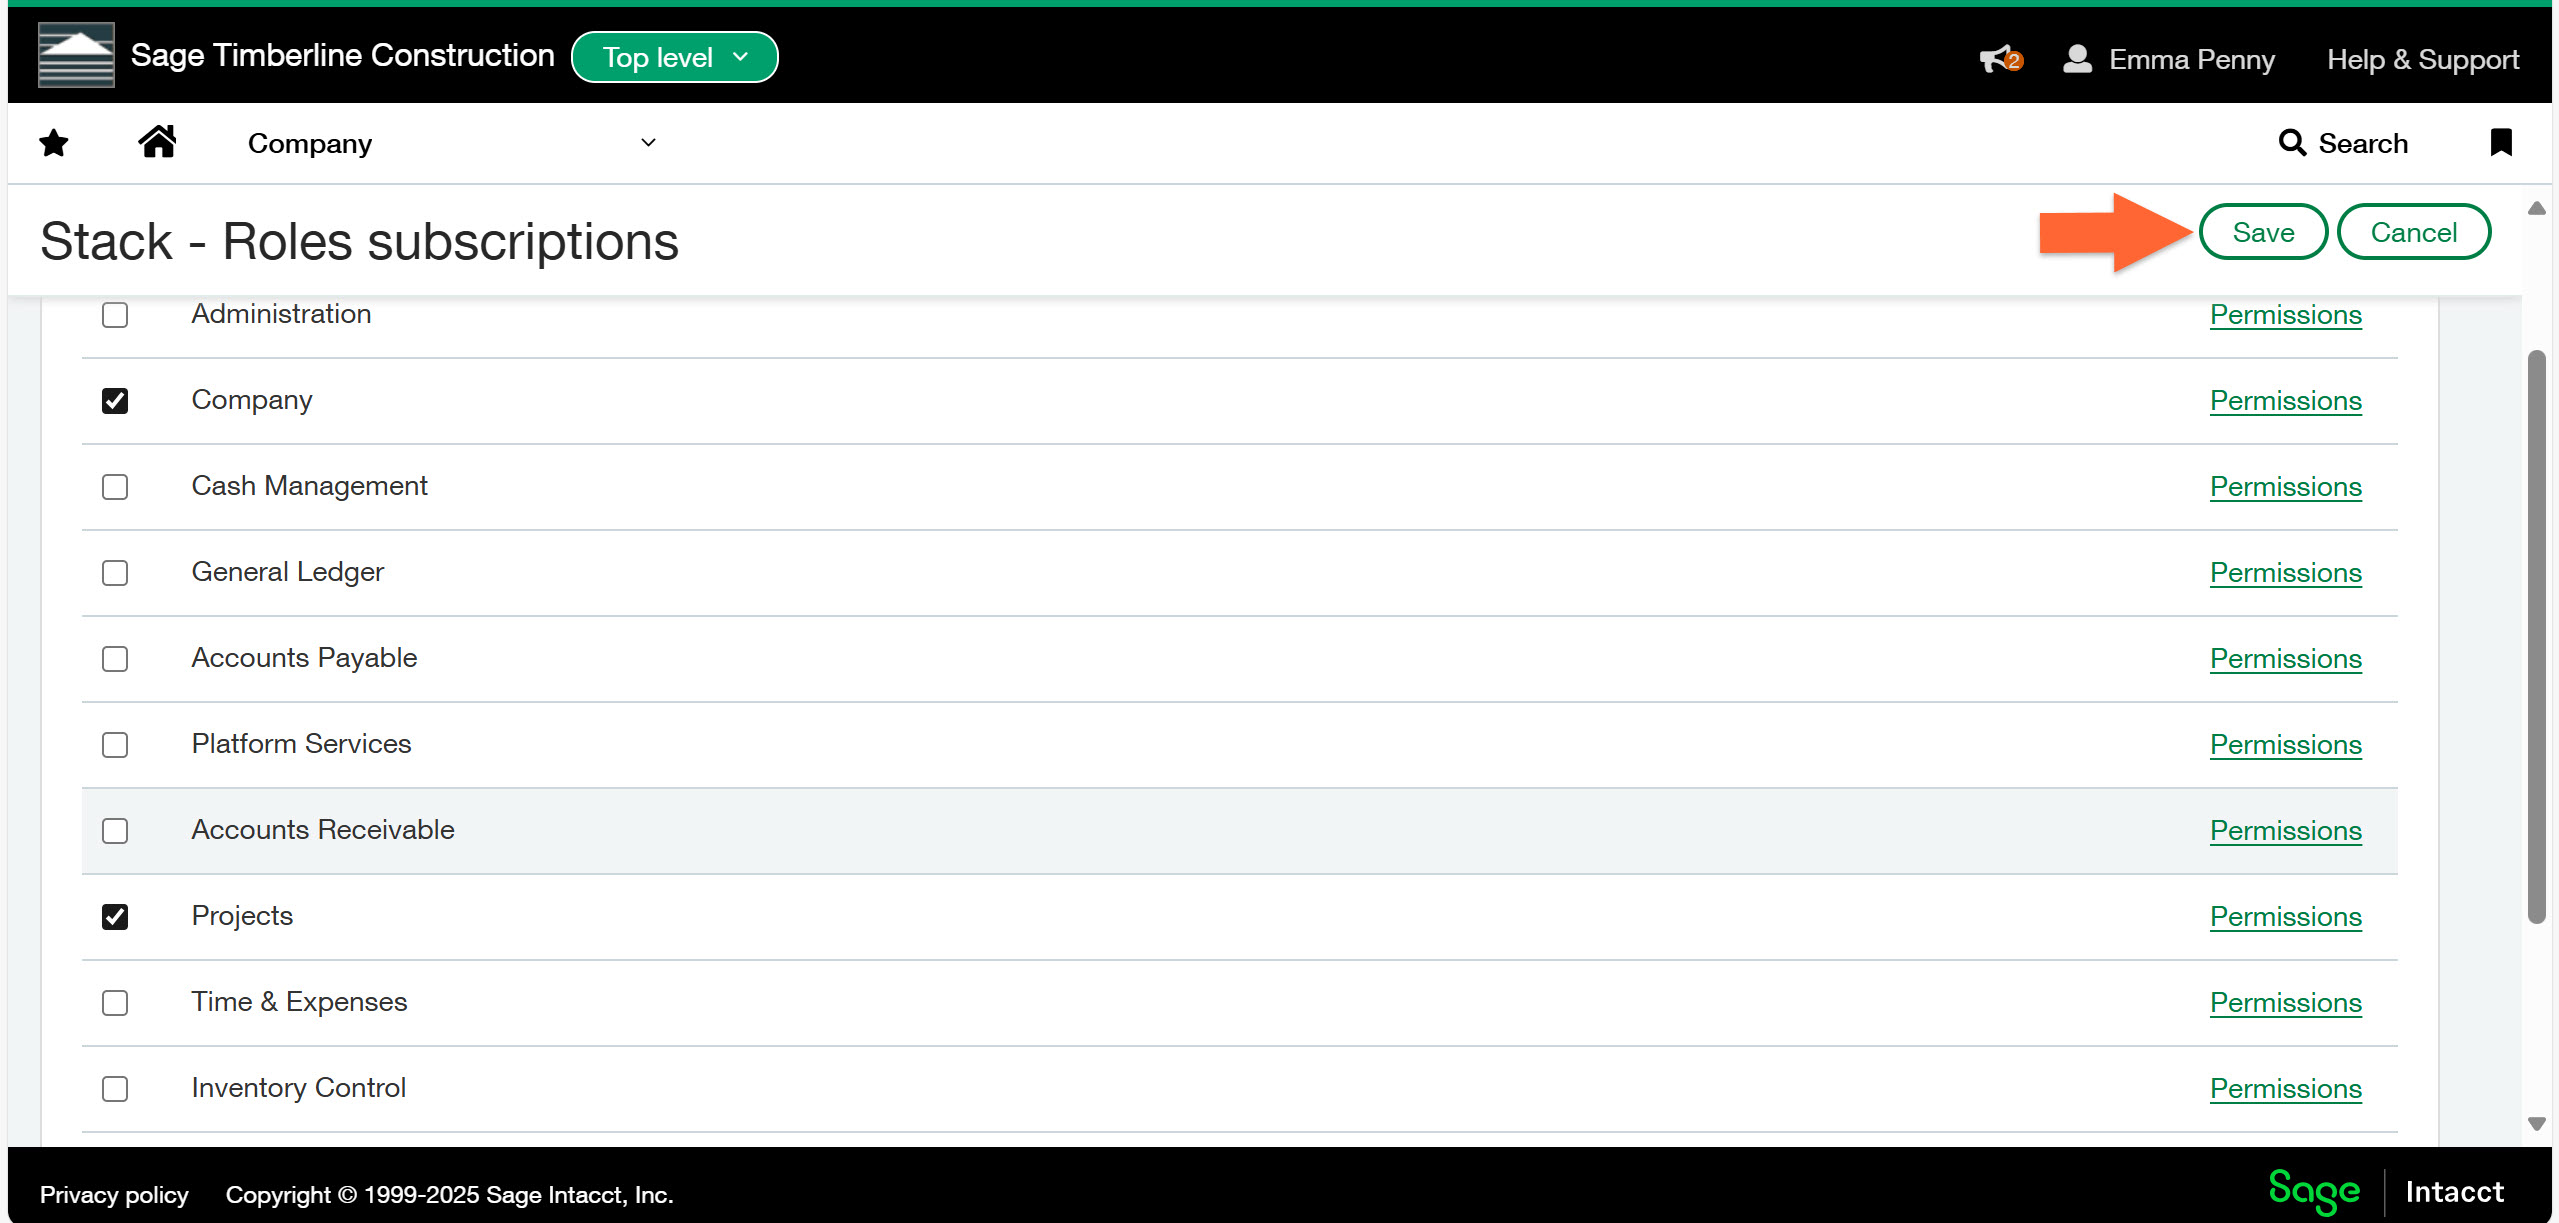
Click Permissions next to Projects on the Roles subscriptions screen.

Scroll to find and select the Project Permissions listed below:
For Standard cost types, check the View permission box.
For Projects, check the View and Edit permission boxes.
For Project estimates, check the View and Add permission boxes.
Click Save.
.jpg)
Click Save on the Roles subscriptions screen.
Create a new Web Service User.
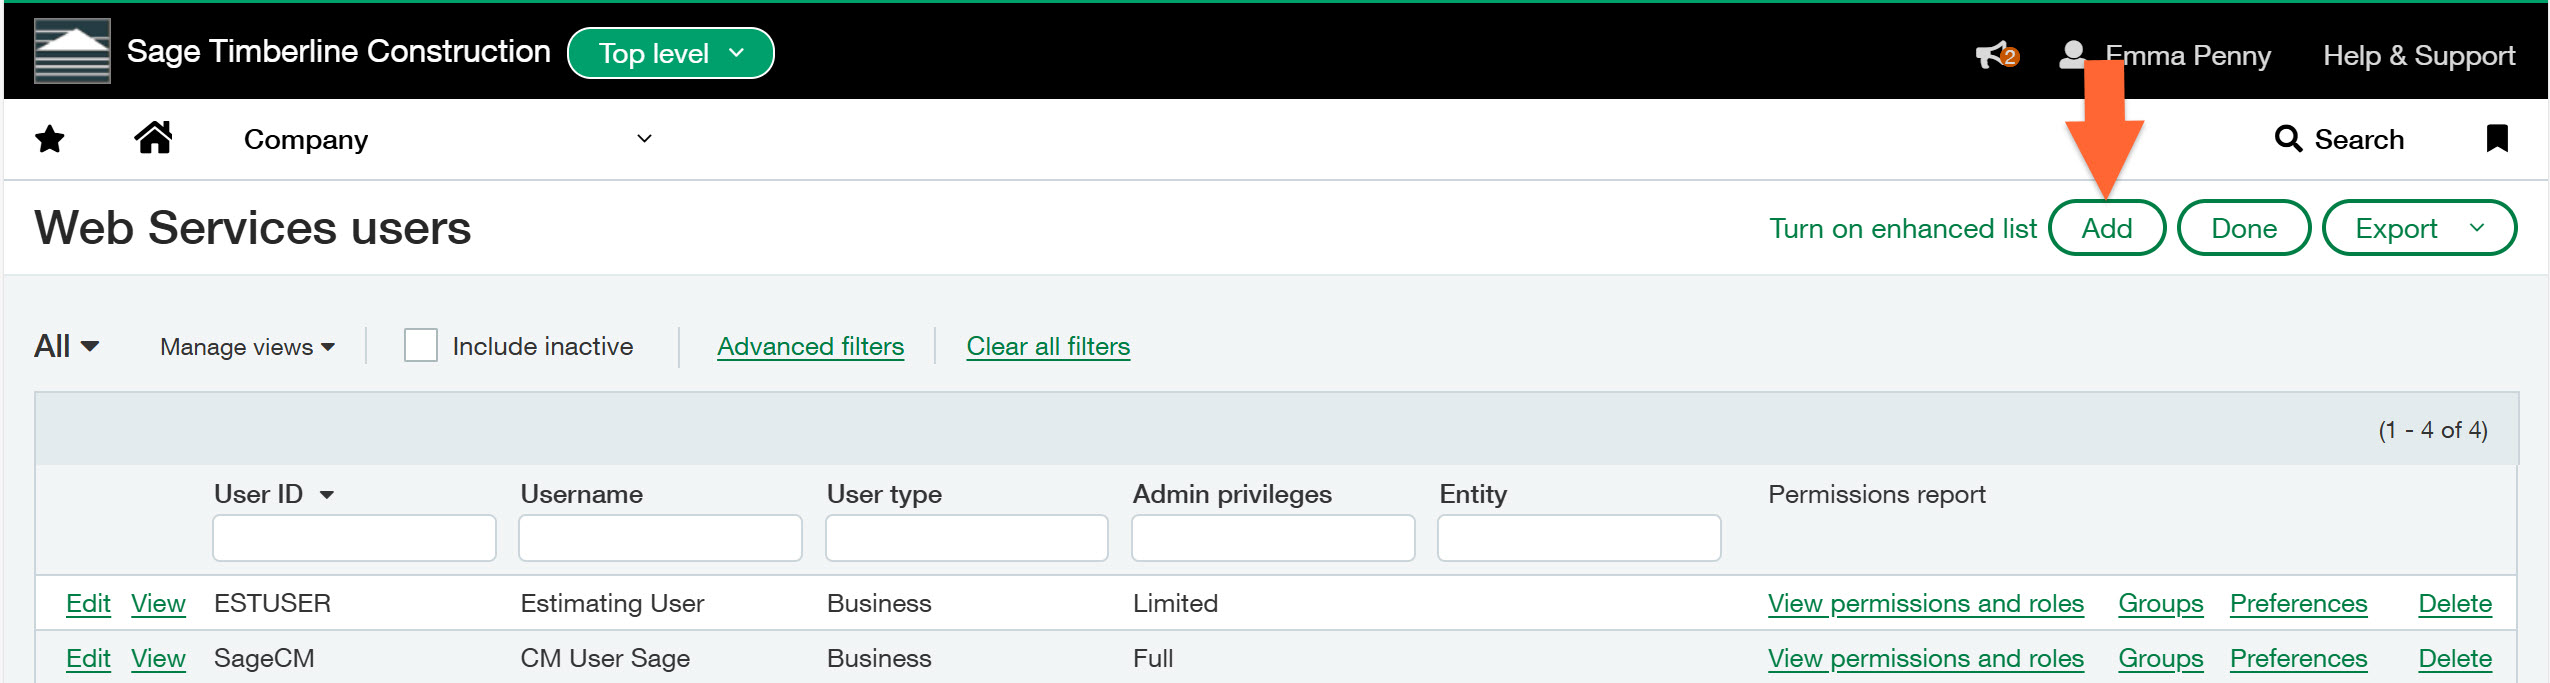
Go to the main menu and click Company, then Web Service users (on the Admin tab).
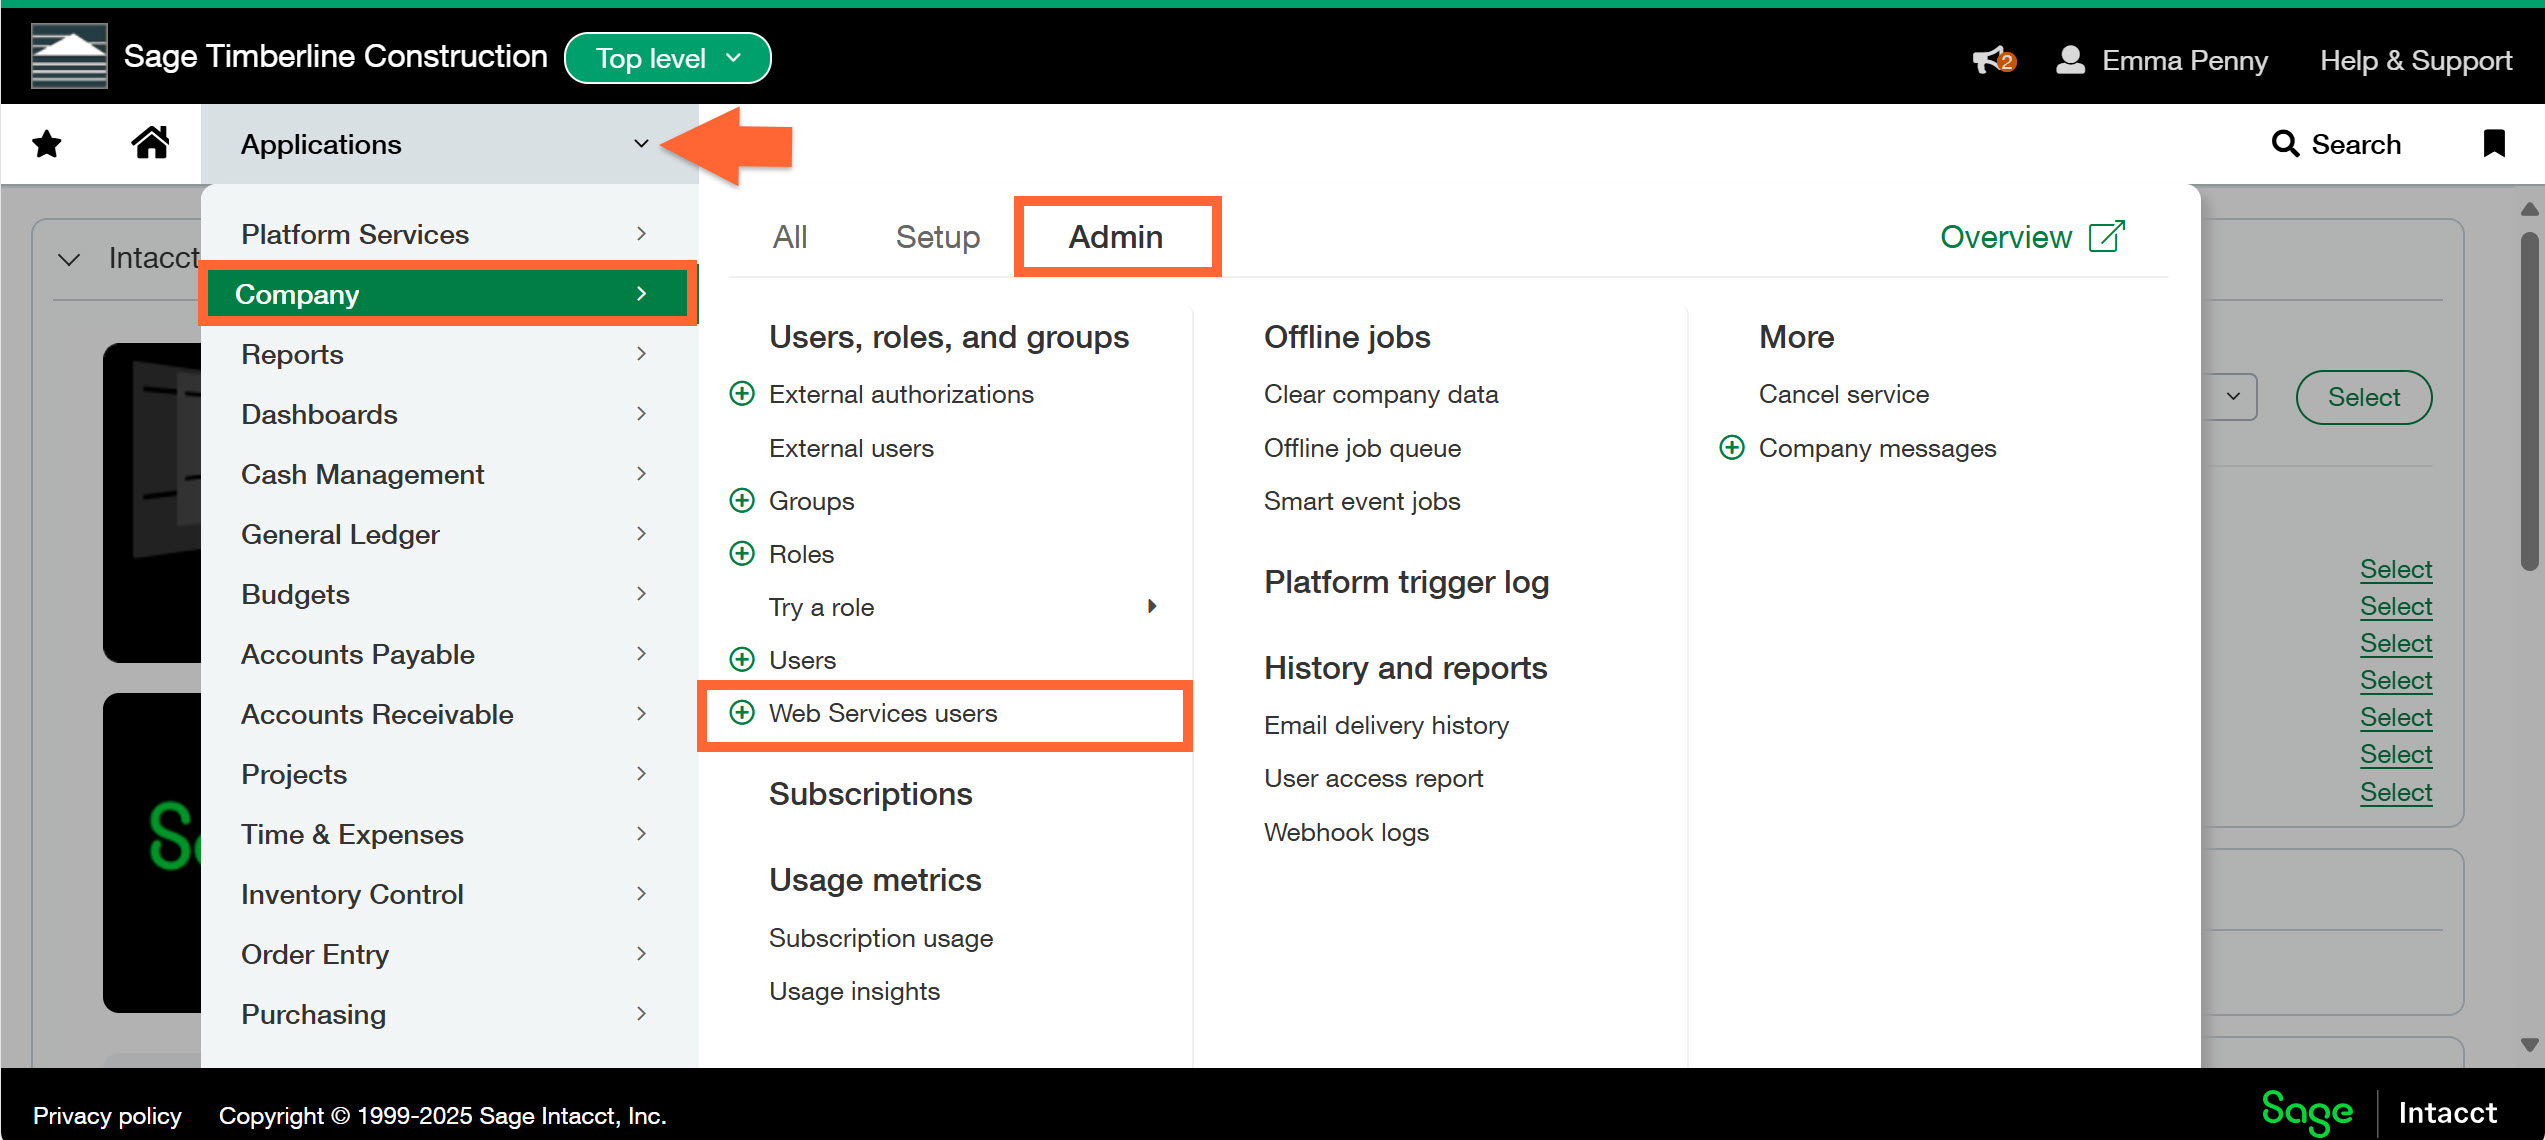
Click Add.
Enter a User ID, Account email address, and Contact name on the User information tab.
NOTE: The info for the user you are creating in this step is what you will need to enter in step 6 of the Connect Sage Intacct to STACK instructions below.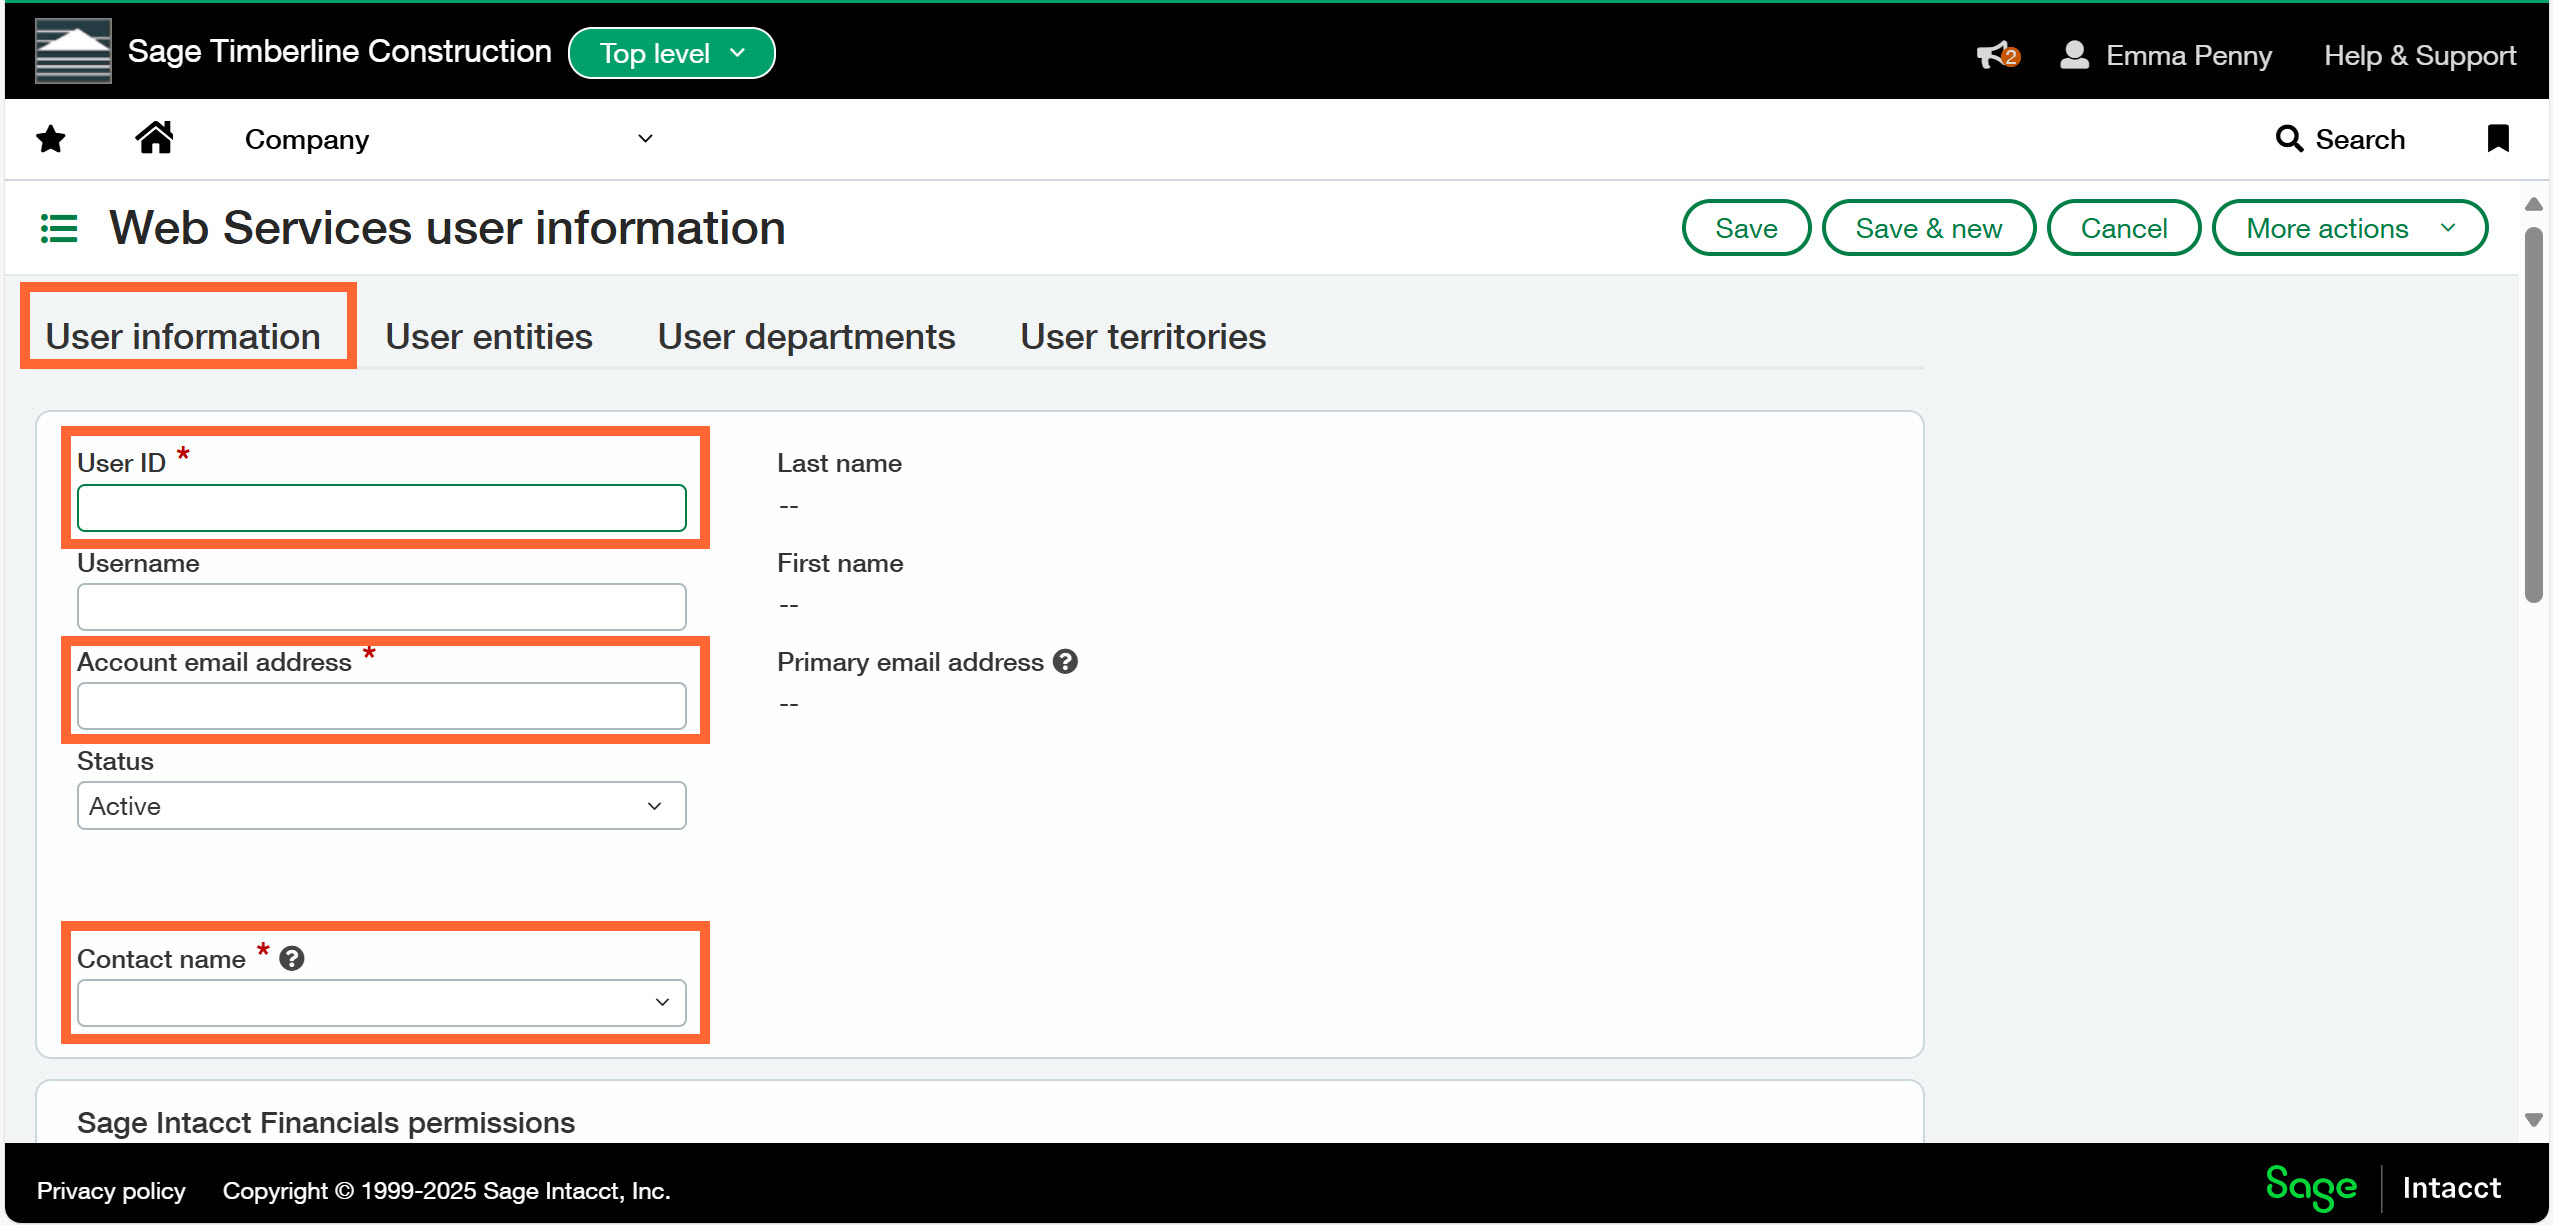
Scroll down to the Sage Intacct Financials permissions section and select Project manager.
Click on the first line of the Roles table and select the (STACK) Role that you just created in step 3.
Click Save.
.jpg)
You can now follow the instructions to Connect Sage Intacct to STACK.
Connect Sage Intacct to STACK
Log in to the STACK account you want to connect to your Sage Intacct account.
.jpg)
Click the Settings icon (person with gear) at the right of the main navigation toolbar.
Select Account Settings from the dropdown menu.
.jpg)
Click App Integrations at the left of your screen.
Locate the tile for the Sage Intacct and click Connect.
TIP: You can use the Search bar, so you don't have to scroll through every integration to find it..jpg)
When prompted, log in to your Sage Intacct account, using the login credentials for the Web Service User created in step 4 of the Set Up Sage Intacct for STACK Connection instructions above.
(You will see a notice that StackCT wants to access to your account.)
Anyone in your STACK account with the necessary role/permissions can now import/export project data between Sage Intacct and STACK. See Create a Project from an External Source and Export Estimate Worksheet Data to Sage Intacct for instructions.
Disconnect Sage Intacct from STACK
If you ever need to disconnect your STACK and Sage Intacct accounts, you can do so by following the instructions below.
Once you disconnect your accounts, you will no longer be able to import data from Sage Intacct.
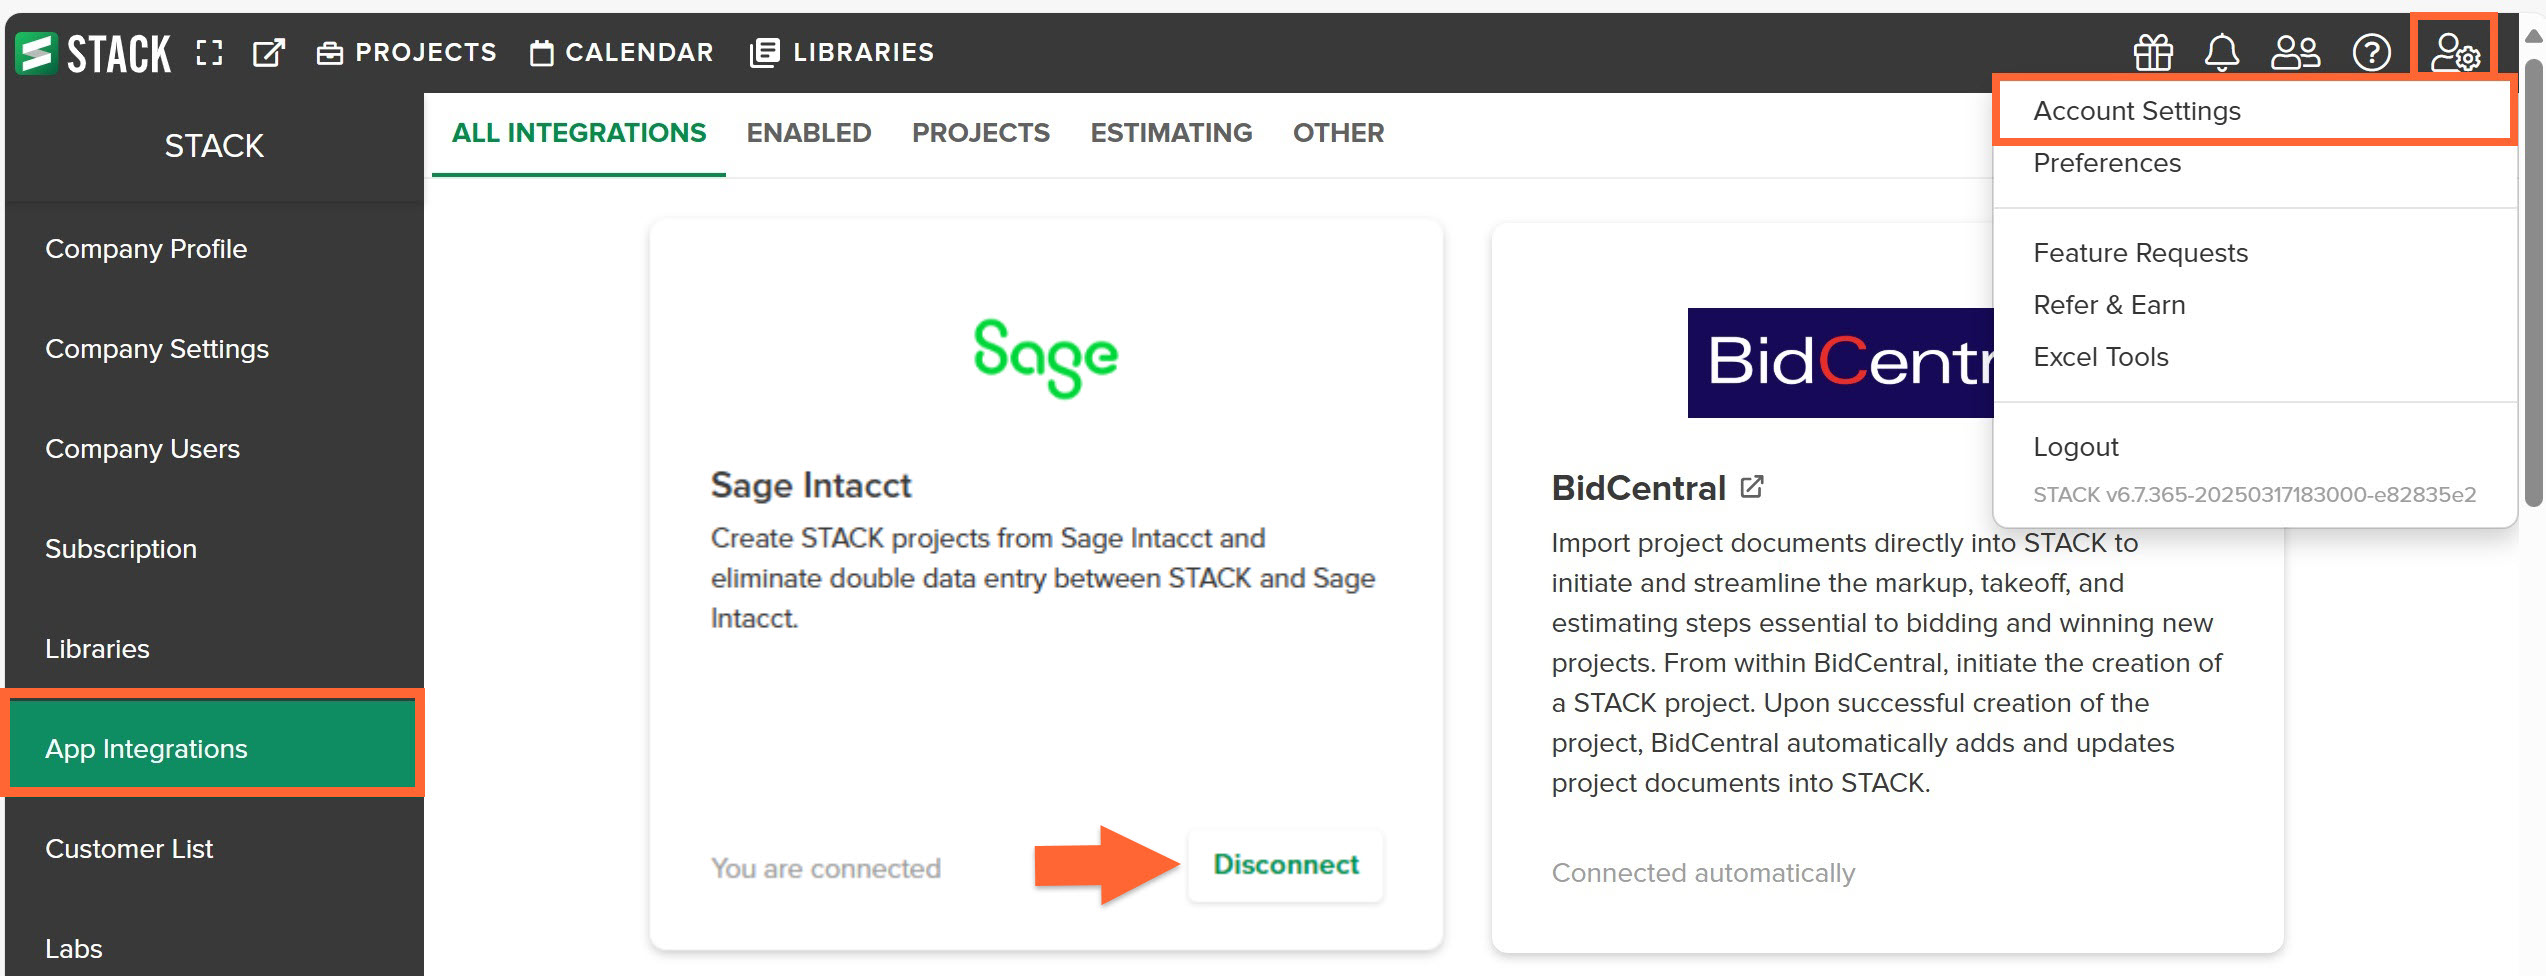
In STACK, click the Settings icon (person with gear) at the right of the main navigation toolbar.
Select Account Settings from the dropdown menu.
Click App Integrations at the left of your screen.
Locate the tile for Sage Intacct and click Disconnect.
TIP: If you want to reconnect your accounts, you can follow the instructions above to Connect Sage Intacct to STACK.
Related Articles
Create a Project from an External Source
Export Estimate Worksheet Data to Sage Intacct
Was this article helpful?