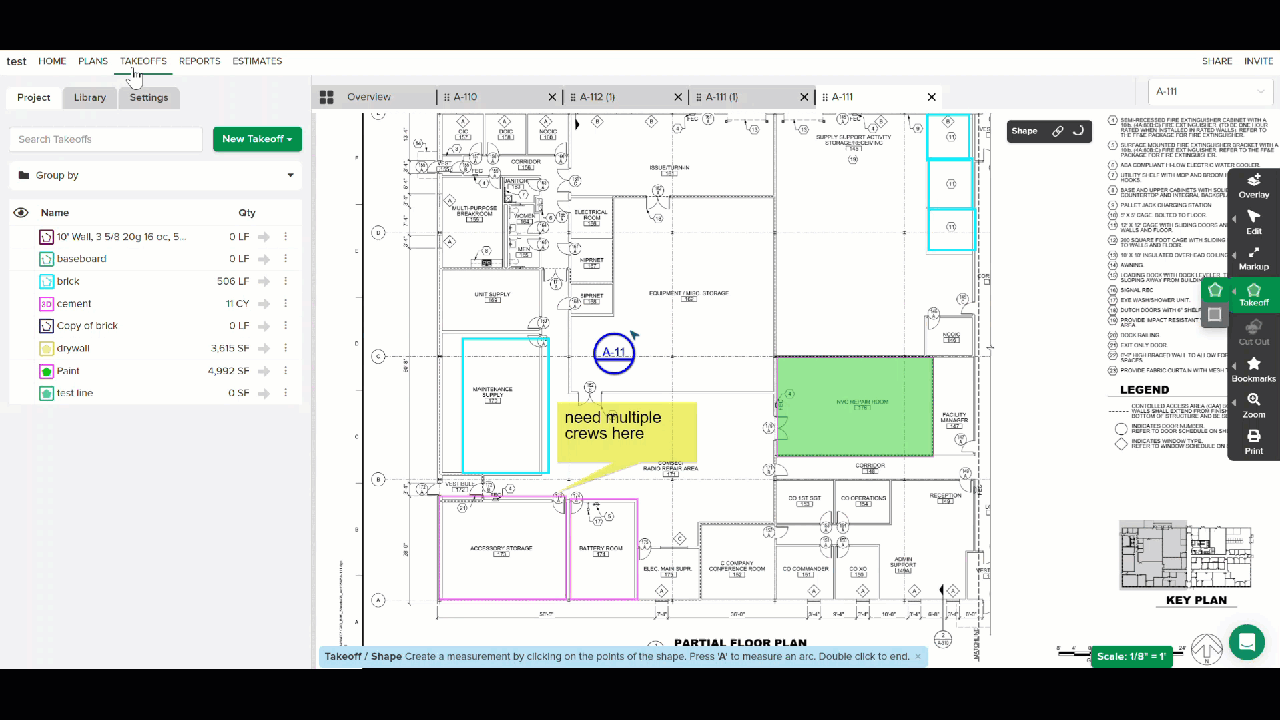
Choose Takeoff Colour and Line Size
- Print
- DarkLight
- PDF
Choose Takeoff Colour and Line Size
- Print
- DarkLight
- PDF
Article summary
Did you find this summary helpful?
Thank you for your feedback!
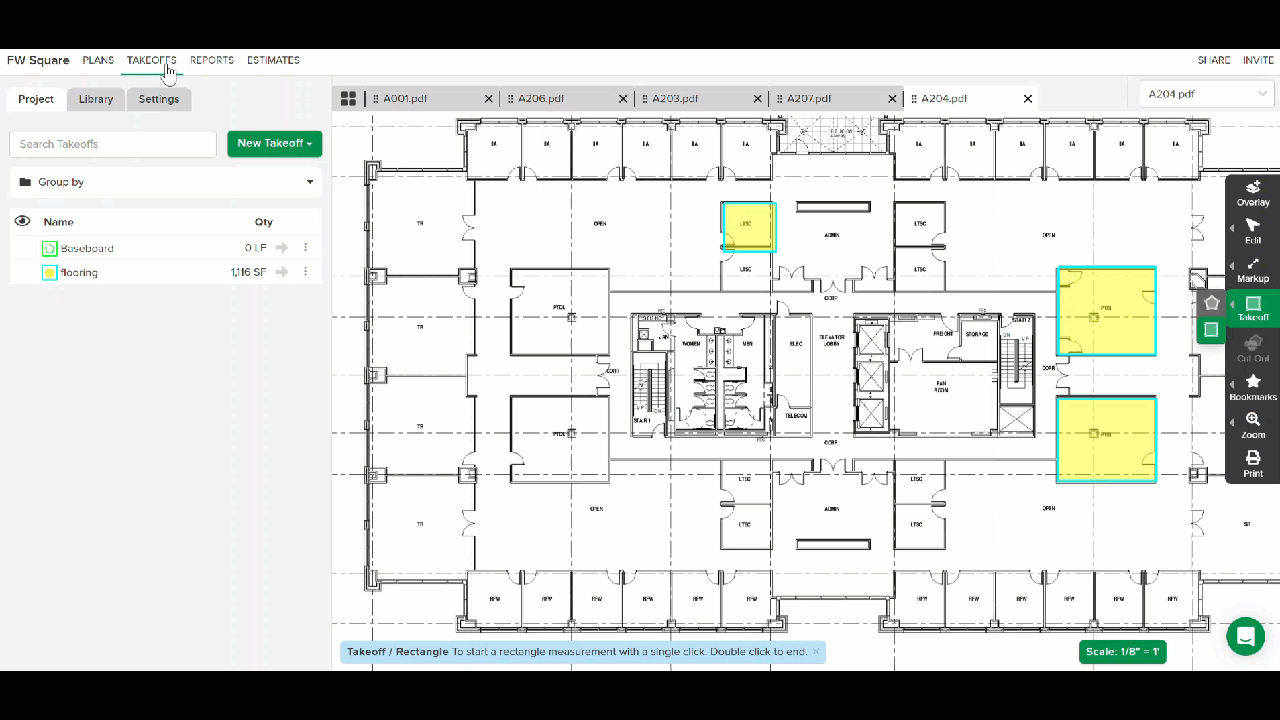
STACK allows you to customize the appearance of your takeoffs by assigning a different color and/or line size to each takeoff. For some Takeoff Measurement Types, you can also add lines, or a grid pattern to the measurements. And for Count takeoffs, you can choose the symbol you want to visually represent the counts on the plan sheet. This helps you visually distinguish the measurements and counts of the different takeoffs shown on your plan sheets.
Color
When creating a takeoff, you can choose one of 60 preset colors or a custom color for the takeoff measurement lines/count symbols, as well as the measurement fill color for certain Takeoff Measurement Types.
Line Size
You have the choice to display the takeoff measurement line size as Thin, Medium, Thick, or Very Thick. Certain takeoff measurement types also offer an option to display the takeoff line size (width) relative to the scale of the plan sheet.
Actual (only an option for the 3D Volume takeoff measurement type) will display each measurement line width on the plan sheet, to scale, based on the actual width dimension you enter for each measurement. (Very useful to distinguish footer takeoffs from wall takeoffs.)
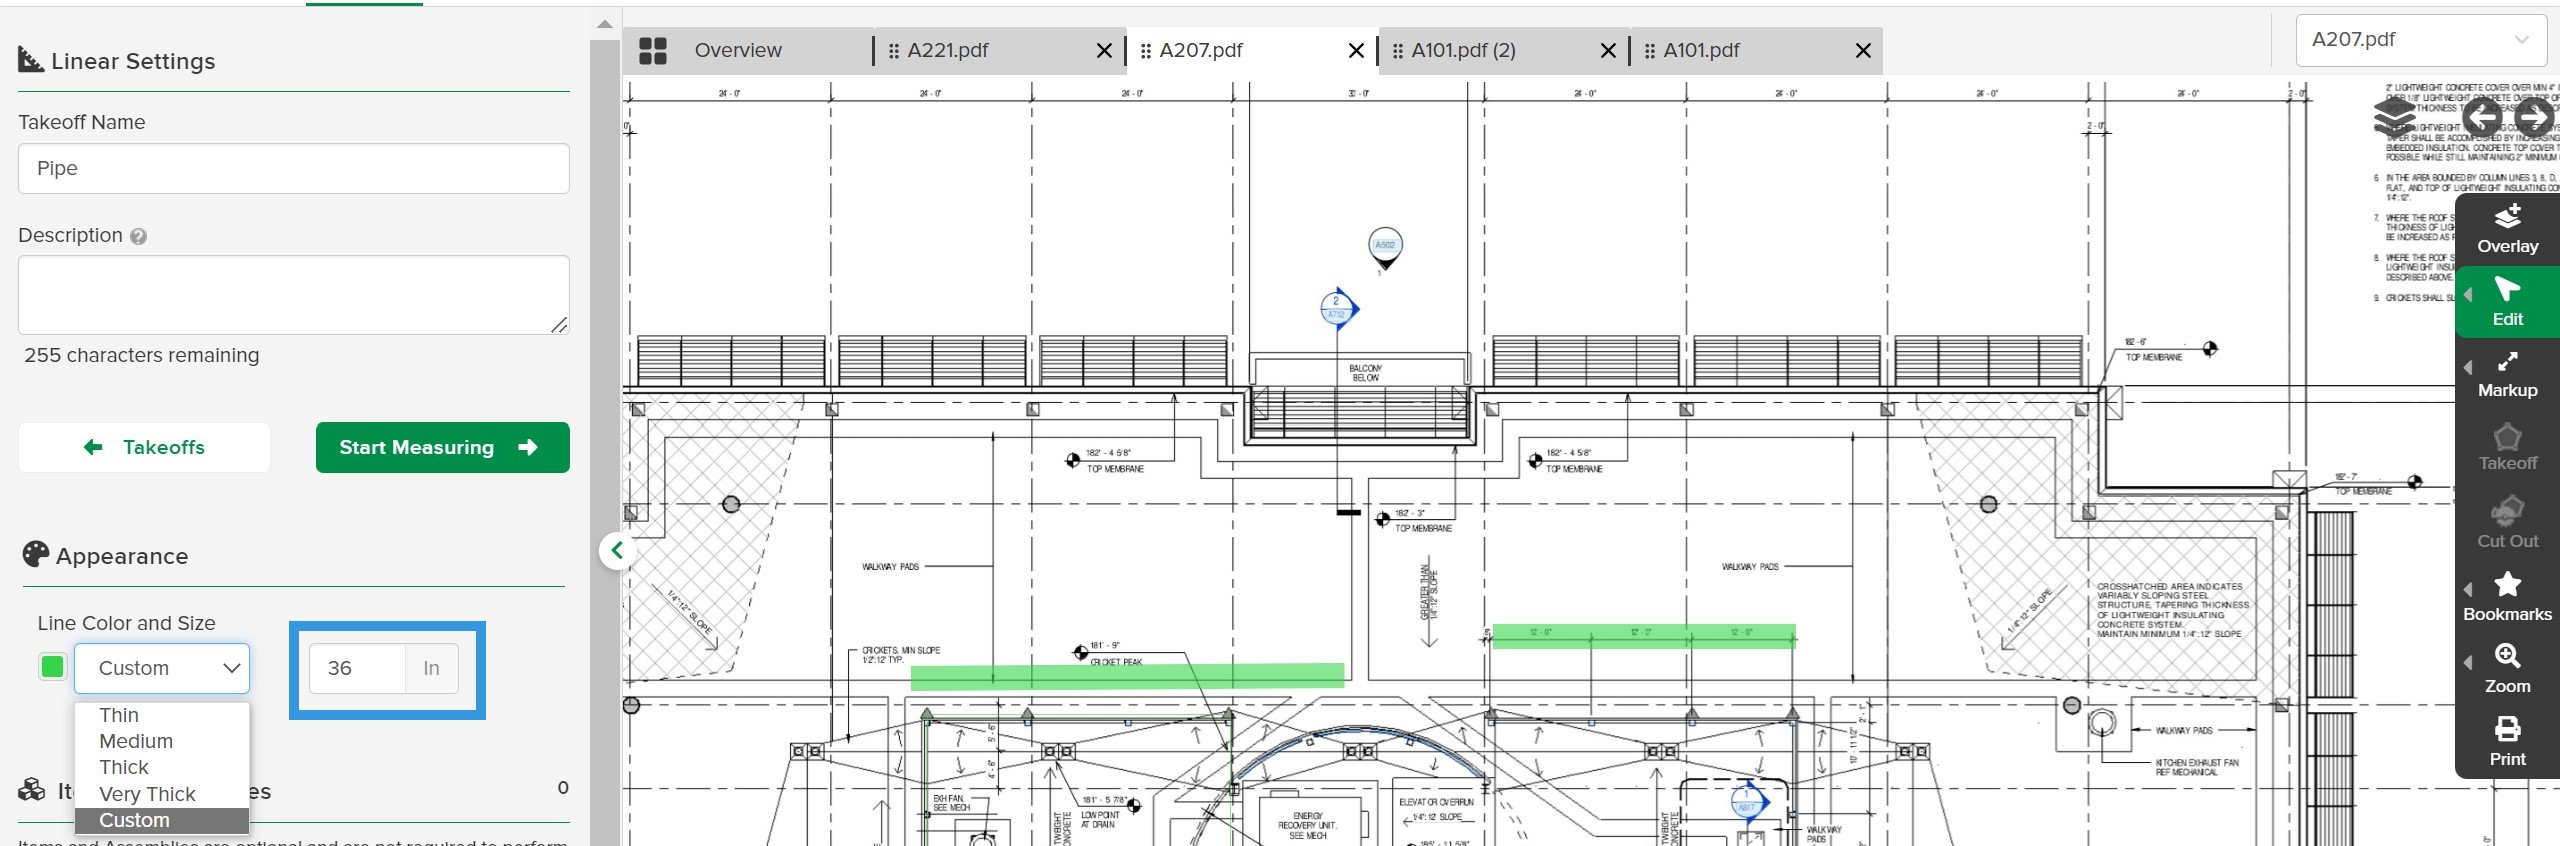
Custom (only an option for Linear, Pitched Linear, or Surface Area takeoff measurement types) will display all measurement line widths for the same Takeoff, to scale on the plan sheet, based on whatever value (in inches or mm) you enter.
Grid Pattern
Horizontal and/or vertical lines can be added to create a grid pattern on your Area takeoff type measurements. You can customize the grid pattern by choosing the line spacing and angle of the lines.
This can be very useful in many cases, like when doing takeoffs for flooring joists, roof trusses, concrete cuts, acoustic ceiling tiles, or water lines and sprinkler head placement.
Count Symbols
For Count Takeoffs, you get to choose the symbol you want to use from a large list of STACK provided symbols. The list includes general symbols, as well as trade-specific symbols to help you visually represent the different materials or tasks needed for your work on the plan sheets. And you can customize the symbol color associated with each Count takeoff.
You can also choose what size you want the count symbols to appear on the plan sheet - Small, Medium, Large, or Custom.
The Custom option allows you to enter the actual size you want the symbol to appear relative to the active scale on the plan sheet. The symbol size is maintained relative to the plan sheet as you zoom in or out on the sheet. This can be useful for landscape takeoffs where you want to show the placement of trees and other plants. When using the Small, Medium, or Large option, the symbol size will change relative to the screen when you zoom in and out.
If needed, you can change the takeoff color, line size, grid pattern, or count symbol at any time.
Choose Takeoff Color
NOTE: If you want to change the color of a Count takeoff, see the Choose Count Symbol and Color section below.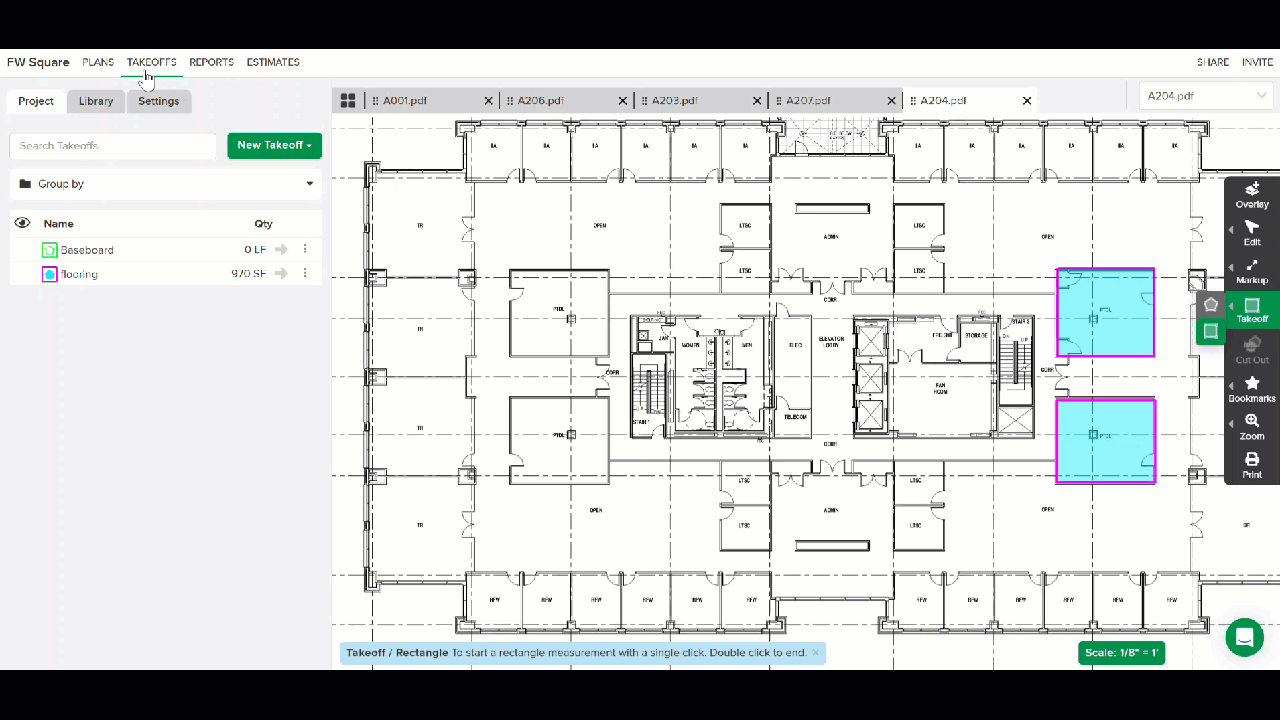
Open or create a Takeoff.
Click on the color selection box under Line Color and Size (located in the Appearance section on the left side of the screen).
Select the desired line color from the available options.
OR
Click the Choose button to select a custom color.If the Fill Color option is visible to the right of Line Color and Size, follow the same process to select the fill color or check the No Fill box if you do not want a fill. (Not all takeoff measurement types support Fill Color.)
(Optional) Choose takeoff line size and add a linear/grid pattern or choose count symbol and size as needed.
Click Start Measuring.
Start drawing your measurements.
You can follow the instructions above to choose a different takeoff color at any time.
NOTE: If you change the takeoff color, it will apply to the existing measurements/counts as well as any new measurements/counts.
Choose Takeoff Line Size
You have various line size (width) options to choose from for your takeoff measurements.
Thin, Medium, Thick, or Very Thick
Available for all takeoff measurement types (except Count).
The selected size applies to all measurements for that takeoff.
Actual
Only available for the 3D Volume takeoff measurement type.
Displays takeoff measurement lines that are sized to scale for the plan sheet, based on the actual width dimension you enter for each measurement.
(Very useful to distinguish footer takeoffs from wall takeoffs.)Each measurement of the same Takeoff can have a different line size.
Custom
Only available for Linear, Pitched Linear, and Surface Area takeoff measurement types.
Allows you to enter a value in inches (or mm) to set the takeoff measurement line size (width) that will be displayed, to scale, on the plan sheet.
The entered line size applies to all measurements for that Takeoff.
Open or create a Takeoff.
Click on the dropdown under Line Color and Size (located in the Appearance section on the left side of the screen).
Select the desired line size.
If you select Custom (only an option for 3D Volume takeoff measurement type), enter the value* in inches (or mm) that you want the line size width to be in the box to the right of Line Color and Size.
*Supports decimals up to 3 places.(Optional) Choose takeoff color and add a linear/grid pattern or choose count symbol and size as needed.
Click Start Measuring.
Start drawing your measurements.
You can follow the instructions above to choose a different takeoff line size at any time.
NOTE: If you change the takeoff line size, it will apply to the existing measurements as well as any new measurements except when using Actual. With Actual, each measurement can have its own line size based on the width you enter.
Add a Linear or Grid Pattern
You can apply horizontal and/or vertical lines to create a grid pattern on Area takeoff measurement types and customize the pattern by changing the line spacing and angle.
NOTE: Only available for the Area, Pitched Area, and Volume 2D takeoff measurement types.
Open or create a Takeoff.
Check the Horizontal and/or Vertical box under Grid Pattern (located in the Appearance section on the left side of the screen).
Enter the value in inches (or mm) that you want the line spacing in the Spacing box to the right of the Horizontal/Vertical checkboxes.
The default line angle is 0 (zero) degrees. If you want a different angle, enter the desired angle degree in the Deg box under Angle.* (You can enter a negative value for counter-rotation.)
Both the horizontal and vertical lines within the takeoff measurement areas will rotate based on the value you enter.
*For reference, this is how we interpret your angle input -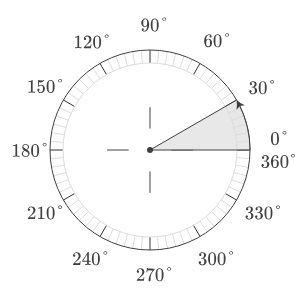
(Optional)Choose takeoff color and takeoff line size if needed.
Click Start Measuring.
Start drawing your measurements.
You can follow the instructions above to change the grid pattern at any time.
NOTE: If you change the grid pattern, the changes will apply to the existing measurements as well as any new measurements.
TIP: You can use the Explode Area tool to create individual line measurements, area measurements, and/or counts from the lines you apply.
Choose Count Symbol and Color
You can choose the symbol used for your Count takeoffs, as well as the symbol size and color of the symbol.
NOTE: If you change the symbol and/or color/size, it will apply to any existing counts for the takeoff, as well as any new counts you add to the takeoff.
.gif)
Open or create a Takeoff.
Select the Count Symbol:
Click the Change button under Select Symbol (located in the Appearance section on the left side of the screen).
Select the desired symbol from the available options.
Change the Symbol Color:
Click on the color selection box under Symbol Color and Size (located in the Appearance section on the left side of the screen).
Select the desired symbol color from the available options.
OR
Click the Choose button to select a custom color.
Choose the Symbol Size:
Click on the Symbol Size dropdown (located in the Appearance section on the left side of the screen).
Select the desired symbol size - Small, Medium, Large, or Custom.
If you select Custom, enter the size* you want the symbol to be in the Custom Size box.
*Supports decimals up to 3 places. Size will be in inches (or millimeters if your project/account is set to metric units).
Click Start Measuring.
Start adding counts.
You can follow the instructions above to choose a different count symbol or change the symbol color or size at any time.
Related Articles
Creating and Editing Takeoffs
Takeoff Measurement Types
Was this article helpful?