Calendar Overview
- Print
- DarkLight
- PDF
Calendar Overview
- Print
- DarkLight
- PDF
Article summary
Did you find this summary helpful?
Thank you for your feedback!
The Calendar in STACK | Takeoff & Estimate provides a centralized view of project-related events, tasks, and deadlines. It helps teams stay on schedule, manage project milestones, and quickly locate key activities across multiple projects.
Key Information
The Calendar displays events in multiple views, including Month, Week, Day, Work Week, Plan, and List.
Events are color-coded and can be clicked to open detailed information or edit settings.
Use the search bar to quickly locate events by name or keyword.
Today’s date appears highlighted in light yellow.
General Overview
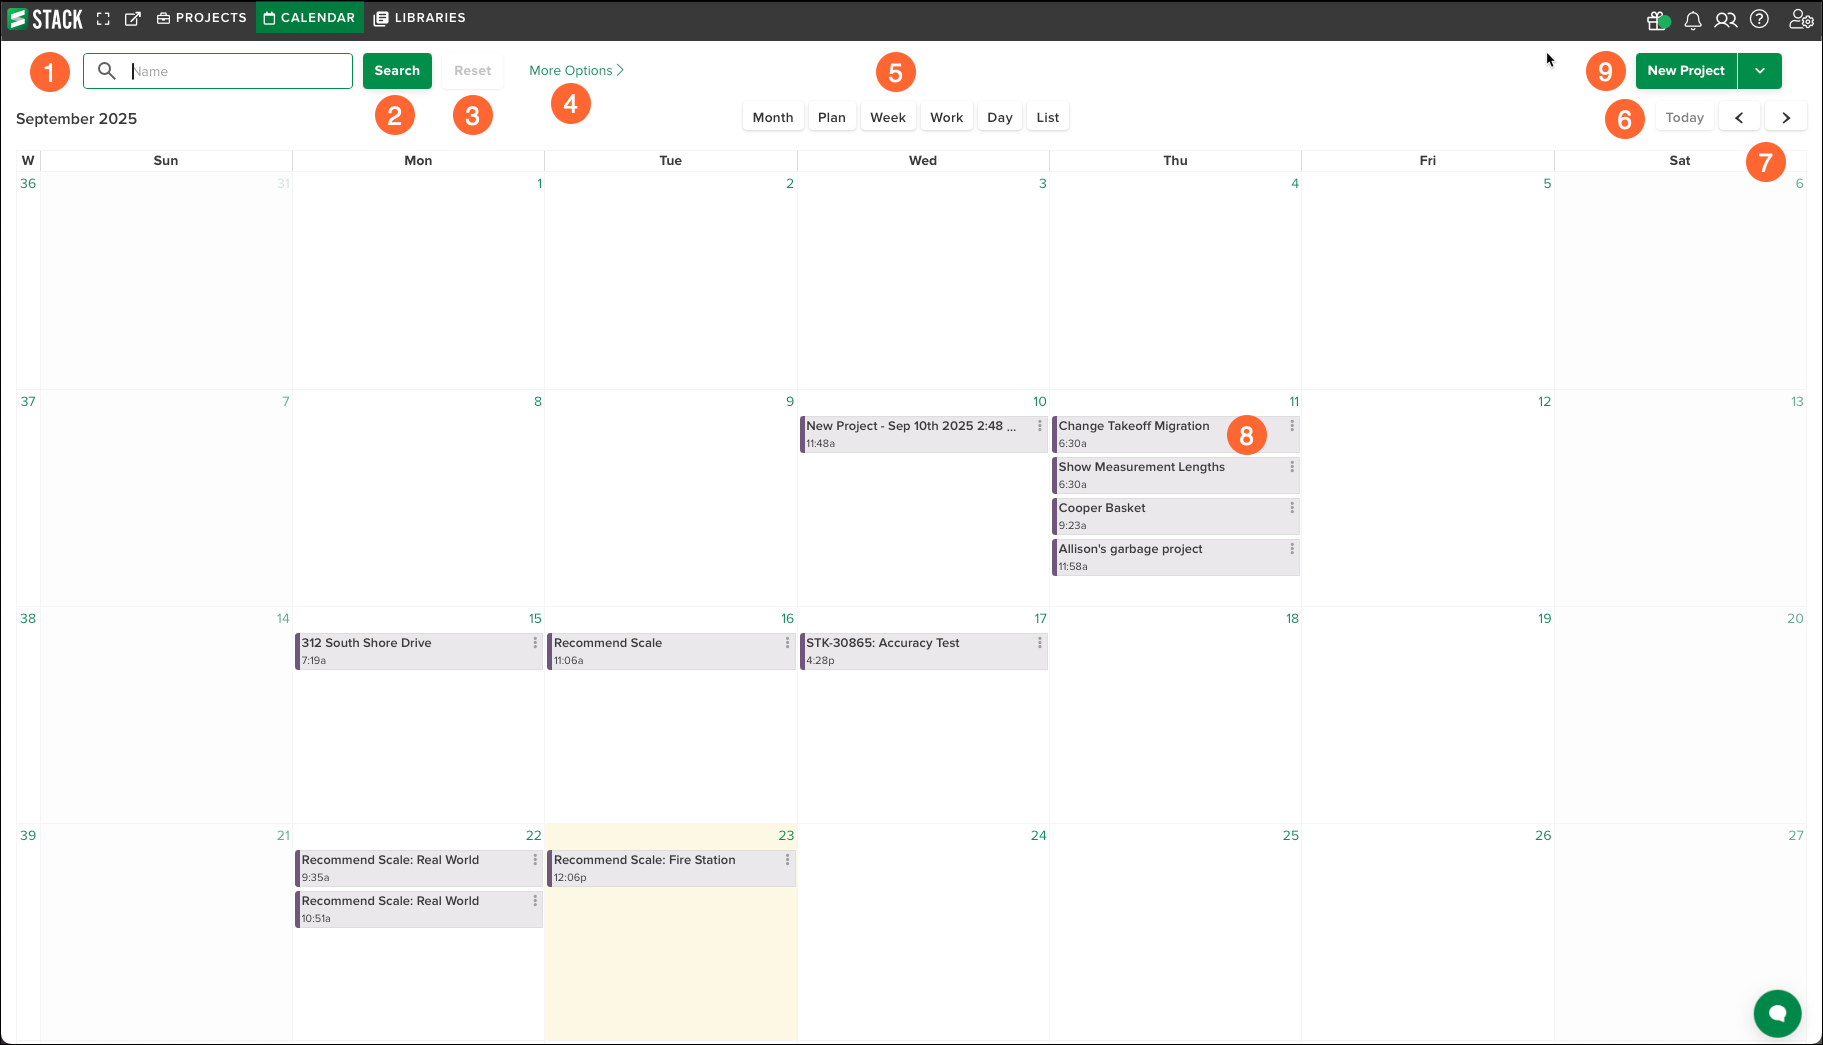
Search bar: Enter a keyword to quickly find events by name.
Search button: Executes the search.
Reset button: Clears any applied searches or filters.
More Options: Opens advanced filtering tools for narrowing calendar results.
View buttons: Switch between Month, Week, Work Week, Day, Plan, or List view.
Today button: Jumps directly to the current date.
Navigation arrows: Move forward or backward through the calendar.
Event tiles: Display scheduled events with their name and time; click to view details or use the ellipsis (⋮) menu to edit or delete.
New Project button: Opens the project creation menu without leaving the Calendar.
Search and Filter Events
At the top of the Calendar, a search bar is available to locate events by name. Use the More Options link to apply filters and narrow results. Select Reset to clear the search and return to the full calendar.
.gif)
In the Name field (top left), type all or part of the event name.
To refine with filters, click More Options >.
Assigned to: Use All | Clear to select or clear all options. Click one or more names or Role entries to include those assignees.
Statuses: Use All | Clear to select or clear all statuses. Click one or more statuses (e.g., Bidding, In Progress, Completed, Won, Lost, etc.) to include them.
Click Search.
Click Less Options to collapse the panel and return to the Calendar.
TIP
Update or clear results:
To change criteria: reopen More Options, adjust selections, then Search.
To remove all criteria and return to the full calendar: click Reset.
Calendar Views

Select from six views at the top of the Calendar:
Month: Displays events in a traditional grid for the entire month.
Week: Shows all events for the seven-day period.
Work Week: Displays only Monday through Friday.
Day: Focuses on events for a single day.
Plan: Organizes events tied to project plans.
List: Displays events in a simplified list format.
Use the Today button to jump back to the current date, or the navigation arrows to move forward or backward.
Event Management
Events are shown directly in the calendar grid. Each event displays its name and start time.

Click an event to open the details.
Or use the ellipsis (⋮) menu to edit, open in new tab, or delete.
In the Calendar view, color coding helps distinguish the event status.
Project Integration
Create a New Project

Click New Project in the top-right corner to create projects directly from the Calendar. Associated events are automatically added to ensure projects and schedules remain aligned.
Follow the direction in the Create a Project article to create a project from the Calendar View.
Create a New Event
An Event is any scheduled project-related activity or milestone that appears in the calendar grid or list. Events are tied to projects and can represent deadlines, tasks, meetings, or key project stages.
Events are interactive: clicking an event opens its details, and the ellipsis (⋮) menu provides options to edit or delete. Color coding may also be applied to visually distinguish event types.
To create a New Event, click the drop down arrow next to New Project.
Select New Event.
Fill in the following fields:
Event name: The name of the activity.
Start Date: The scheduled start date, if applicable.
Start time: The scheduled start time, if applicable.
End Date: The scheduled end date, if applicable.
End Time: The scheduled end time, if applicable.
Assigned to: The user name of the person to whom the activity is assigned to.
Click Create Event.
The event is then posted in the CALENDAR, on the selected start and end dates, with the start time and colour coding of the status.
Related Articles
Create a Project and Add Project Information
Was this article helpful?